
How to Use Workbench
1 What is Workbench
The film-creation Workbench is NadouPro’s structured workflow for users who have a script and want to move through production step by step. It takes you from script → subjects → storyboard → production.
2 How to create a Workbench
Click [+] in the navigation bar or in the upper-right corner of the creation space, choose a creation mode, then click [New Workbench]. Pick the mode that matches your needs to create a Workbench project. The Workbench then guides you through a standard film-production flow.
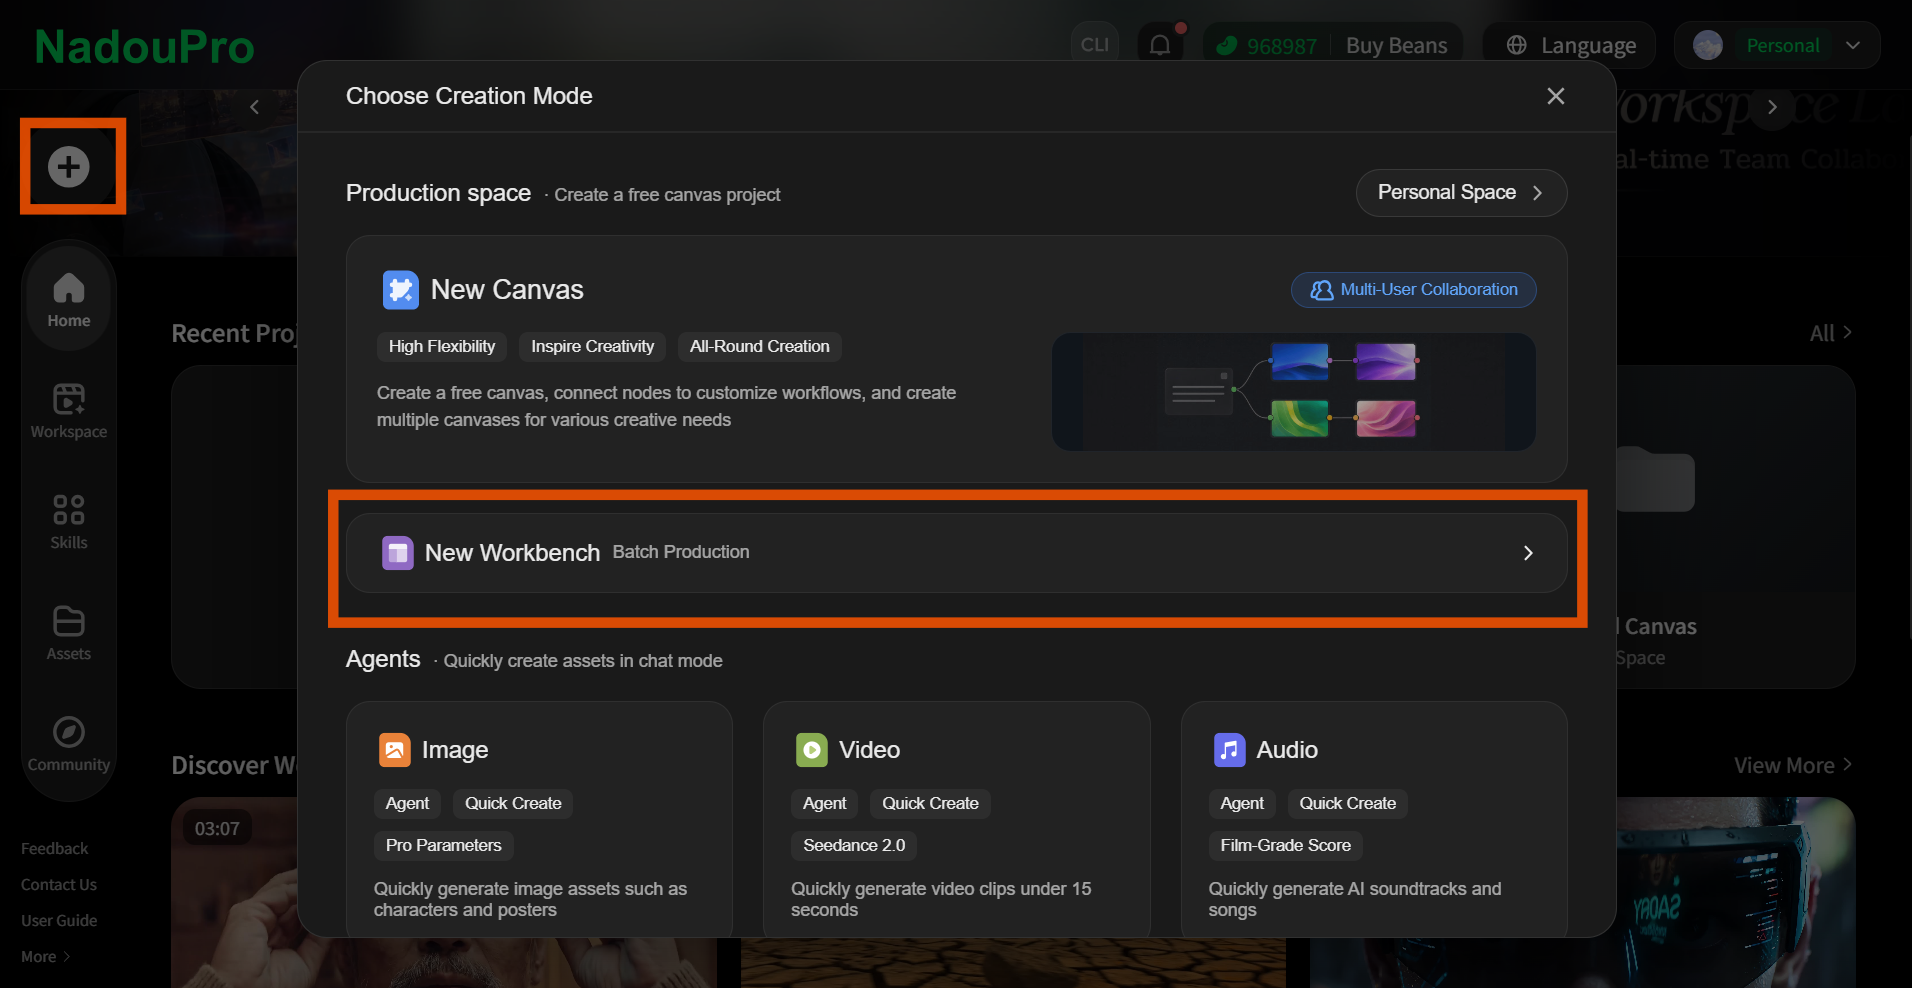
Two ways to create a Workbench
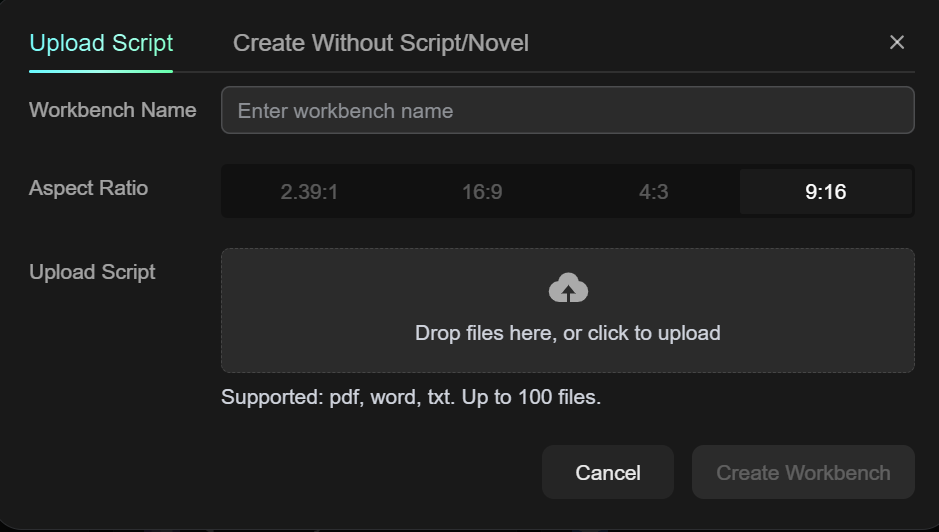
- I have a script. Upload your script: PDF, Word, TXT, and similar formats are supported.
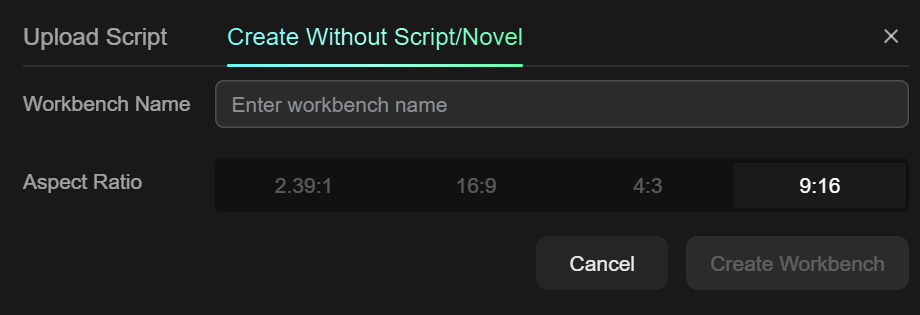
- No script? That’s fine. Use script-free creation and start in one click.
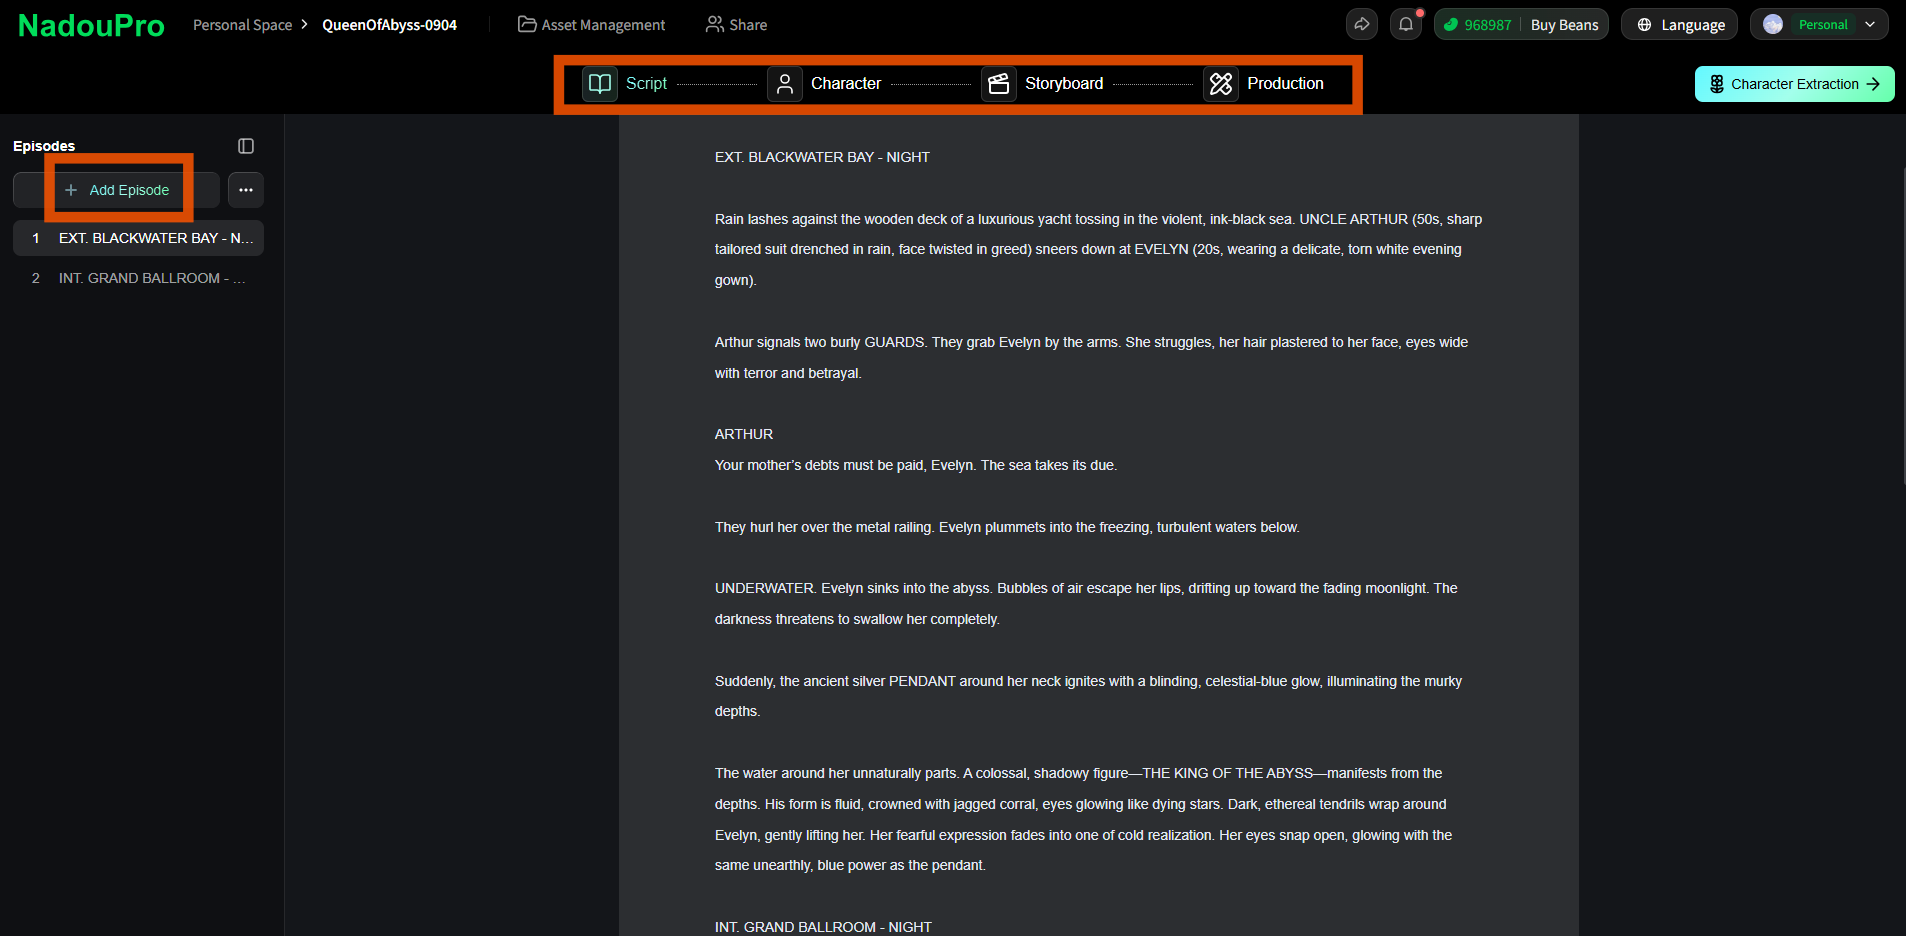
Workbench production flow
Workbench includes [Script] - [Subjects] - [Storyboard] - [Production]. Follow the prompts to complete a short-film pipeline.
3 How to manage subjects
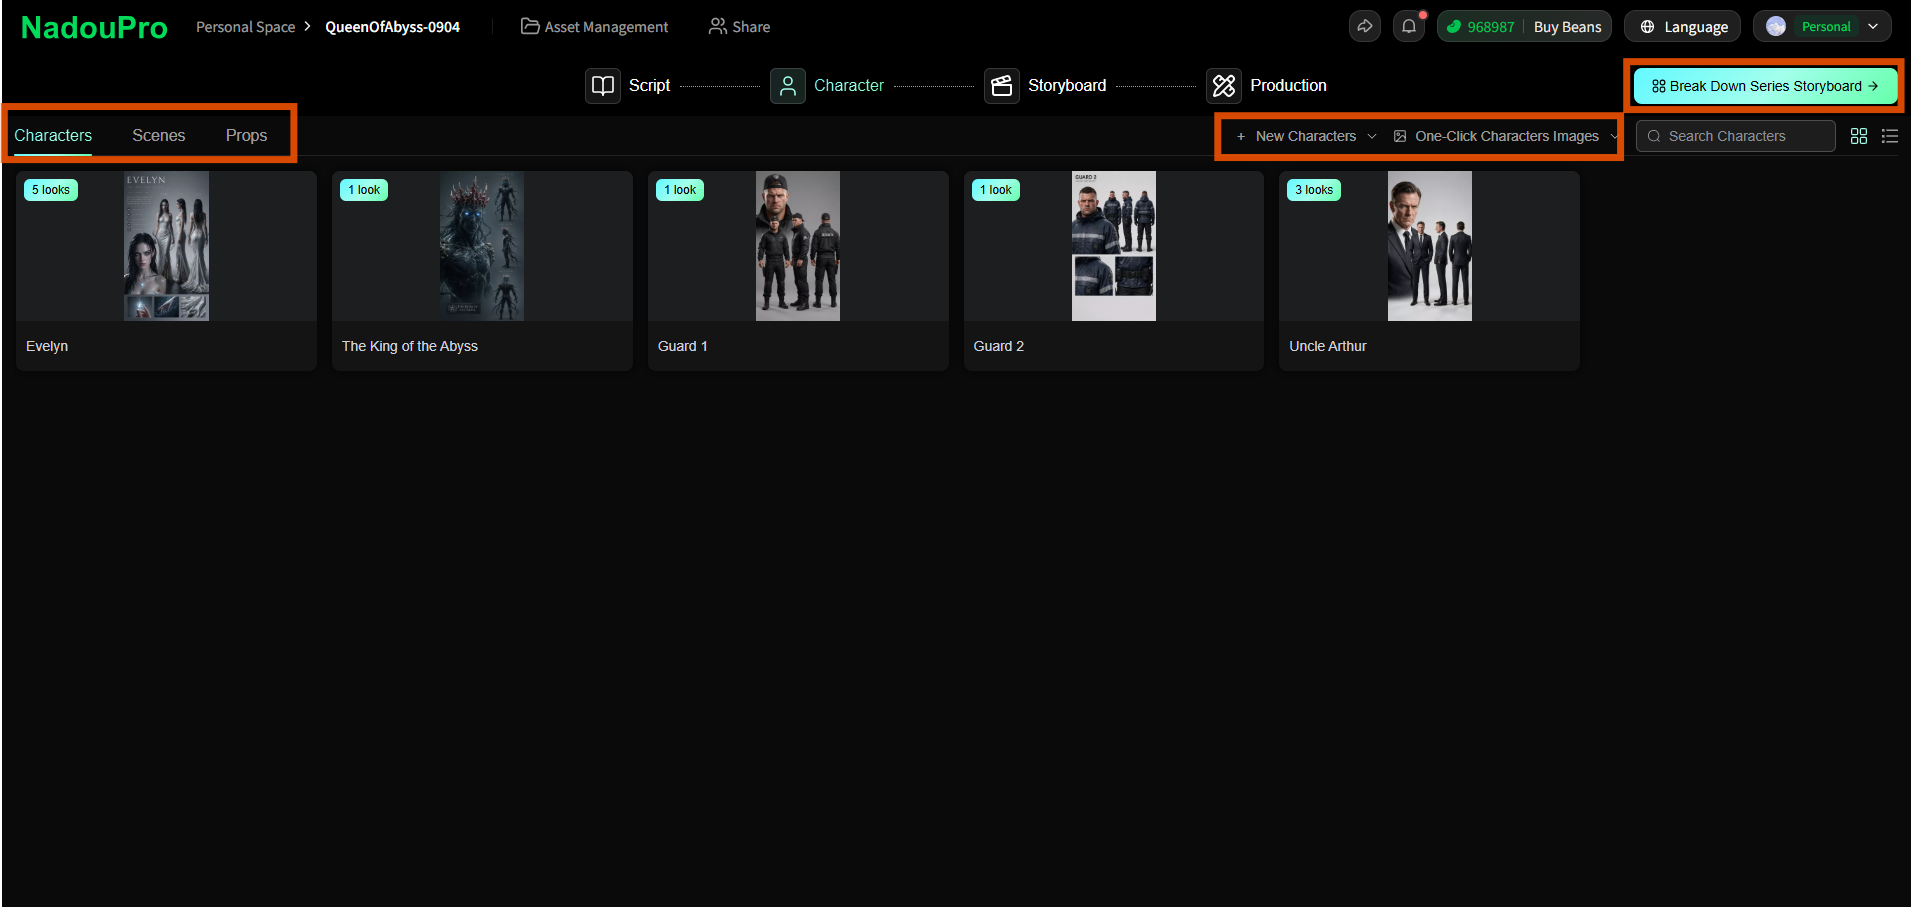
Subjects are the core assets of film creation. There are three types: characters, scenes, and props.
Create subjects
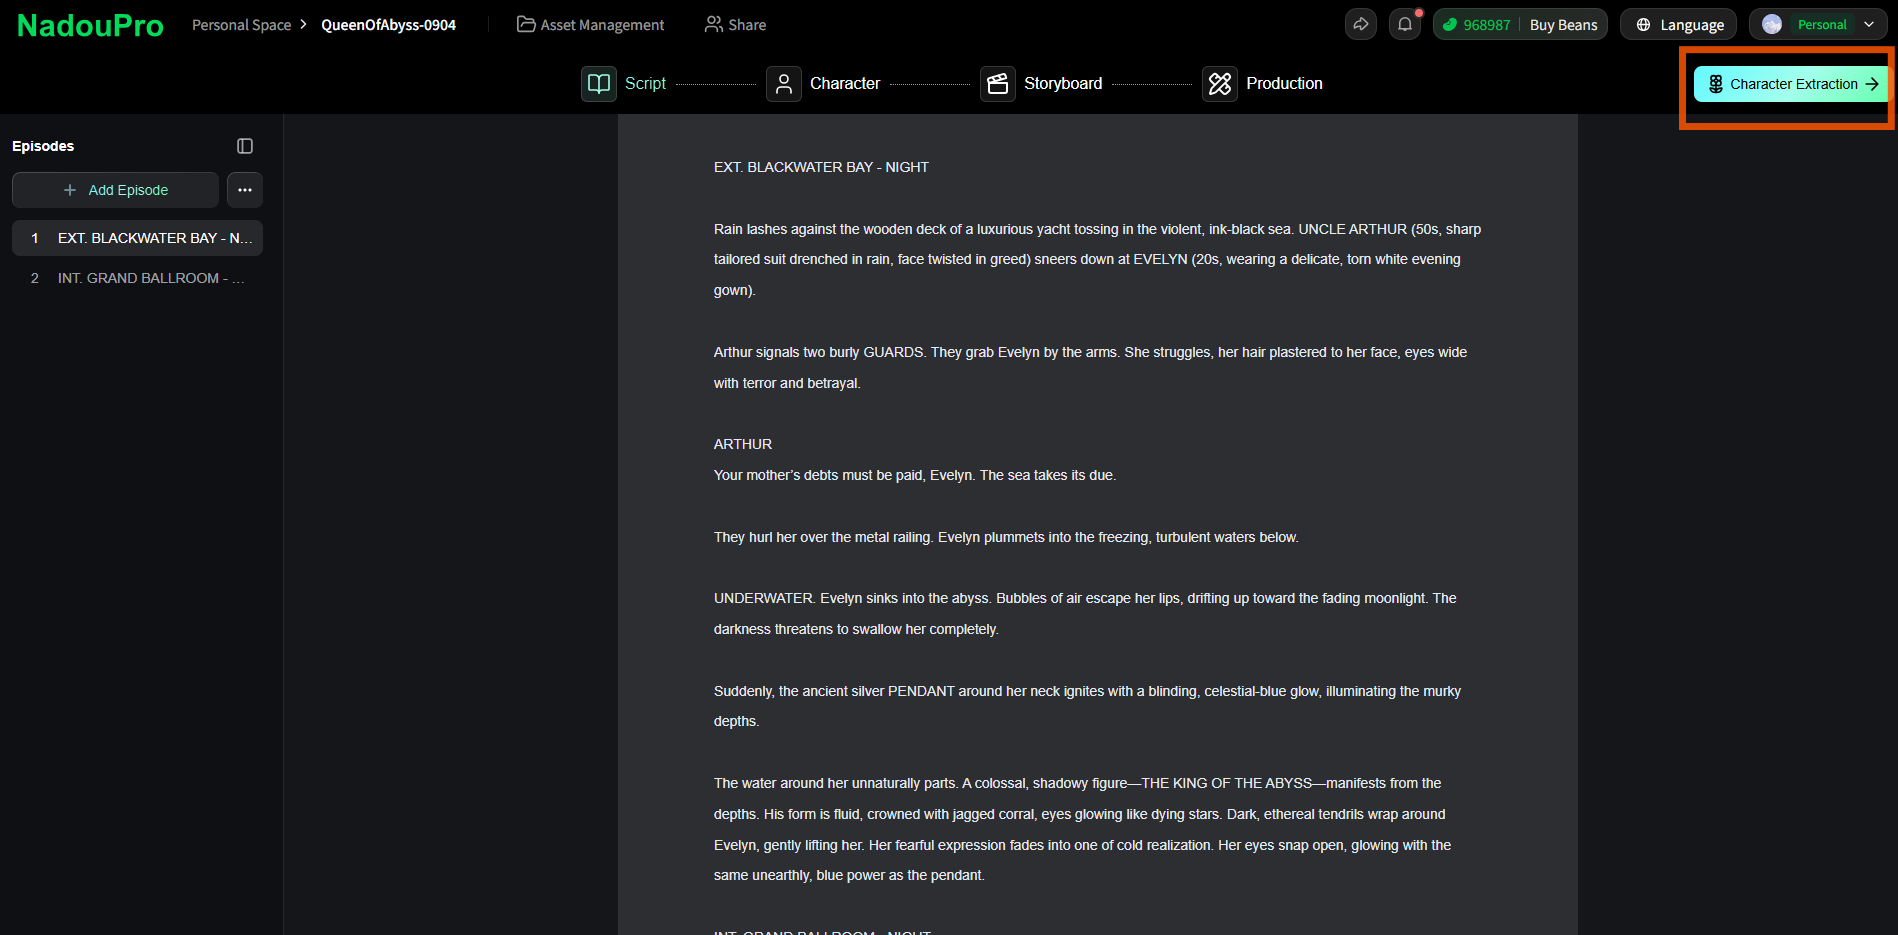
For a faster start, open the [Script] page and click [Extract subjects from script] to pull related subjects from the script in one click.
On the [Subjects] page, choose a subject type, then click [New character / scene / prop] to create one. You can also click [One-click scene image] to generate a look quickly. If you need tighter control, adjust the result manually.
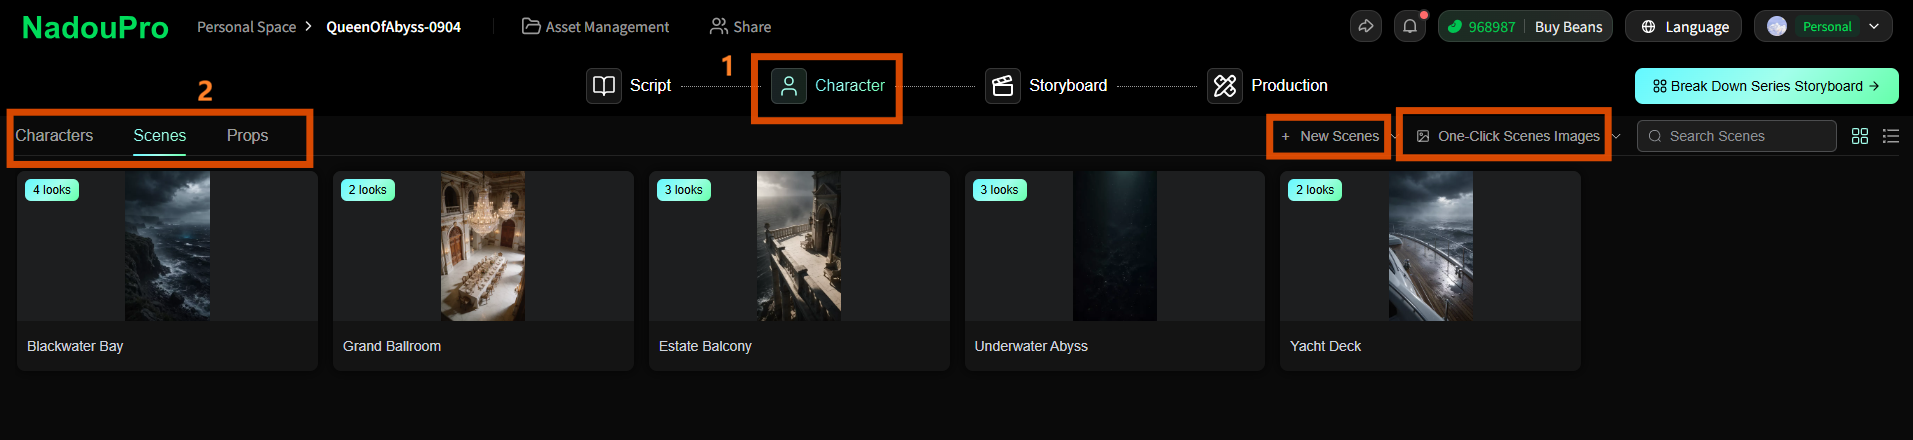
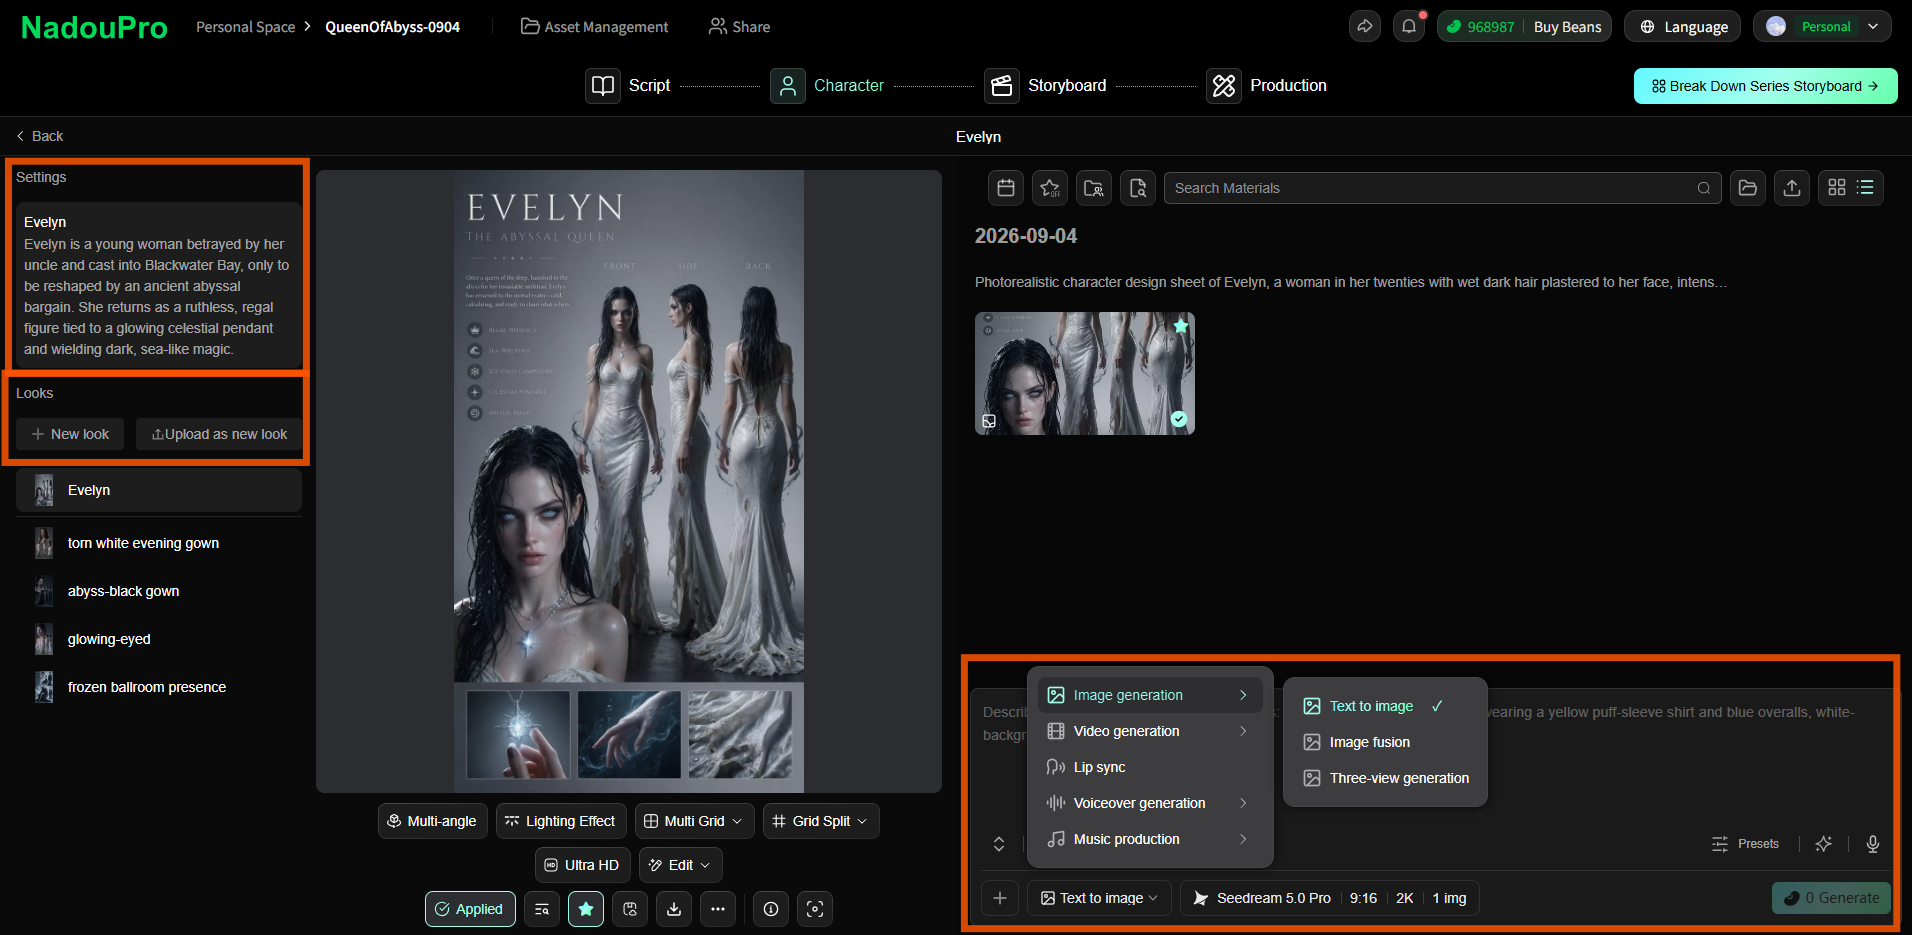
Character subjects
Open a character to edit [Character settings]. Enter a prompt or upload a reference image to generate the look. You can set and adjust multi-angle views such as a three-view turnaround and a nine-grid of expressions, so the character stays consistent across shots.
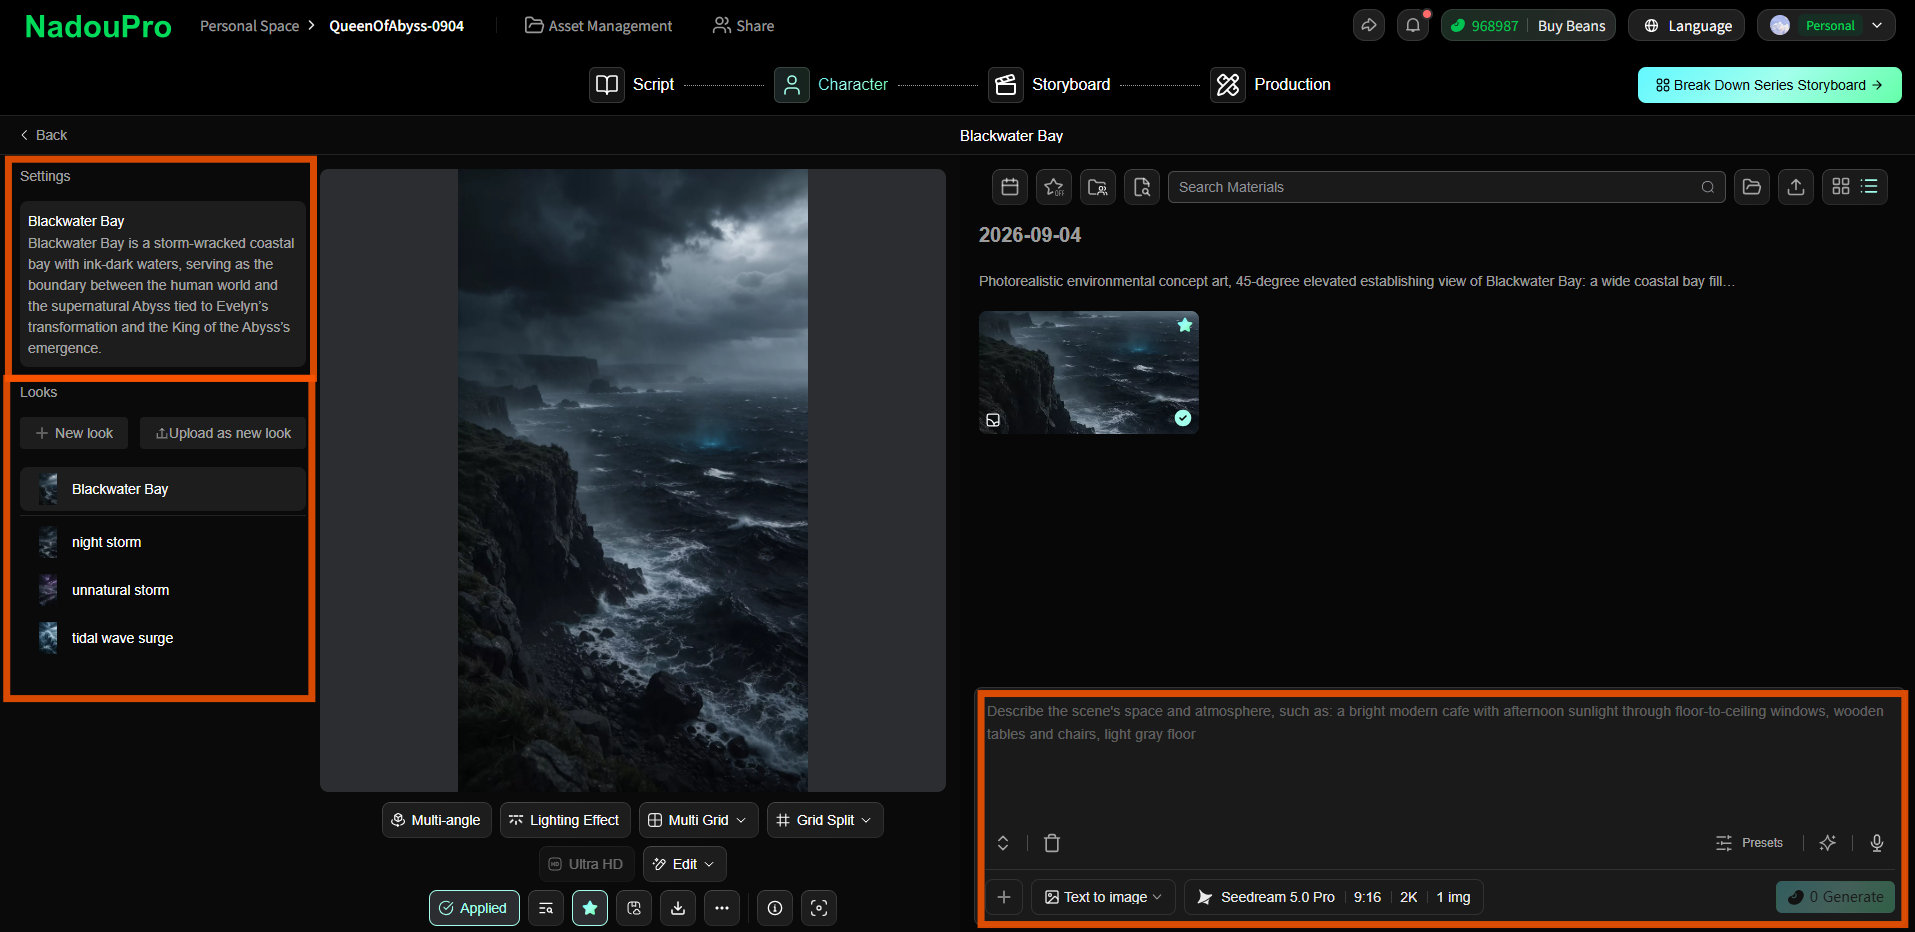
Scene subjects
Open a scene to edit its settings. Enter a prompt or upload a reference image to generate the environment. 720° panoramas are supported, so you can build a complete cinematic space.
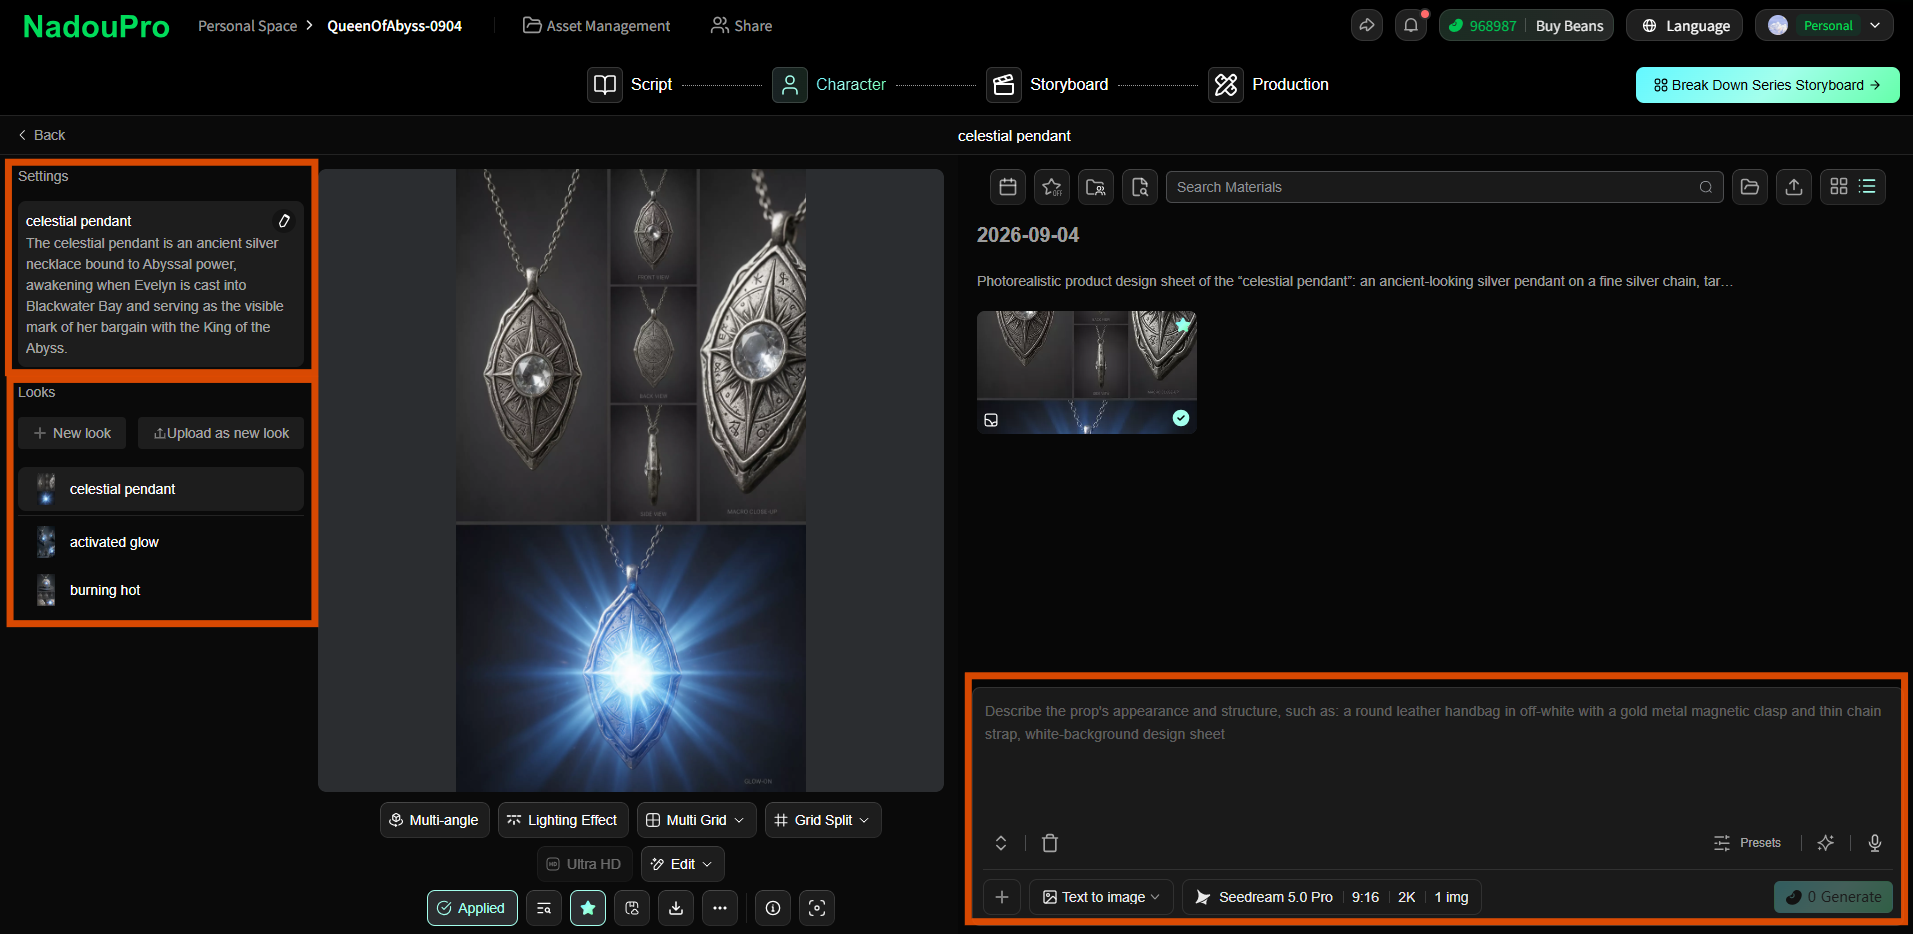
Prop subjects
Open a prop to edit its settings. Enter a prompt or upload a reference image to generate prop assets that add detail to the frame.
4 How to design storyboards
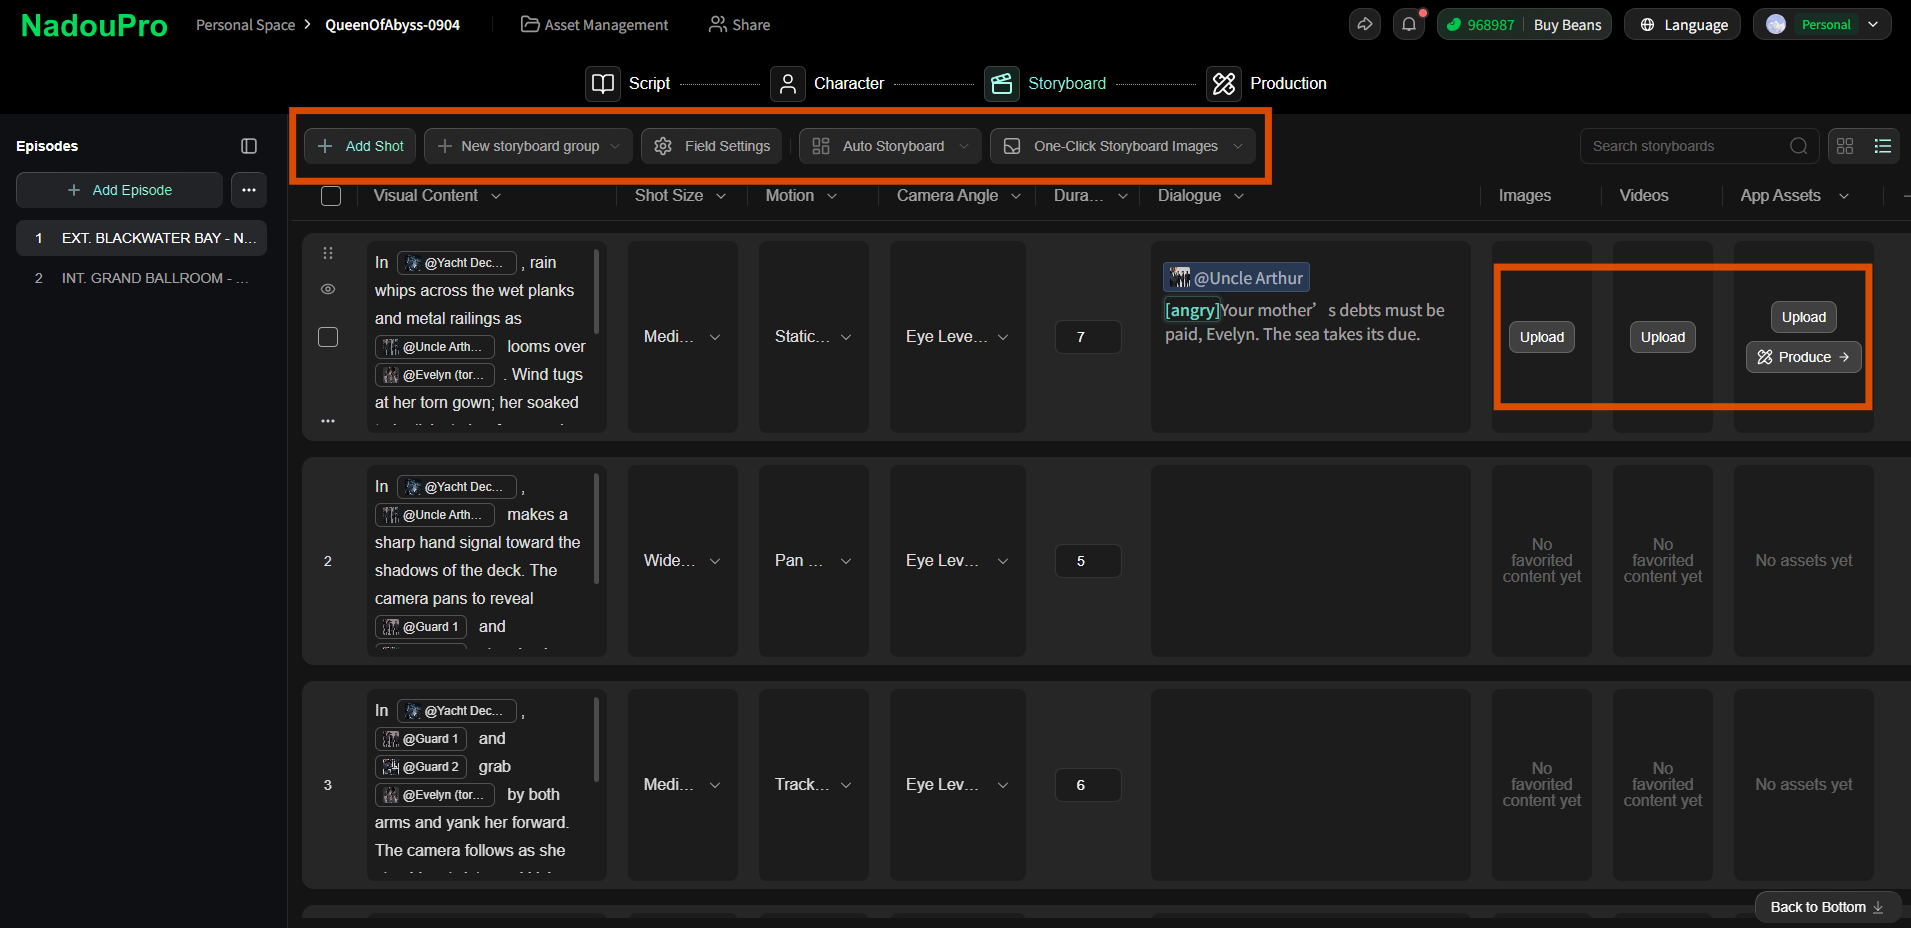
Workbench includes built-in storyboard tools:
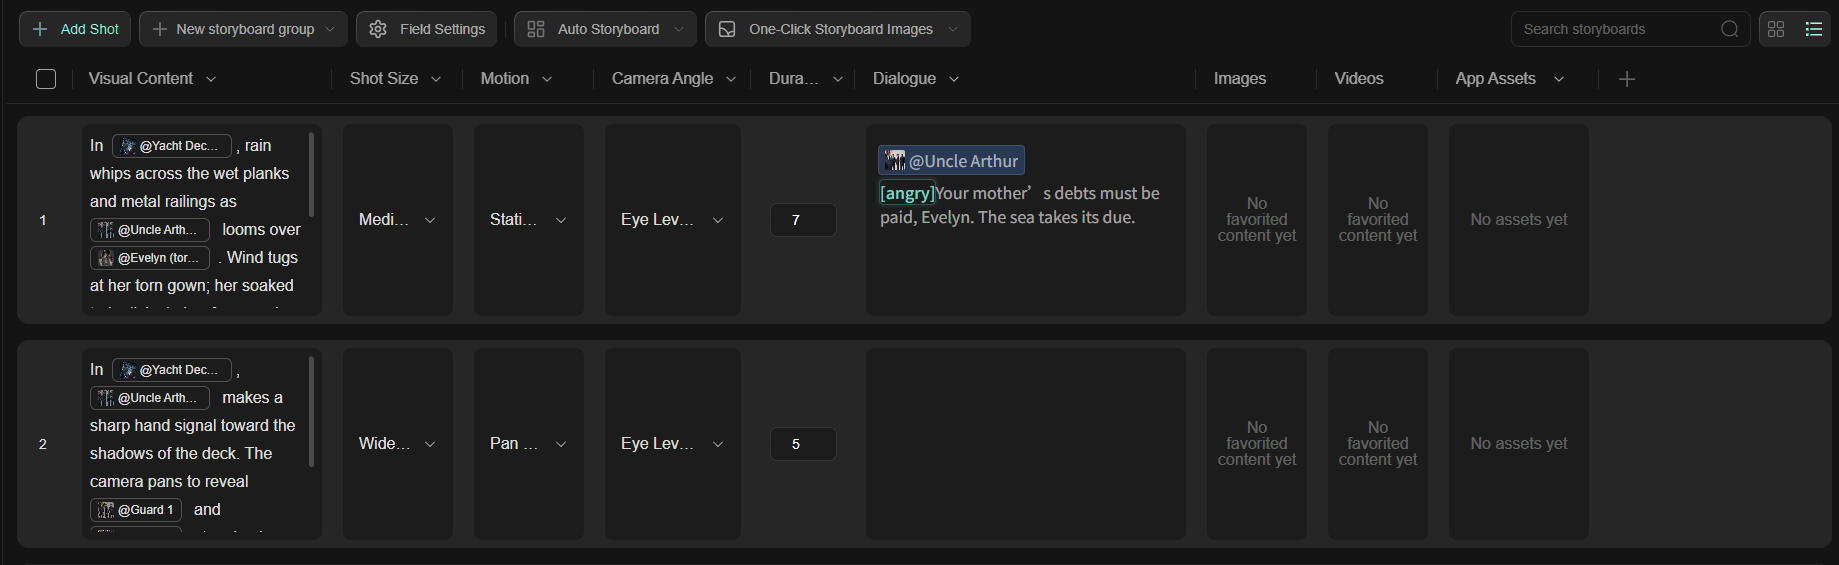
AI auto-storyboard: split the script into storyboard cards and automatically identify characters, scenes, and props
Manual adjustment: edit each shot’s image content, shot size, camera movement, camera angle, duration, and dialogue
Storyboard preview: preview the sequence on a timeline and check narrative continuity
5 How to produce video
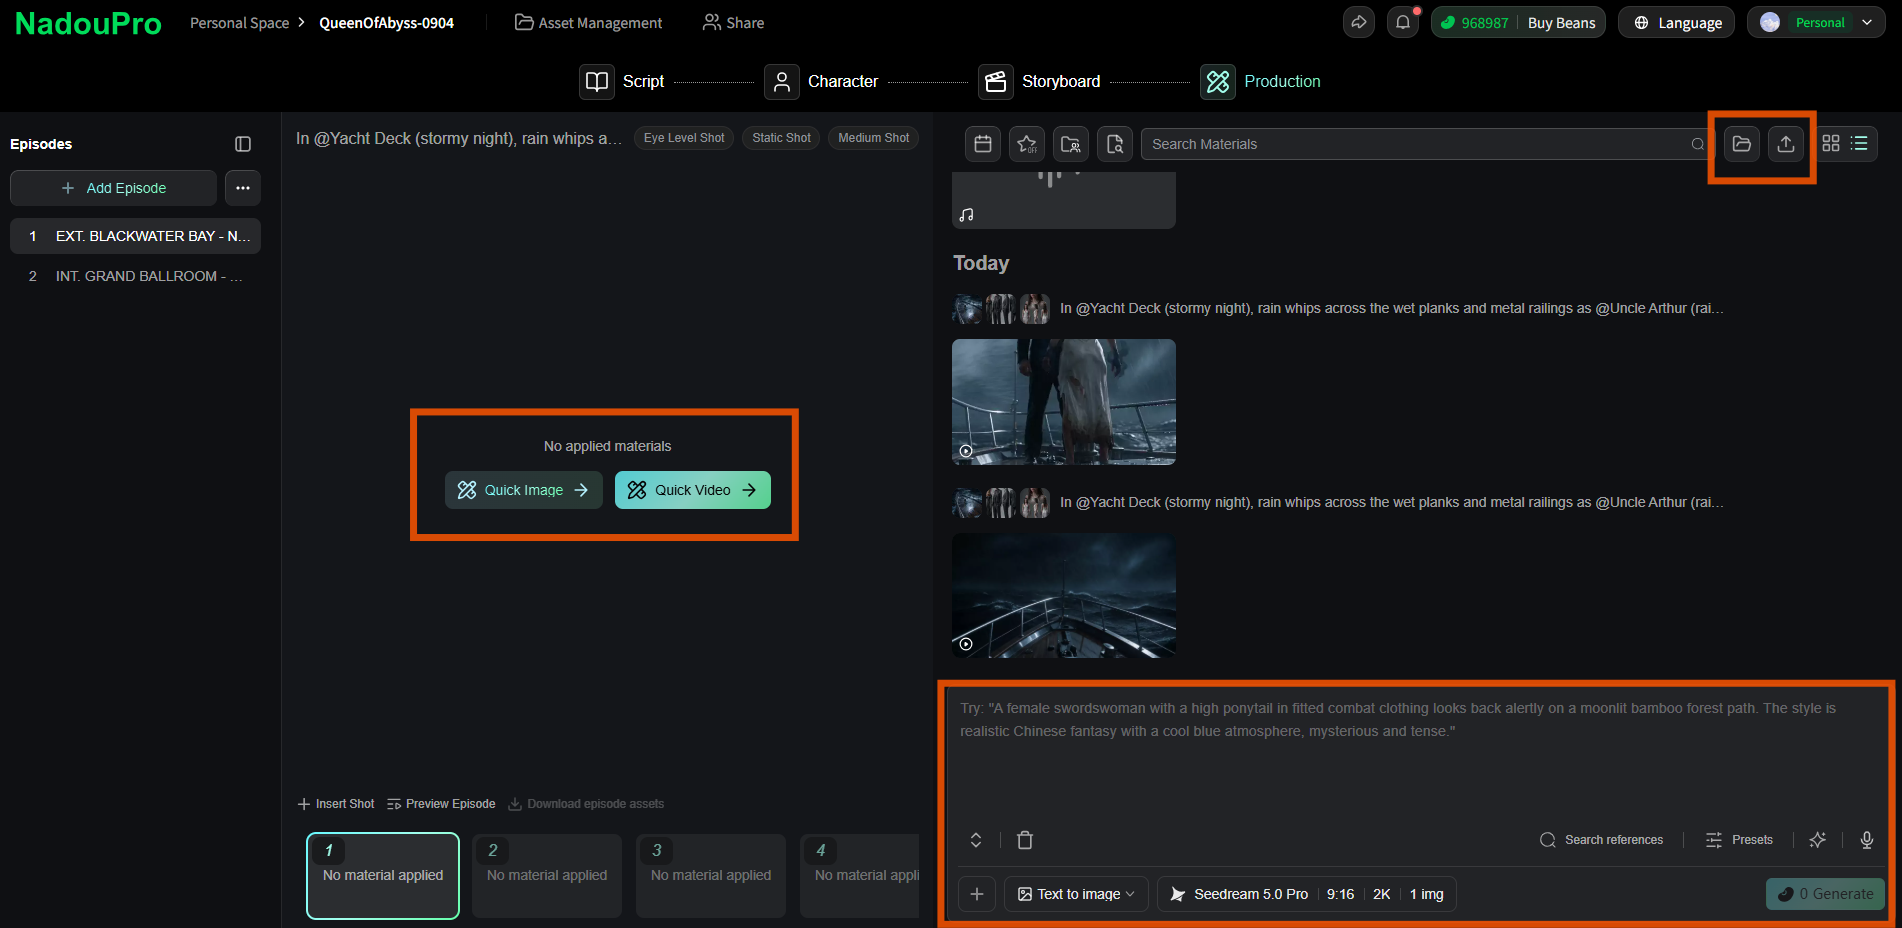
Click any storyboard shot to produce it.
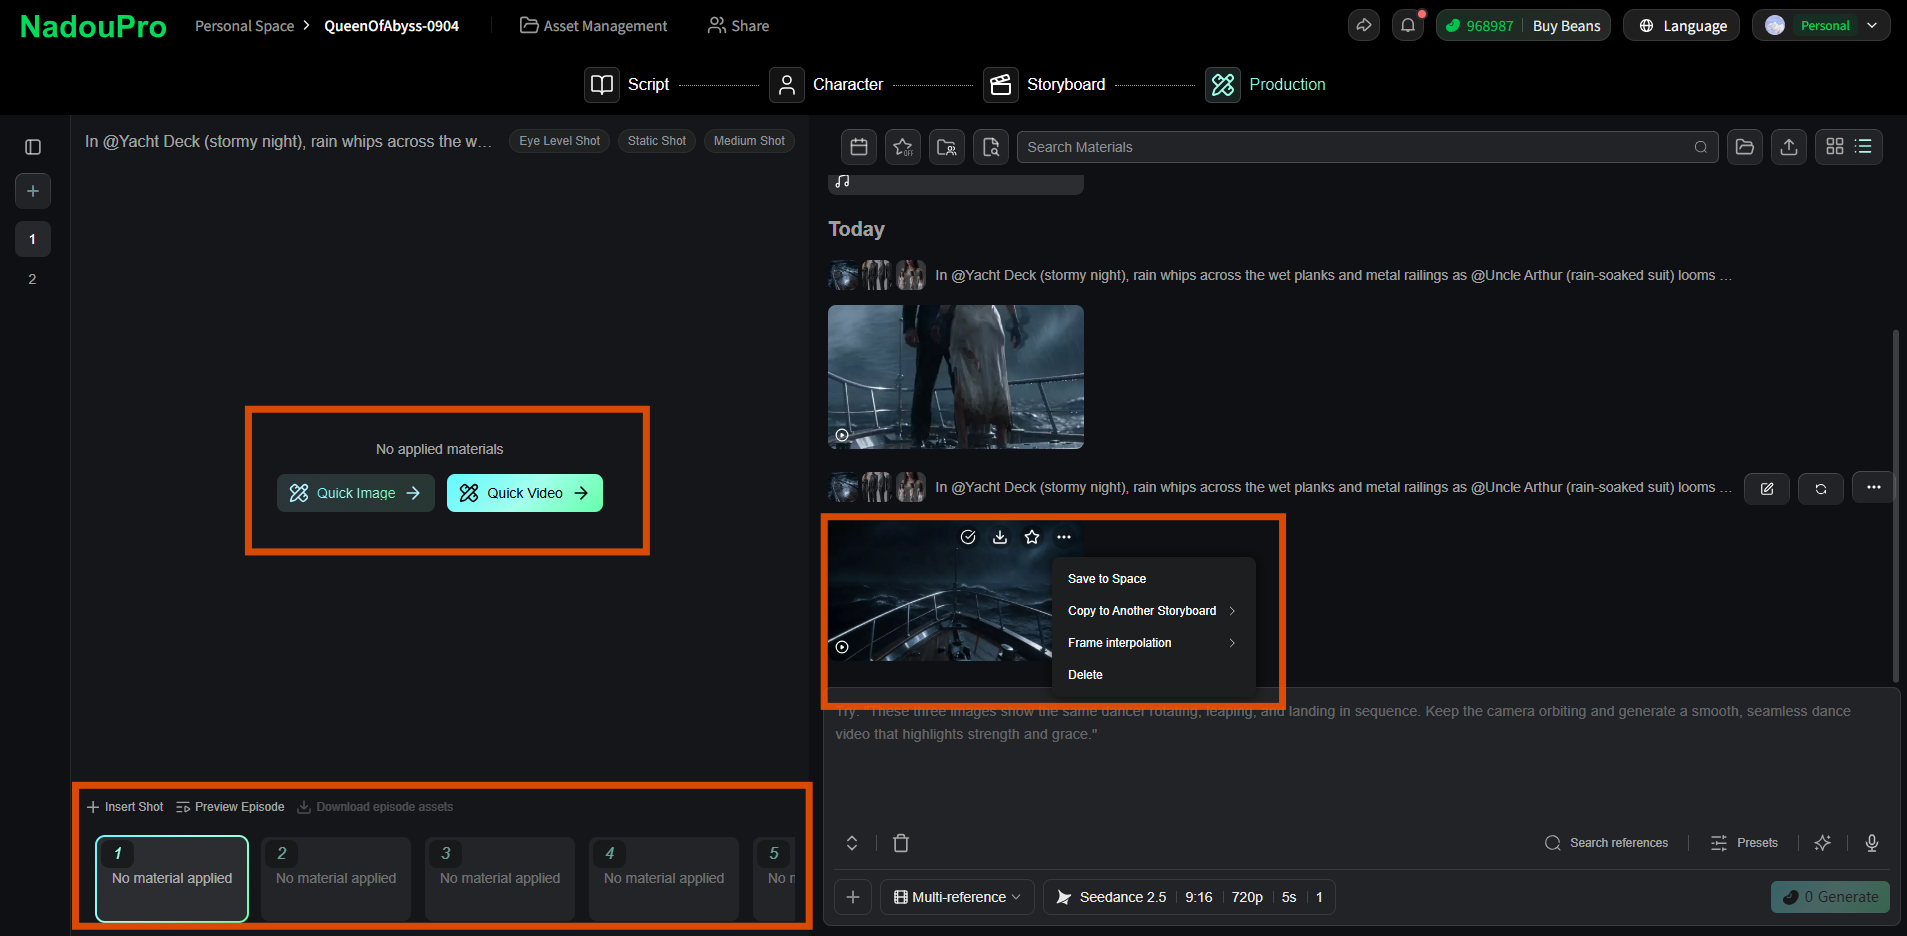
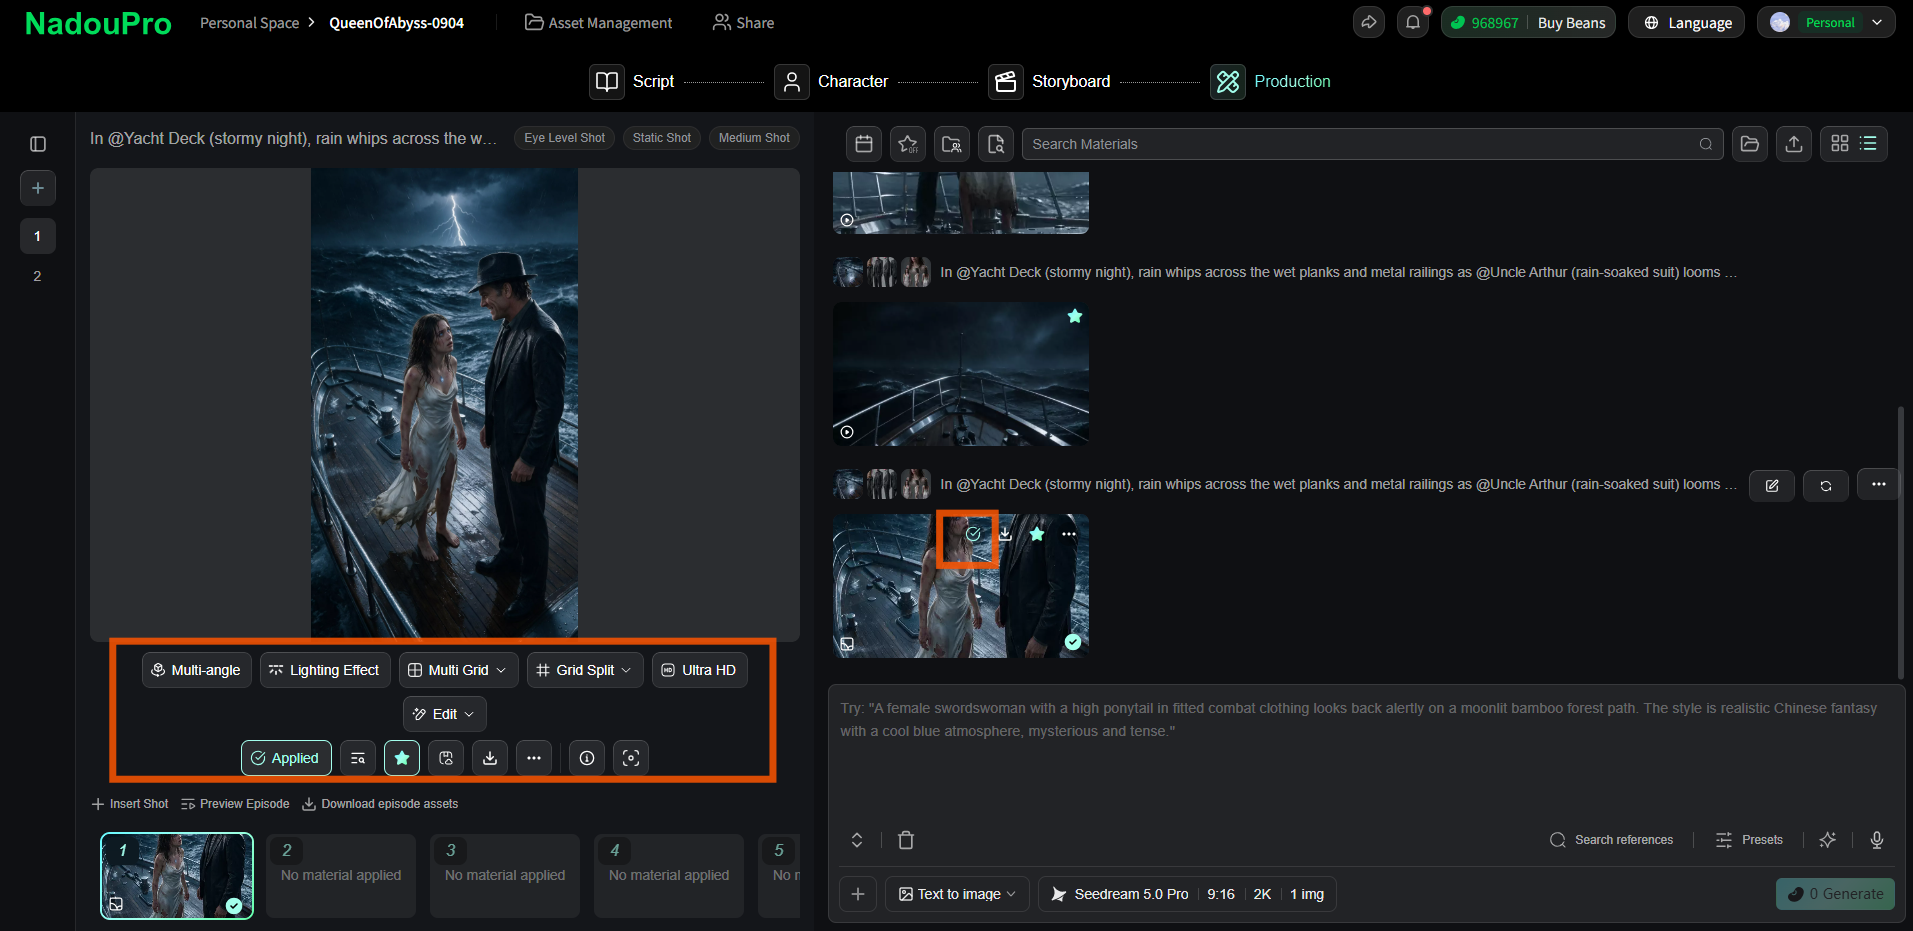
You can keep adjusting and regenerating images or videos until you are satisfied.
After an image is generated, you can use [Multi-view], [Lighting], [Multi-grid], [Grid split], [Ultra HD], [Edit], and similar tools. For details, see How to Generate AI Images, Video, and Audio? - [Image features].
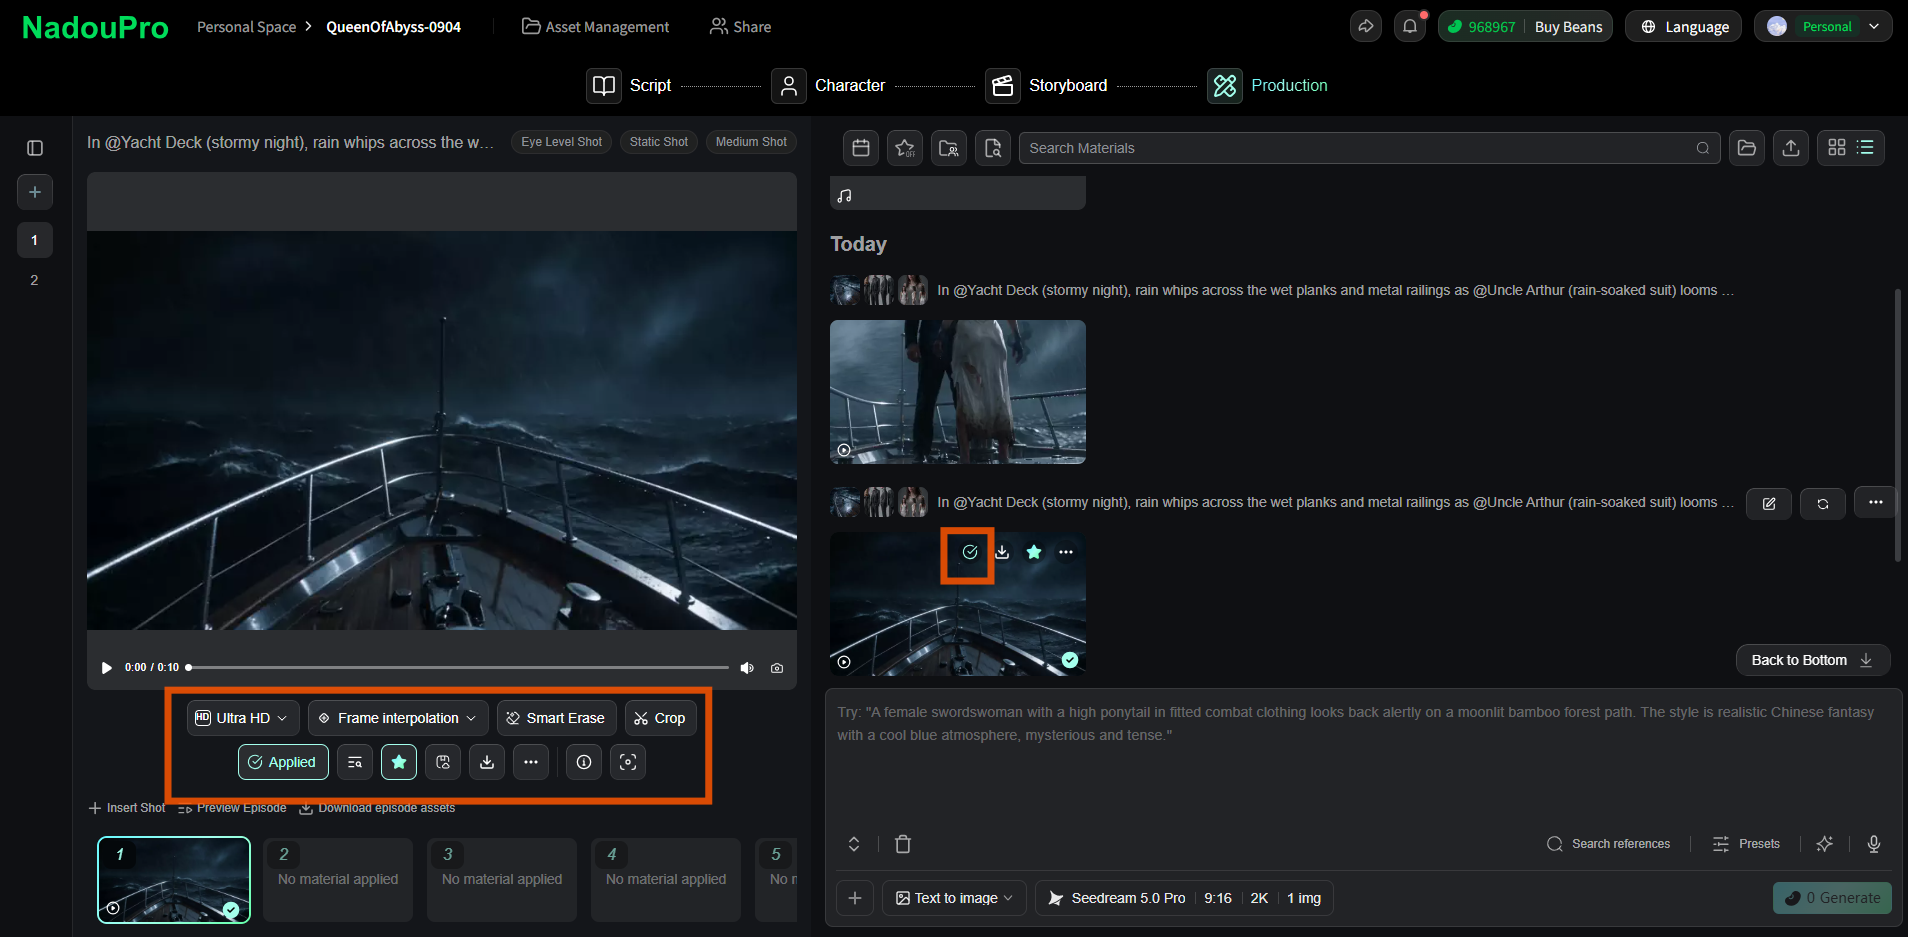
After you have a video you like, you can use [Ultra HD], [Frame interpolation], [Smart erase], [Crop], and similar tools. For details, see How to Generate AI Images, Video, and Audio? - [Video features].
6 How to export your work
When production is done, export the final video. Multiple resolutions and formats are supported.
7 Workbench tips
Extract subjects from the script first: finish the script in the script space, import it into Workbench, let AI extract character and scene subjects, then fine-tune them by hand
Set shot size before writing the frame: when designing a storyboard, choose each shot’s size (wide / medium / close-up) first, then write the description. This helps control pacing
Generate shot by shot: do not generate every storyboard image at once. Generate one shot at a time, check consistency, and use Image Reference to correct drift as soon as it appears
8 FAQ
Q: Can I switch between Workbench and Canvas?
They are currently separate creation modes. Choose the right mode before you start. Assets generated in Workbench can be saved and reused in Canvas.
Q: Can one Workbench project contain multiple storyboard sequences?
Yes. One Workbench can manage multiple storyboard sequences, which is useful for multi-episode shorts or series.
Q: Which script formats does Workbench support?
Script uploads support PDF, Word, TXT, and similar formats, with up to 100 files. Novel uploads support PDF, Word, and TXT, with a maximum of 1 file.
Q: Can I still edit subjects after extracting them from a script?
Yes. After extraction, open the [Subjects] page to manually edit each character’s settings, look, voice, and more.
Q: What if I am not happy with a generated image or video?
You can keep adjusting and regenerating until you are satisfied. After image generation, use multi-view, lighting, and multi-grid tools to refine the result. After video generation, use Ultra HD, frame interpolation, smart erase, and crop.