
How to Use Canvas?
1 What is Canvas
Canvas is NadouPro’s open AI creation space for exploring ideas. Add different feature nodes to combine text, images, video, audio, and other materials, and go from an idea to generated content in one flow.
Canvas supports:
Free combination of multimodal materials
AI content generation
Free connections between nodes
Real-time adjustments during creation
Unified asset management
Best for:
Exploring ideas quickly
Generating character, scene, and storyboard assets
Making short videos, motion comics, and film clips
Building a custom AI creation workflow
2 How to create a Canvas
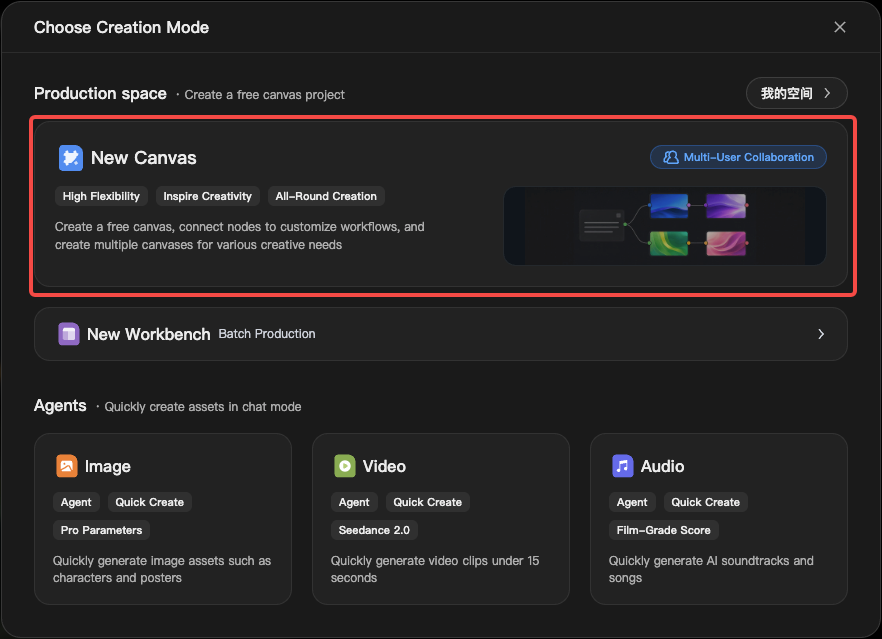
Click 【+】 in the navigation bar or in the upper-right corner of the creation space, choose a creation mode, then click 【New Canvas】. After creation, you enter the free creation area.
3 How to add creative content
On Canvas, you can add content in three ways:
Method 1: Add a node
Double-click a blank area on the canvas, choose a node type, and add it.
Method 2: Upload materials
Drag and drop images, videos, audio, and text files onto the canvas.
Method 3: Use existing assets
You can pull existing materials from 【Assets】, including characters, scenes, props, and audio saved in your personal space.
You can also pull characters, models, or videos from 【Digital assets】.
4 What creation nodes are available
Canvas nodes fall into two groups: content-generation nodes and helper nodes.
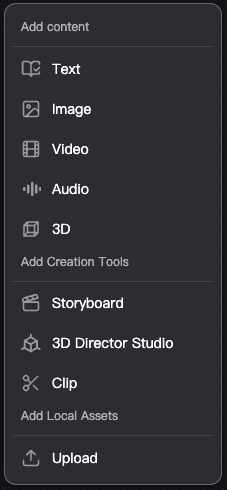
4.1 Content-generation nodes
Used to generate AI content assets.
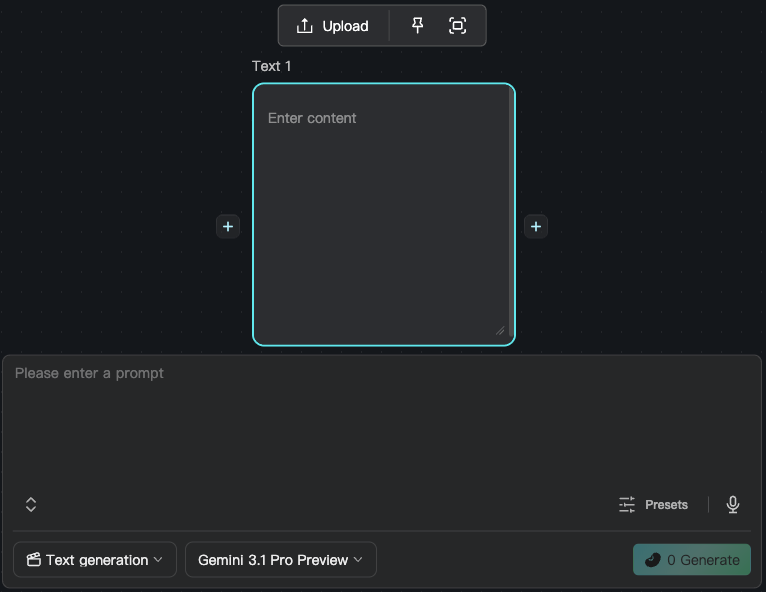
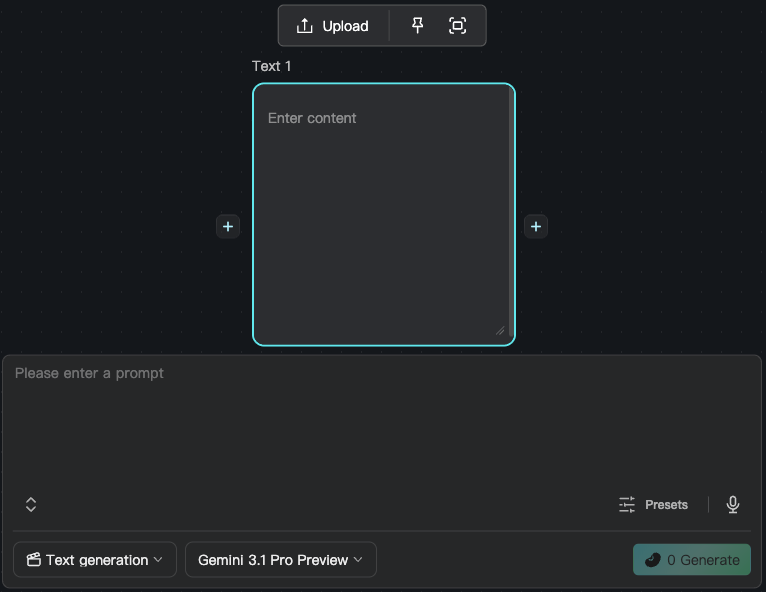
4.1.1 Text node
The Text node generates written content for the creation process.
Supports: script generation, prompt generation, copywriting, storyboard script generation, and more
Best for: story writing, video planning, content script design, and more
4.1.2 Image node
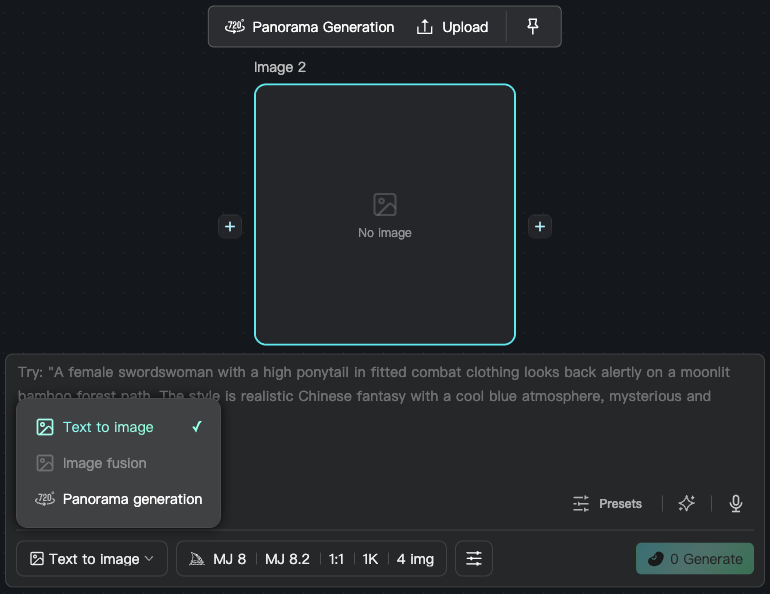
The Image node generates and processes visual materials such as storyboard frames, character designs, and posters.
Supported generation modes:
Text to Image: enter a text description to generate a matching frame. Good for exploring ideas and quickly producing visual options.
Image Reference: upload reference images so AI can create from them. Good for character consistency, unified scene style, and combining visual elements.
720° panorama generation: generate a full spatial environment from a reference image. Good for scene design, film-space building, and keeping multiple shots in one scene.
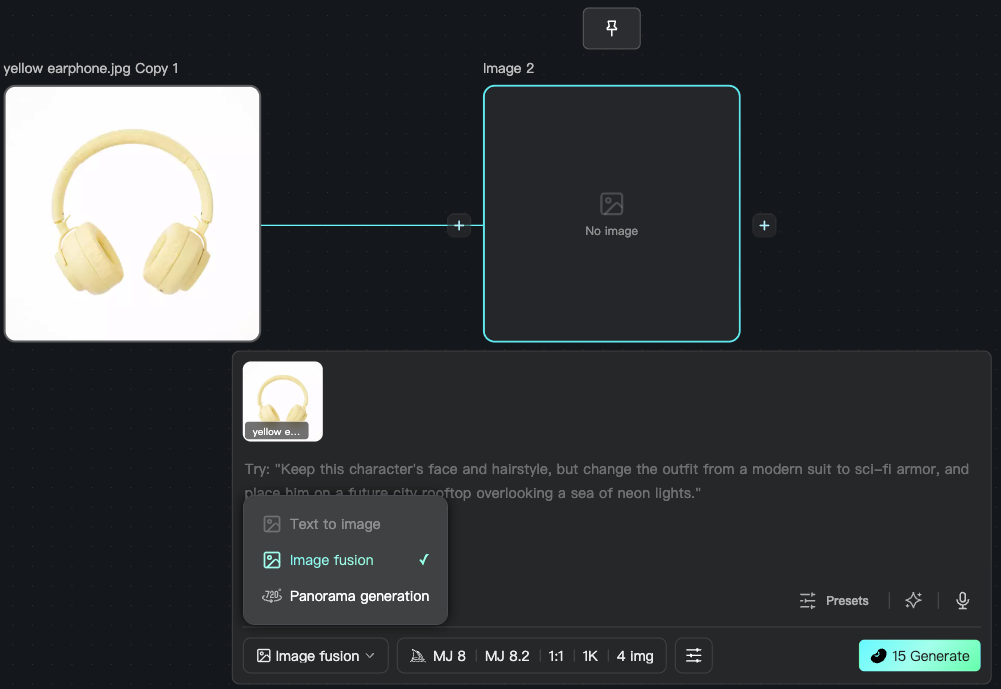
For more Image node features, see How to Generate AI Images, Videos, and Audio?
4.1.3 Video node
The Video node generates motion video and can turn images, text, and similar materials into video. Useful for film assets, short videos, and TVC production.
Supported generation modes:
Text to Video: enter a text description and generate video directly
Start & End Frames: set the opening and closing frames to generate a natural transition
Multi-Reference video: upload several related images as references to generate continuous motion
Video Editing: upload a video and enter an edit prompt to change the content
Action Control: upload a reference video or character image to generate more precise motion
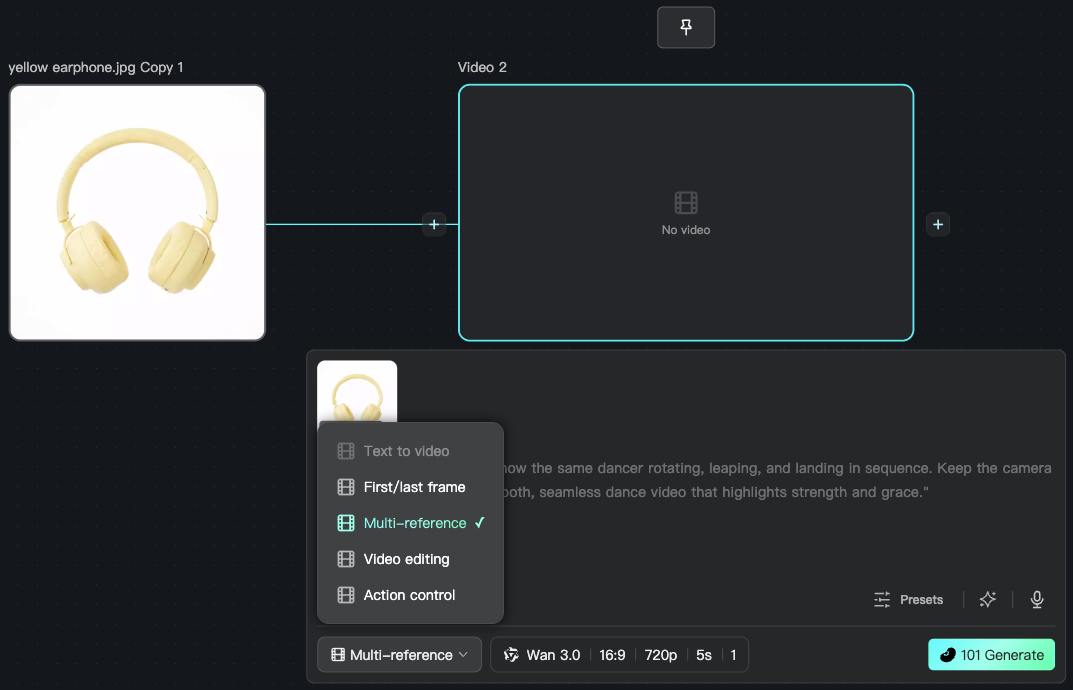
For more Video node features, see How to Generate AI Images, Videos, and Audio?
4.1.4 Audio node
The Audio node generates and processes sound.
- Supports: background music, theme music, AI voice-over, and voice conversion
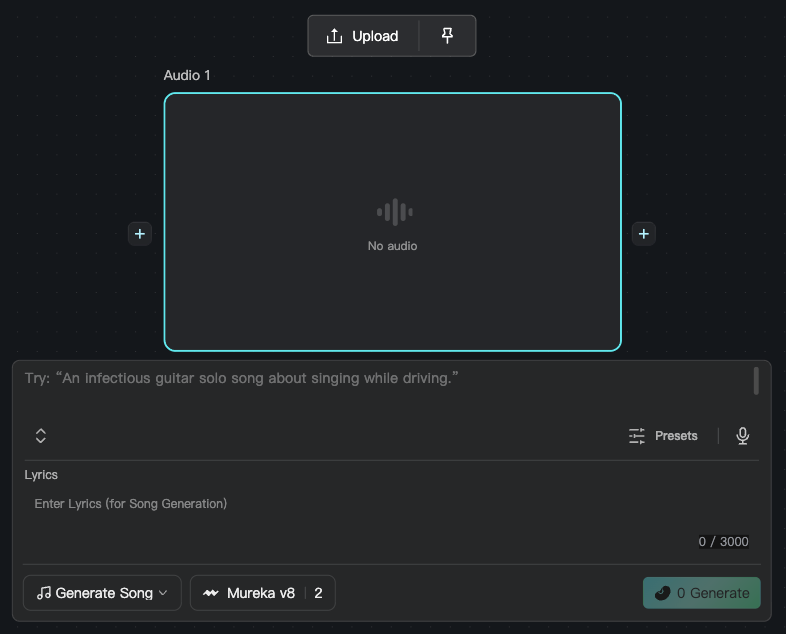
For more Audio node features, see How to Generate AI Images, Videos, and Audio?
4.1.5 Other
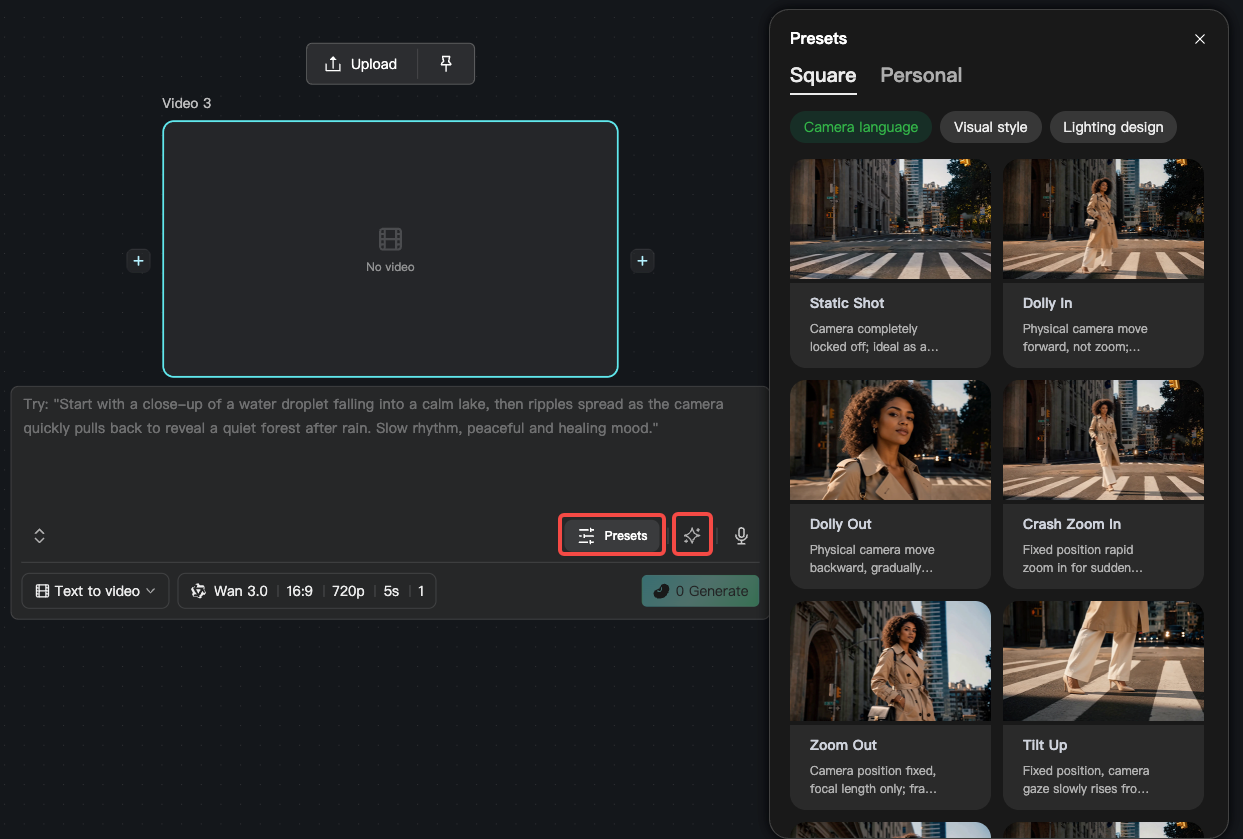
On content-generation nodes you can also click 【Presets】 to use camera language, visual style, and lighting presets. Click 【Optimize】 next to a preset to refine the prompt.
4.2 Helper nodes
These help you complete a fuller, more advanced production flow.
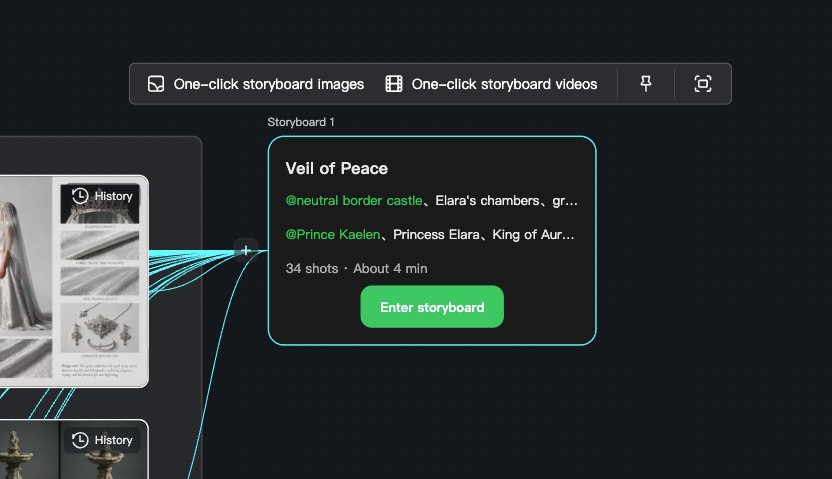
4.2.1 Storyboard node
The Storyboard node splits script text into visual storyboards. It can identify characters, scenes, and props, generate storyboard cards, and batch-generate subject images.
How to use:
Add a script Text node
Click 【One-click storyboard split】
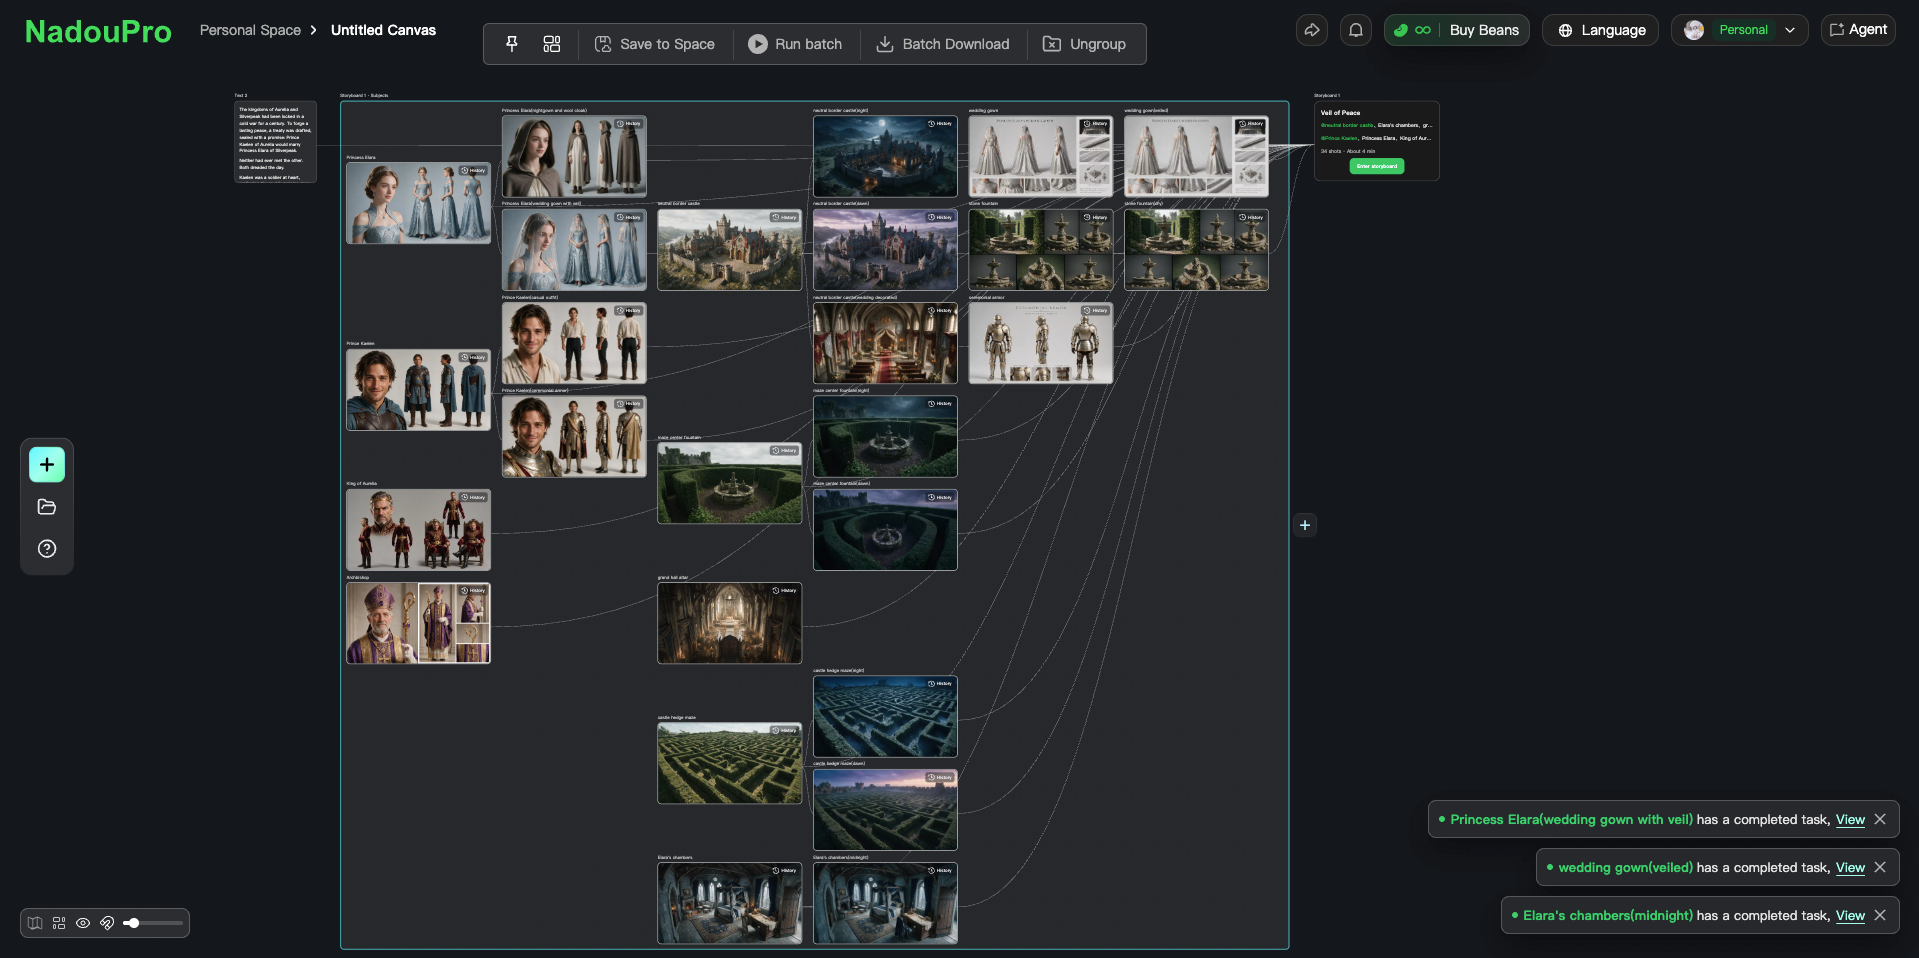
AI generates storyboard content. Use 【Batch run】 to generate all subject images in one click
In Canvas mode, select the script Text node and click 【One-click storyboard split】
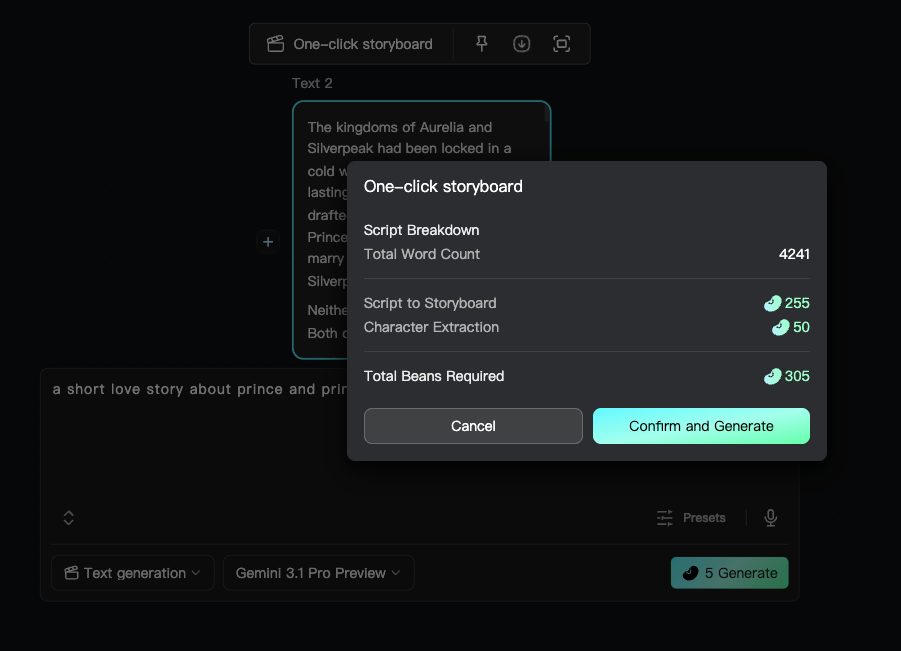
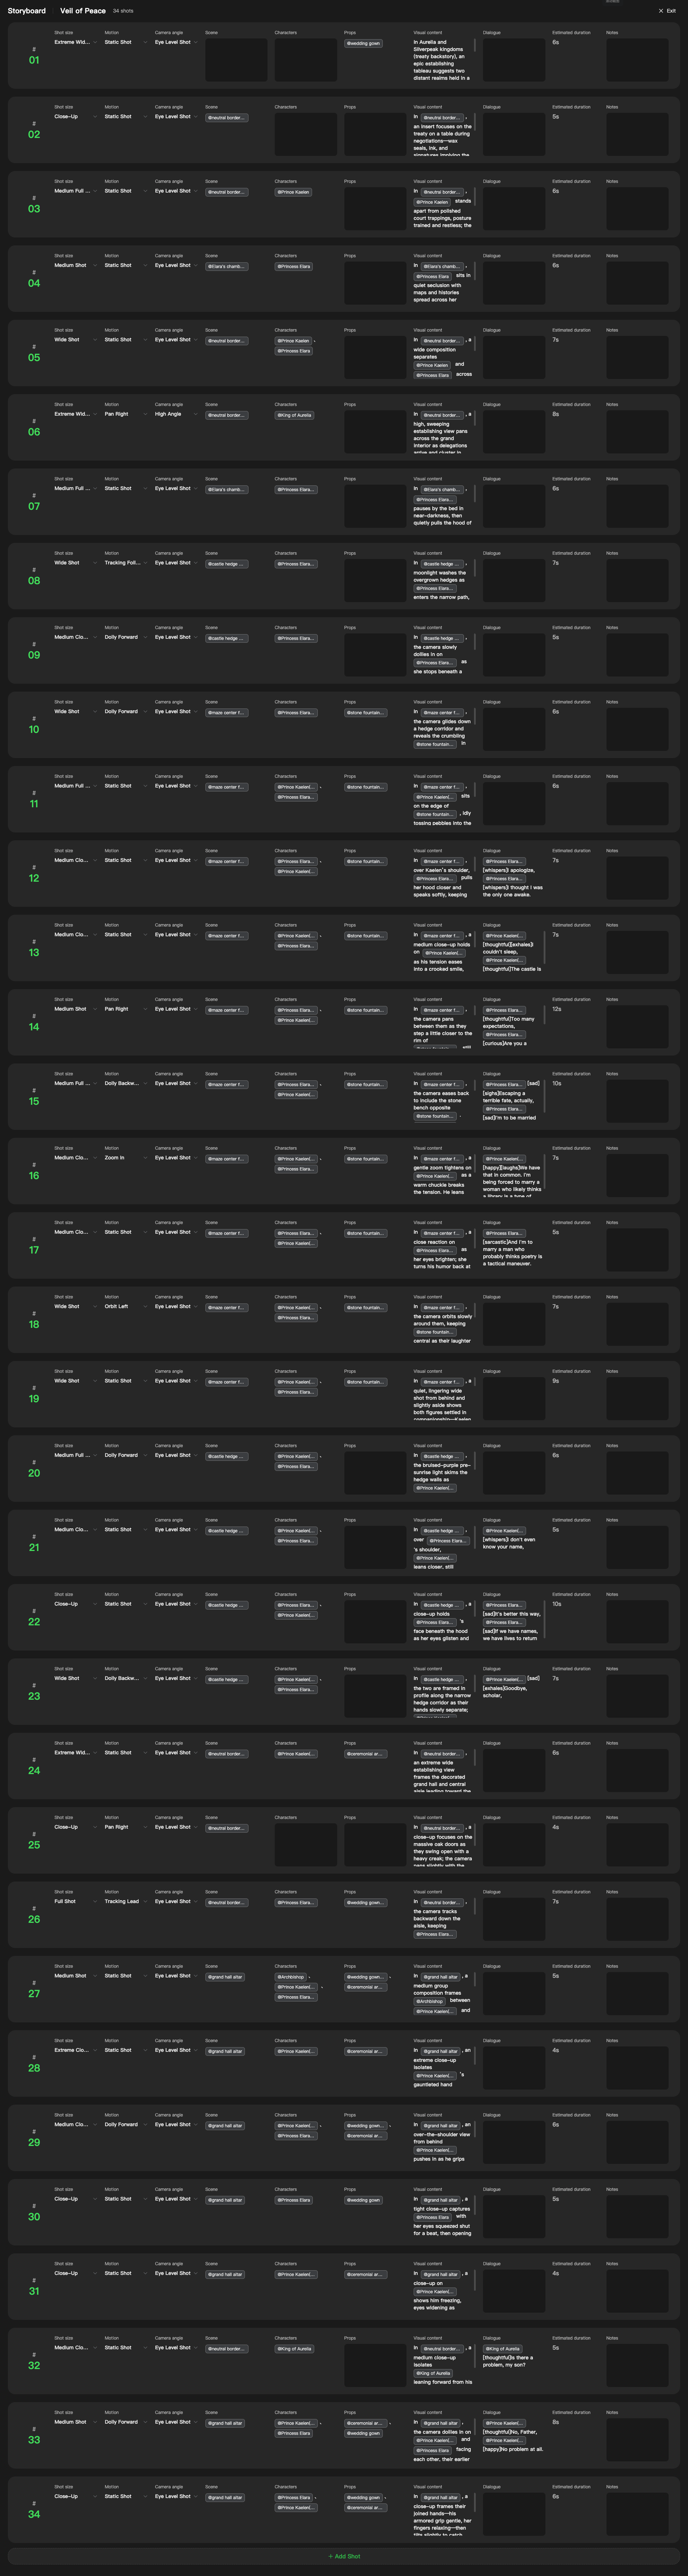
- AI splits shot content into images (subjects such as characters, scenes, and props) and a storyboard table. Names and prompts are generated automatically, and each subject asset is shown clearly.
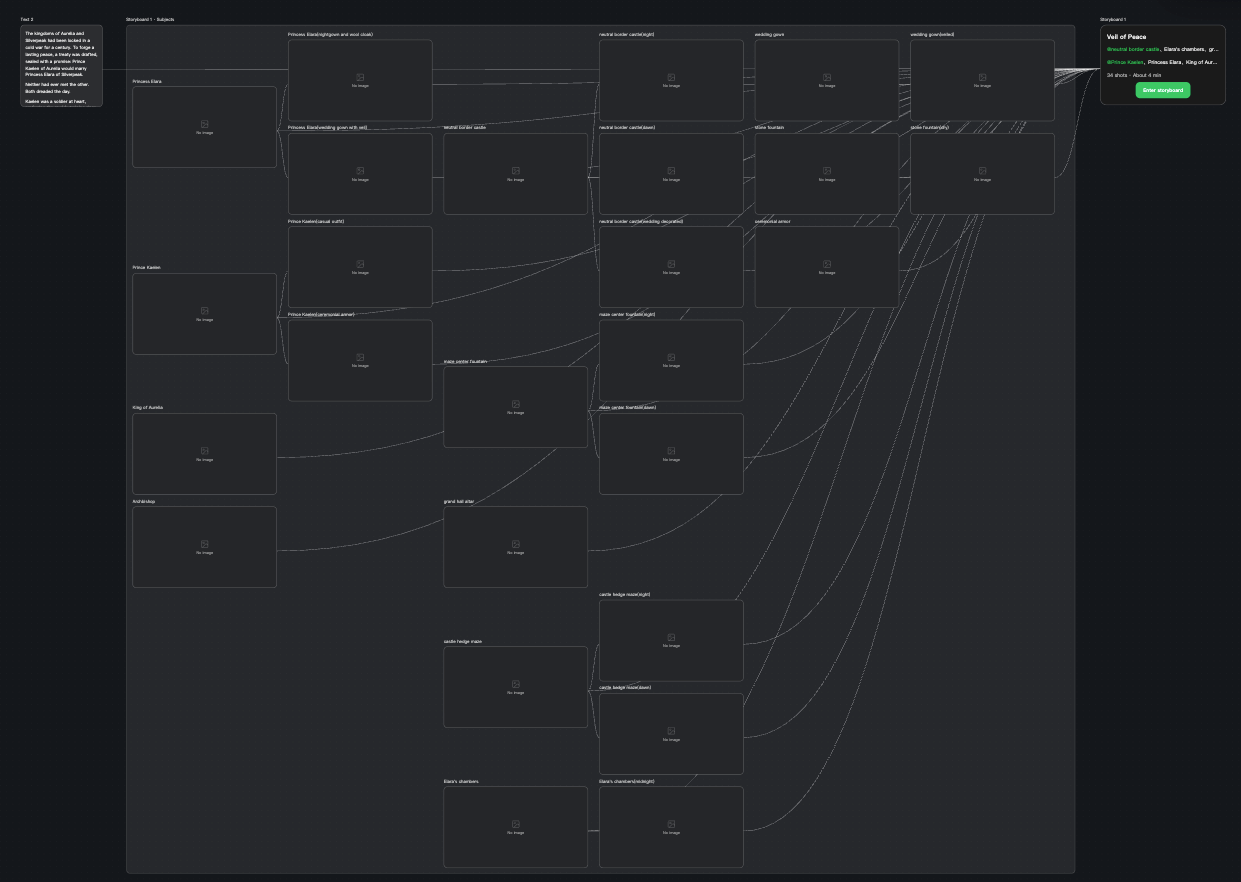
- 【Batch run】 generates all subject images in one click
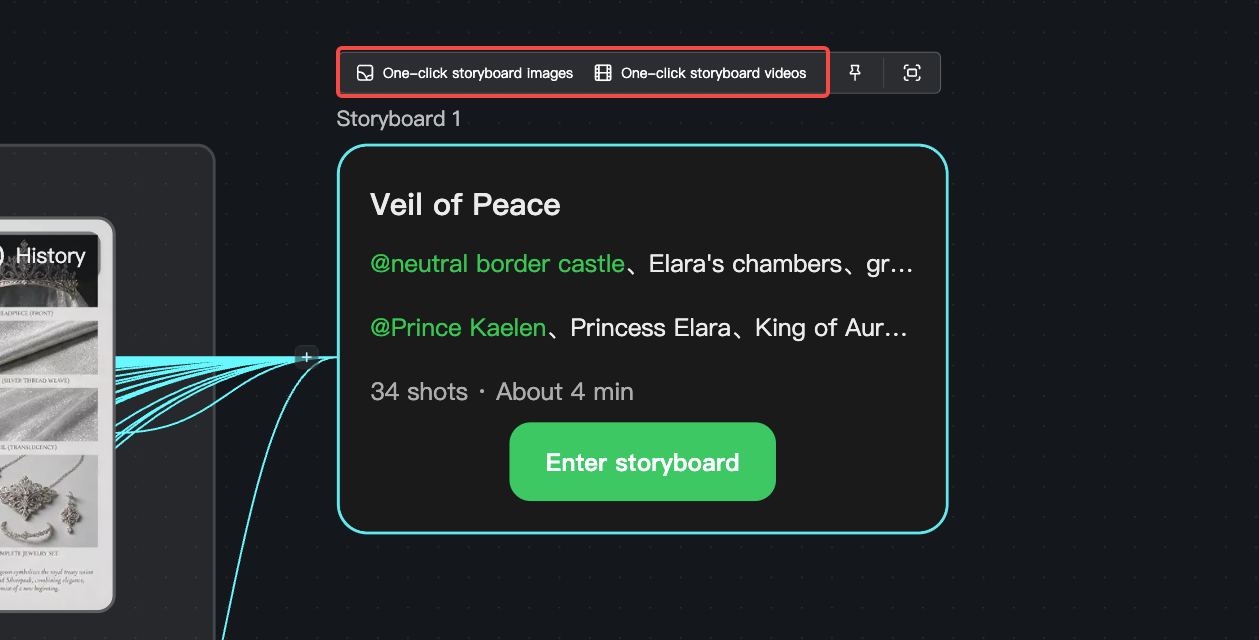
- The Storyboard node supports 【One-click storyboard images】 and 【One-click storyboard videos】
4.2.2 3D Director Stage
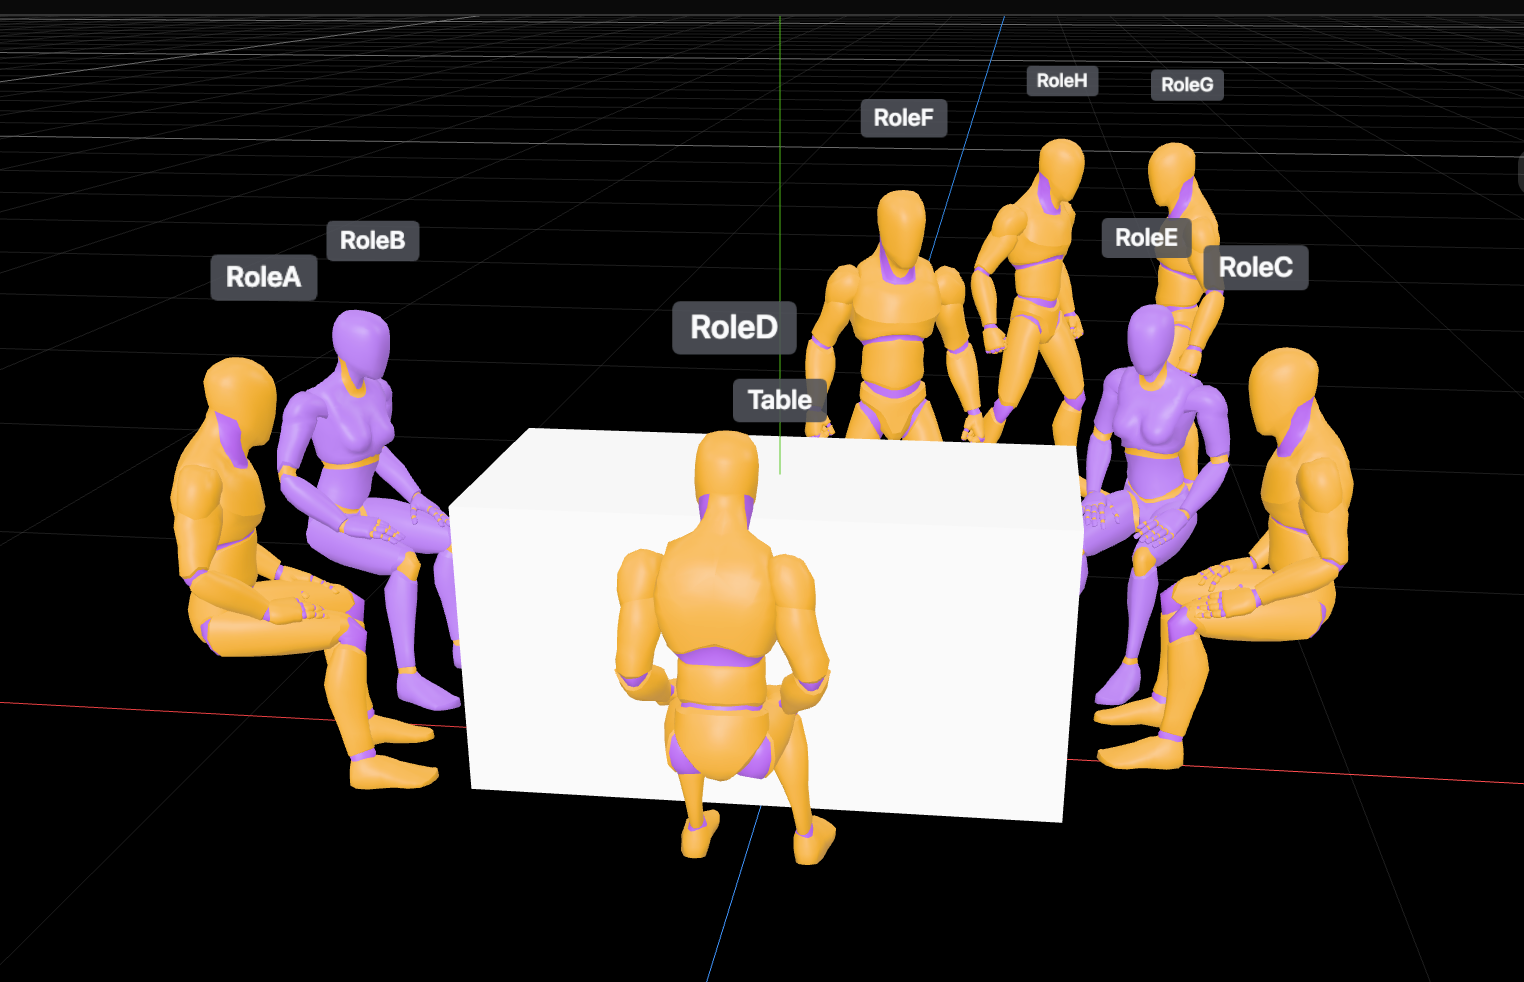
3D Director Stage uses a 3D preview so you can control character positions, motion, and camera relationships.
Core features: pose adjustment, camera position, multi-camera design, timeline animation, panorama import
Presets: a large pose library, and free adjustment of geometric white-model skeletal motion
Best for: film shot design, complex scene blocking, multi-character frames
- Visual character blocking. Customize character position and prop scale, set performance poses quickly, and refine composition in advance. Complex scenes and staging are easier to handle.
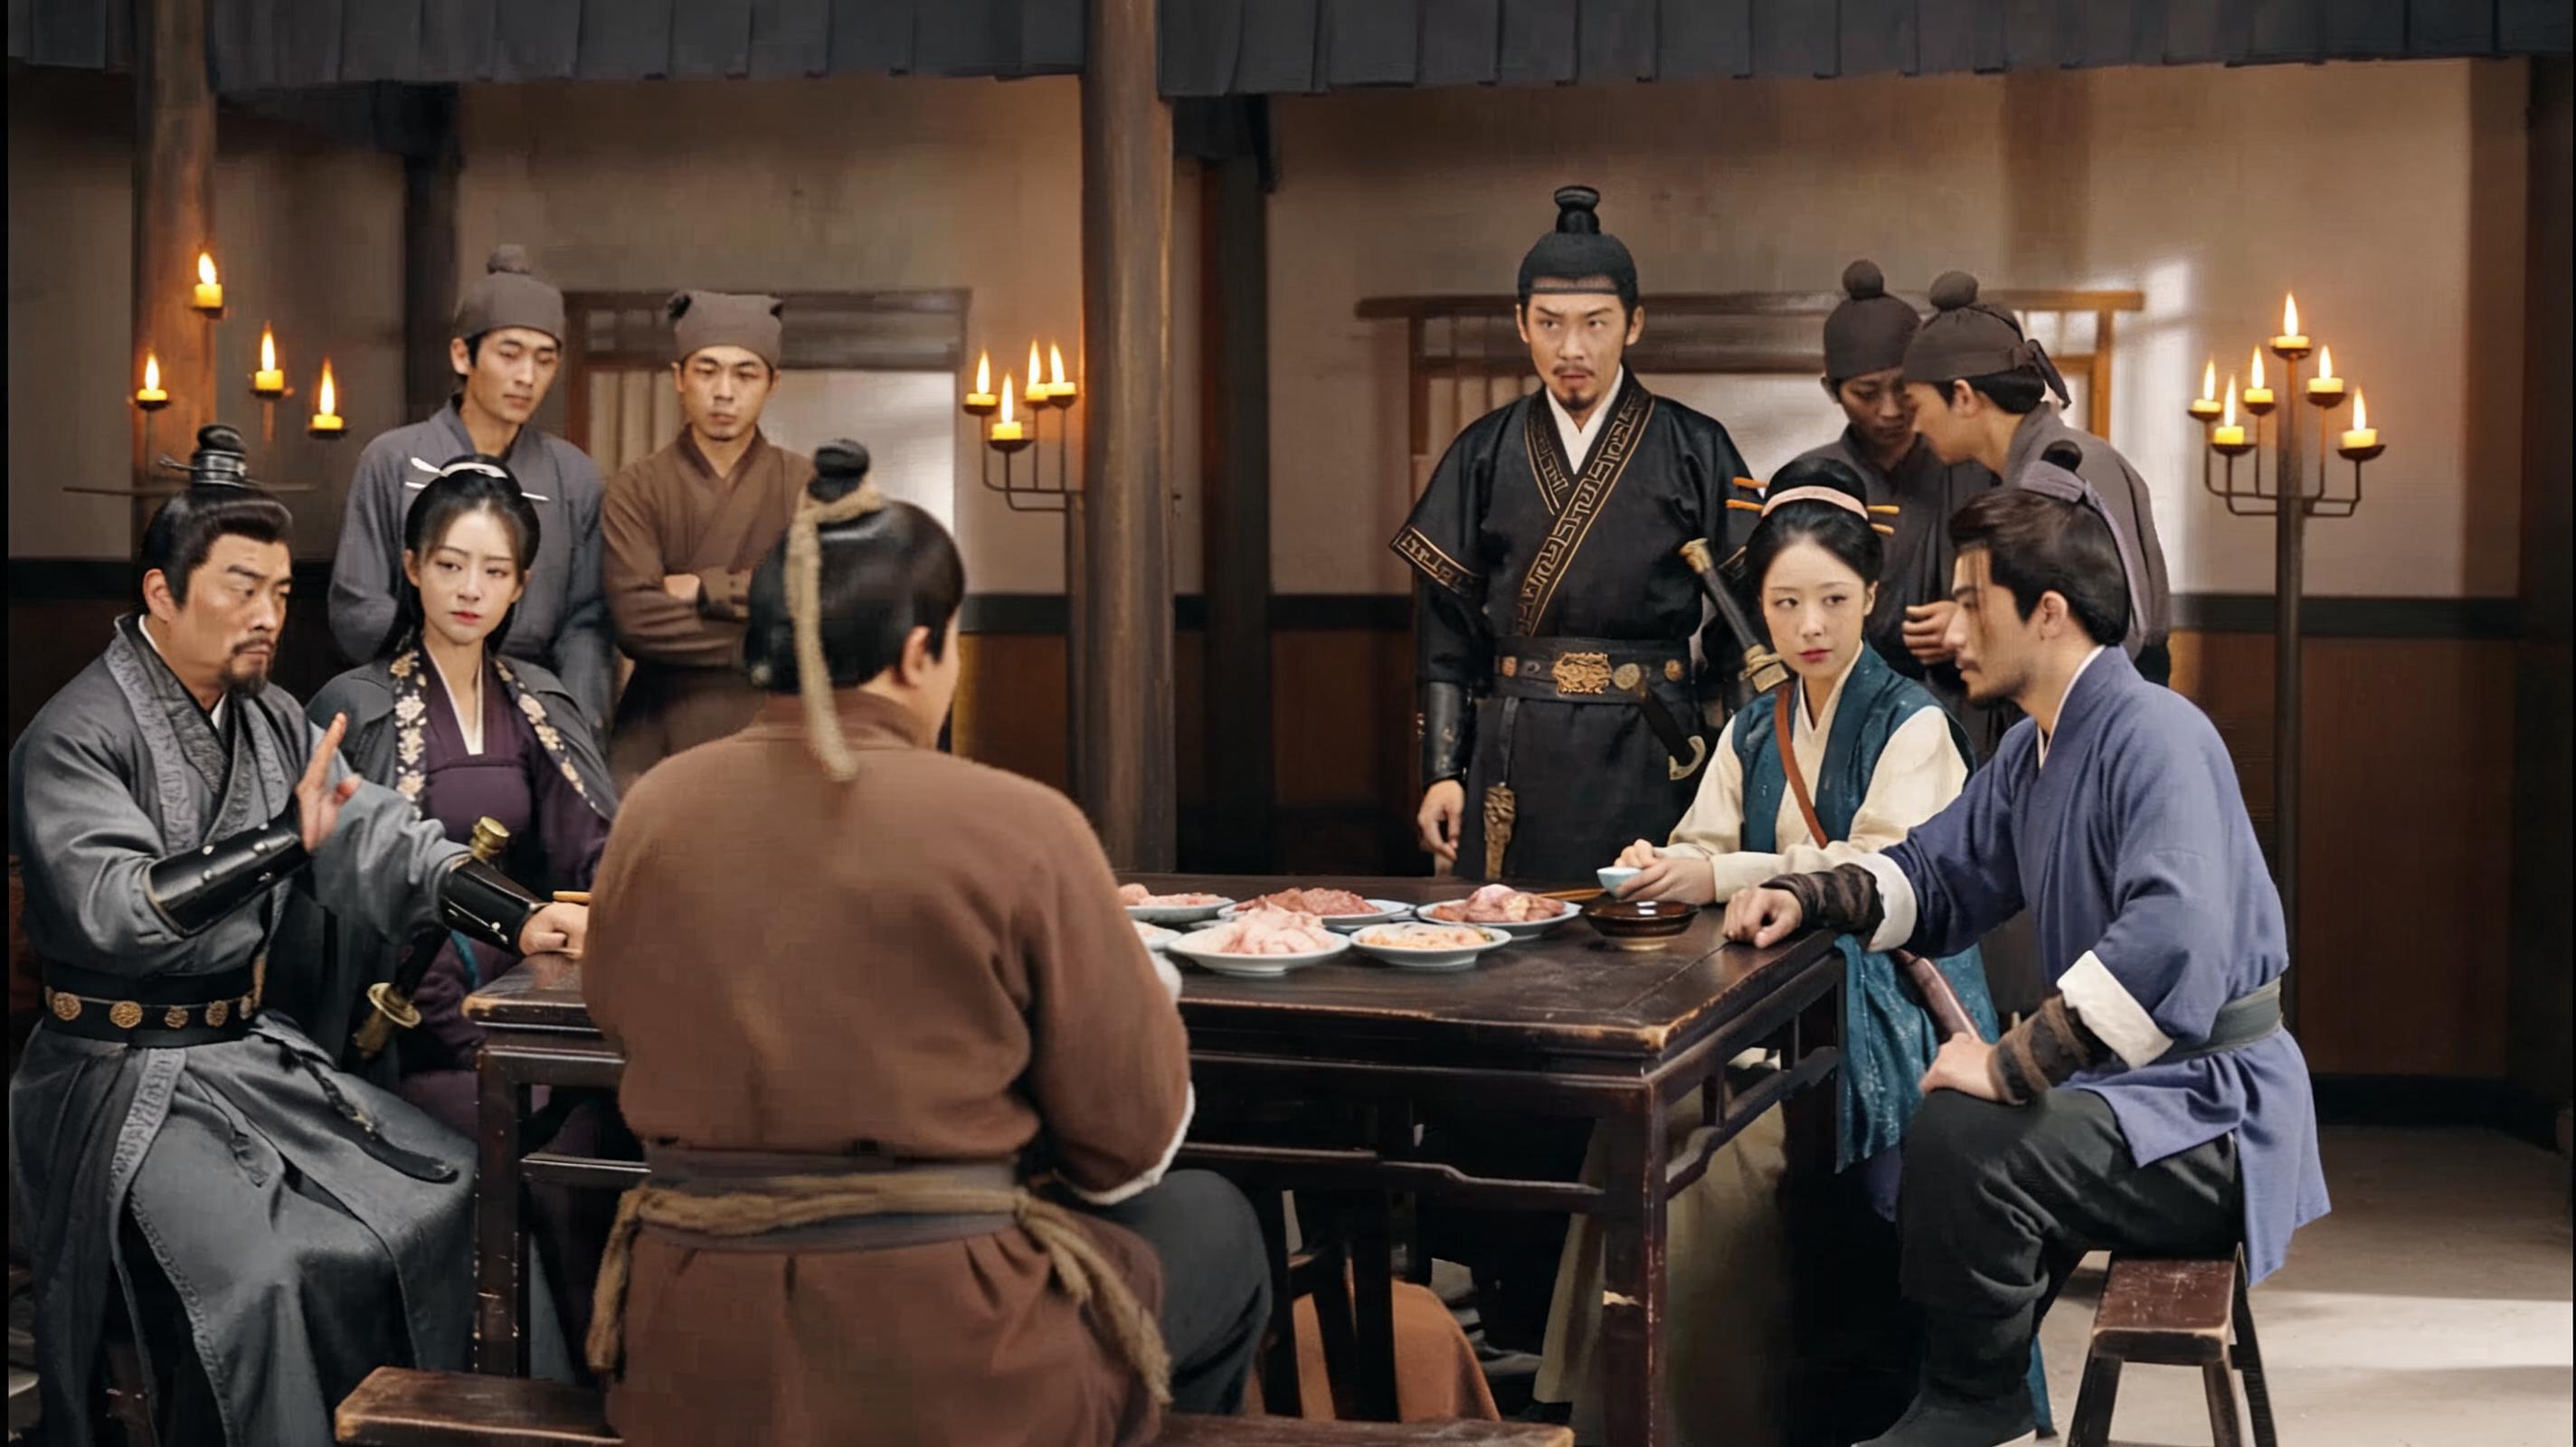
- Import 720° panoramas so staging is more intuitive and blocking is easier.
- A dedicated multi-camera editing timeline can output a complete video up to 90 seconds. Freely set cameras and character animation. Every camera move and action can be locked frame by frame so the model shot matches your intent.
White-model animation
Generated result
- You can also arrange multi-camera shot sequences for quick cut references, which helps professional multi-camera scenes.
White-model animation
Generated result
4.2.3 Edit node
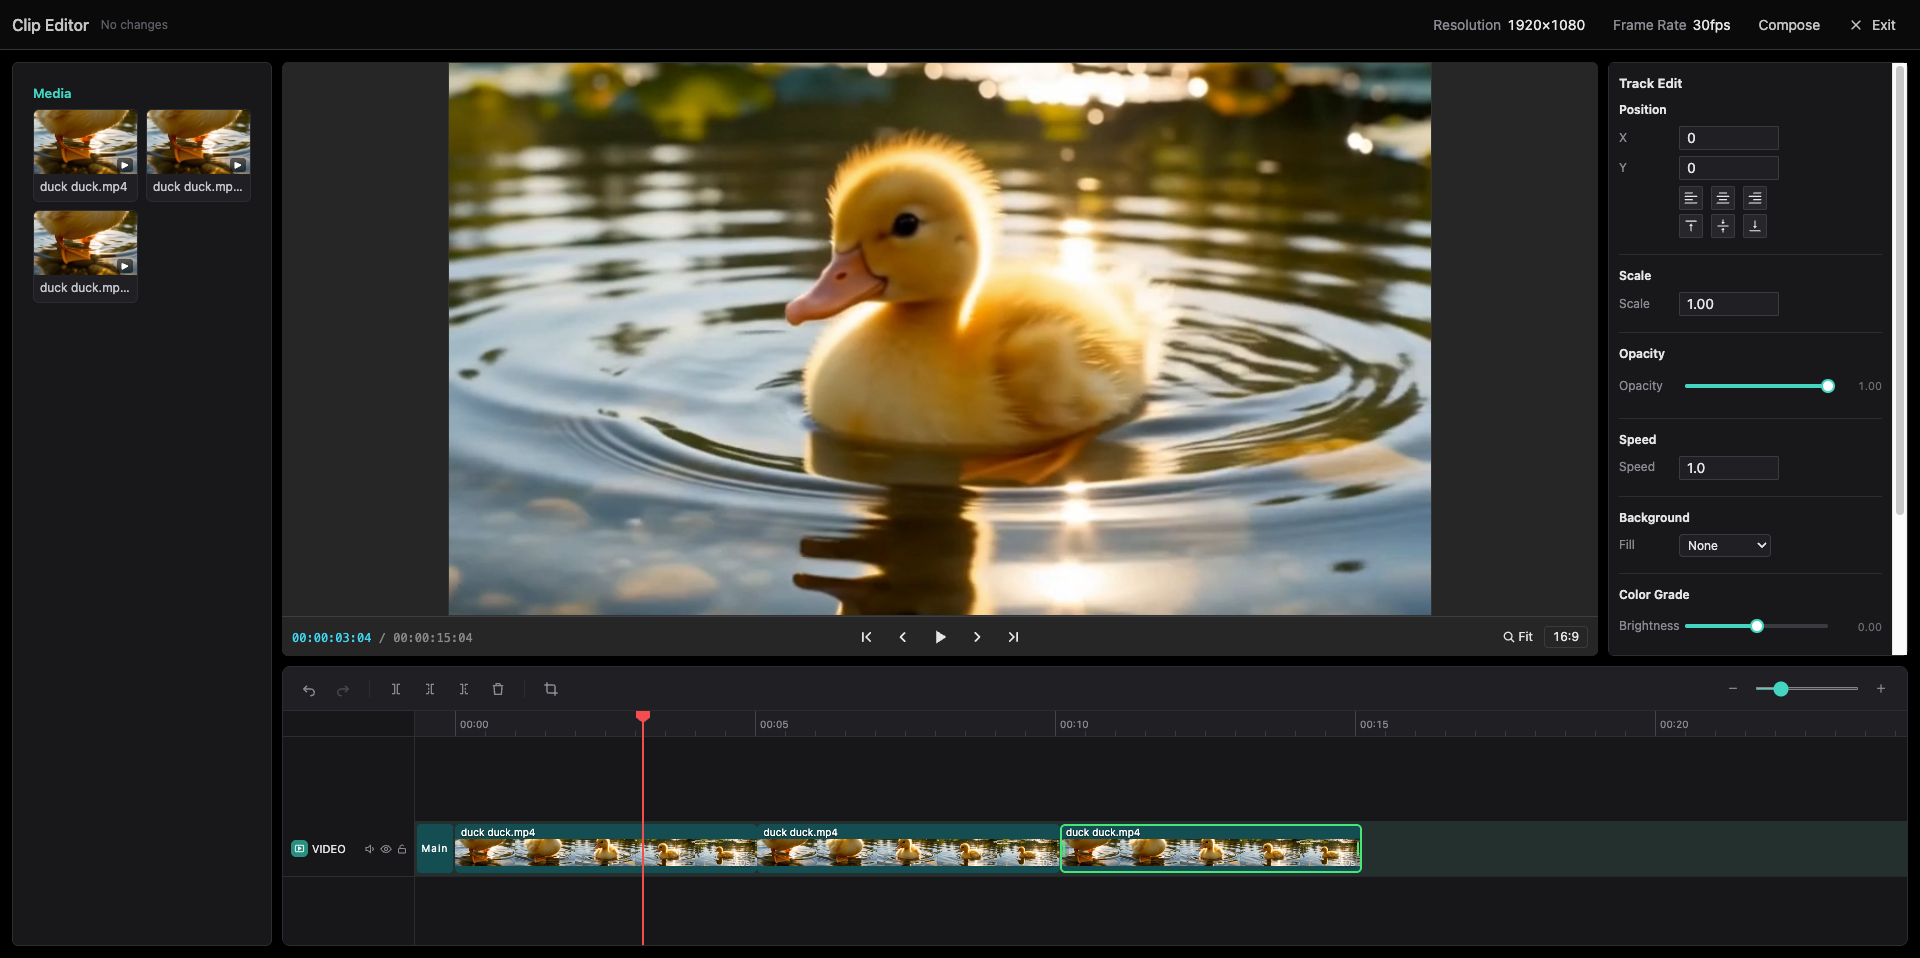
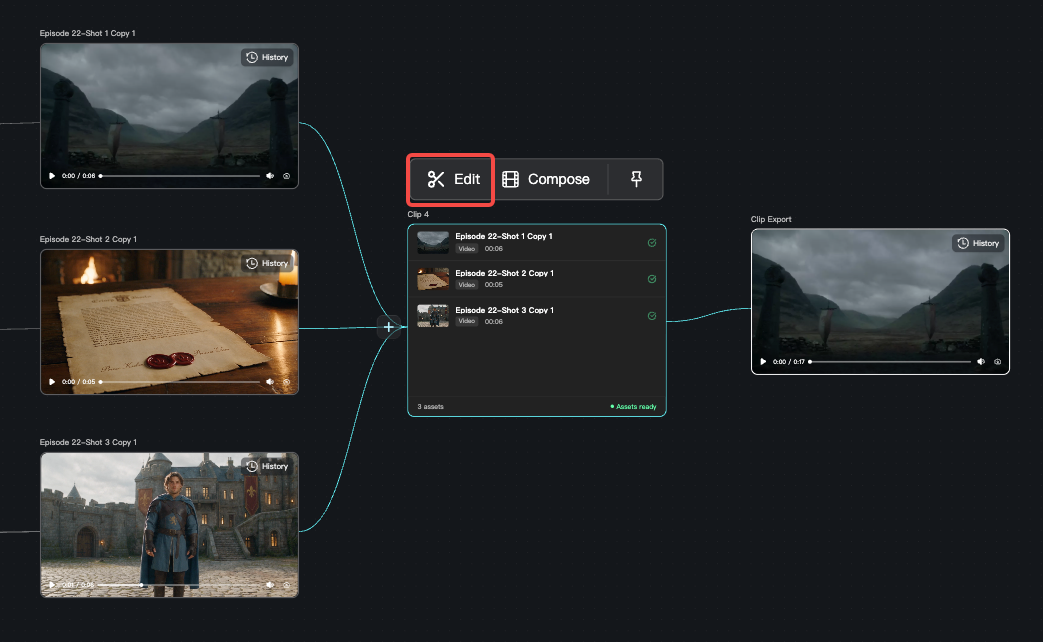
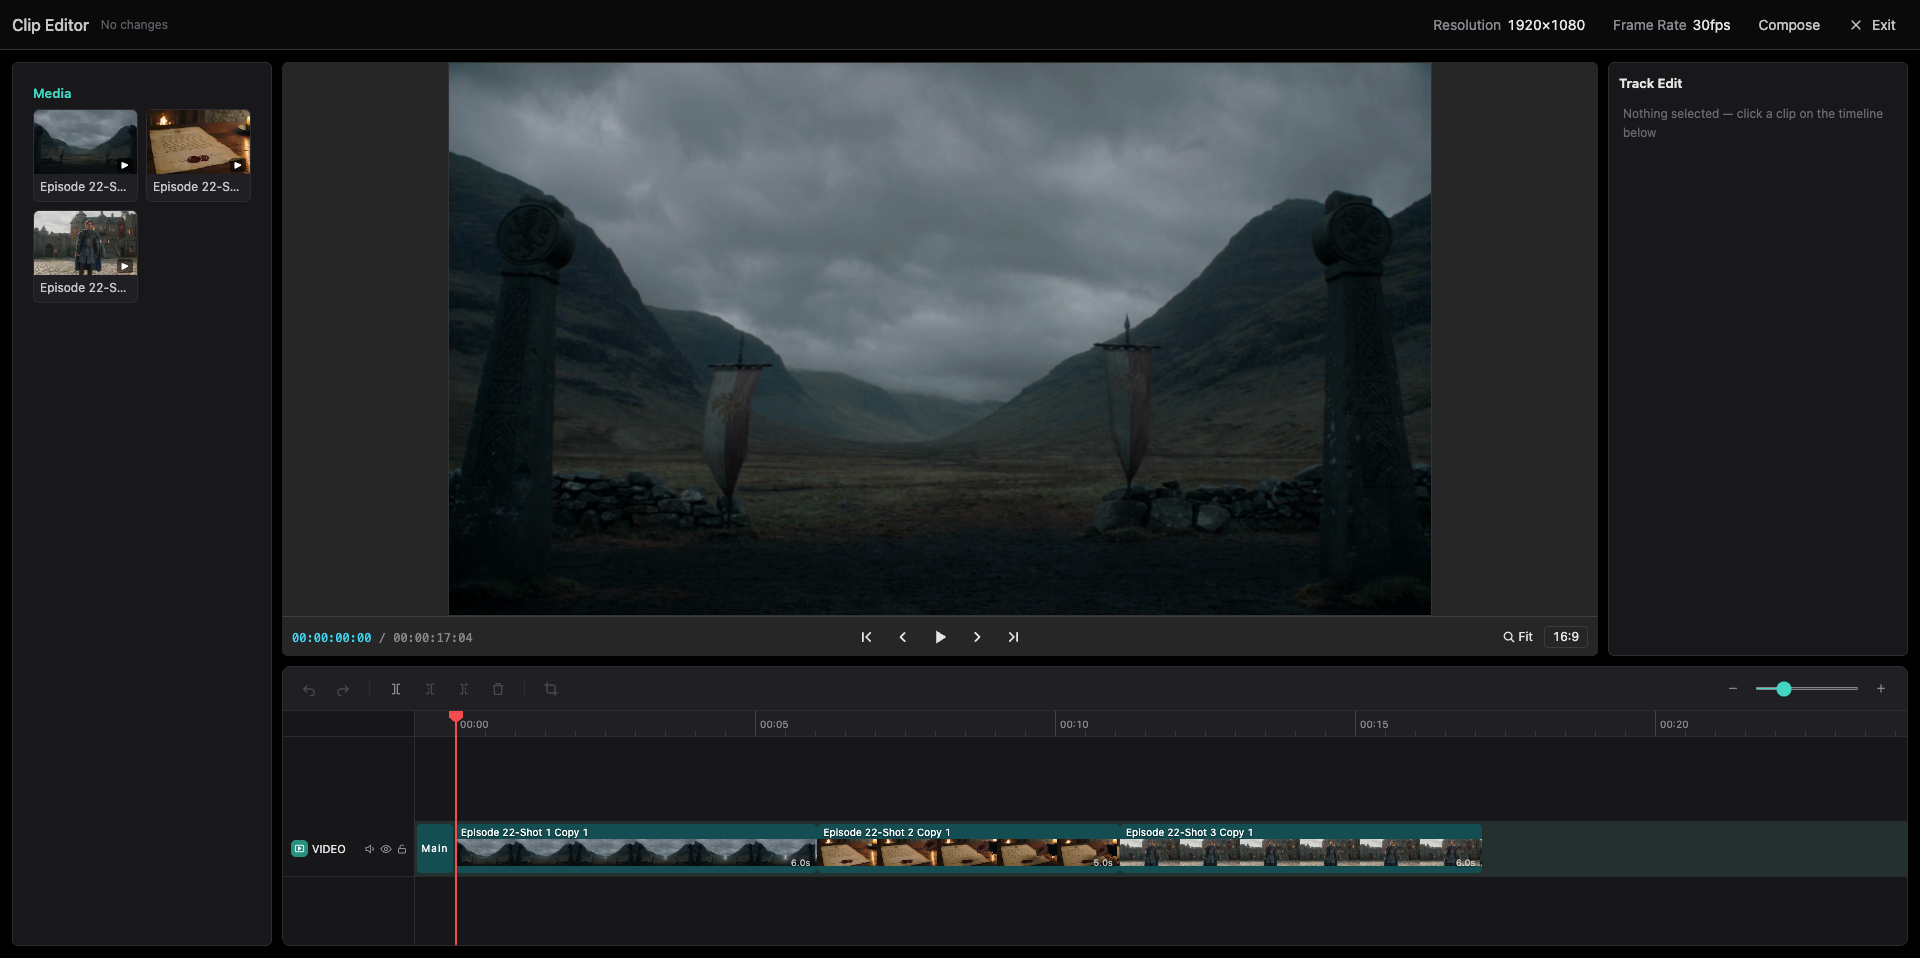
The Edit node provides online material editing so you can process generated images, videos, and audio directly.
Supports: material stitching, video editing, online preview
How to use: connect the materials to the Edit node → click 【Go to edit】 → finish editing and export
- Connect the images, videos, or audio you want to edit to the Edit node, then click 【Go to edit】
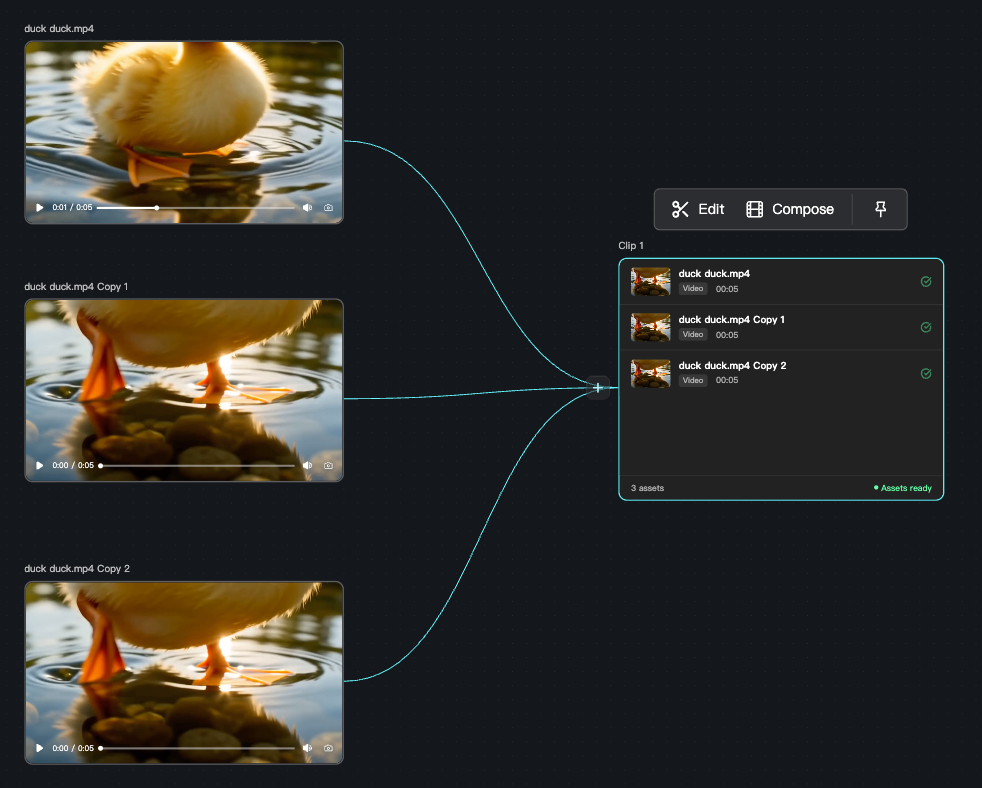
- Edit online without downloading. Real-time preview shows the finished look at a glance.
5 How to use Agent-assisted creation
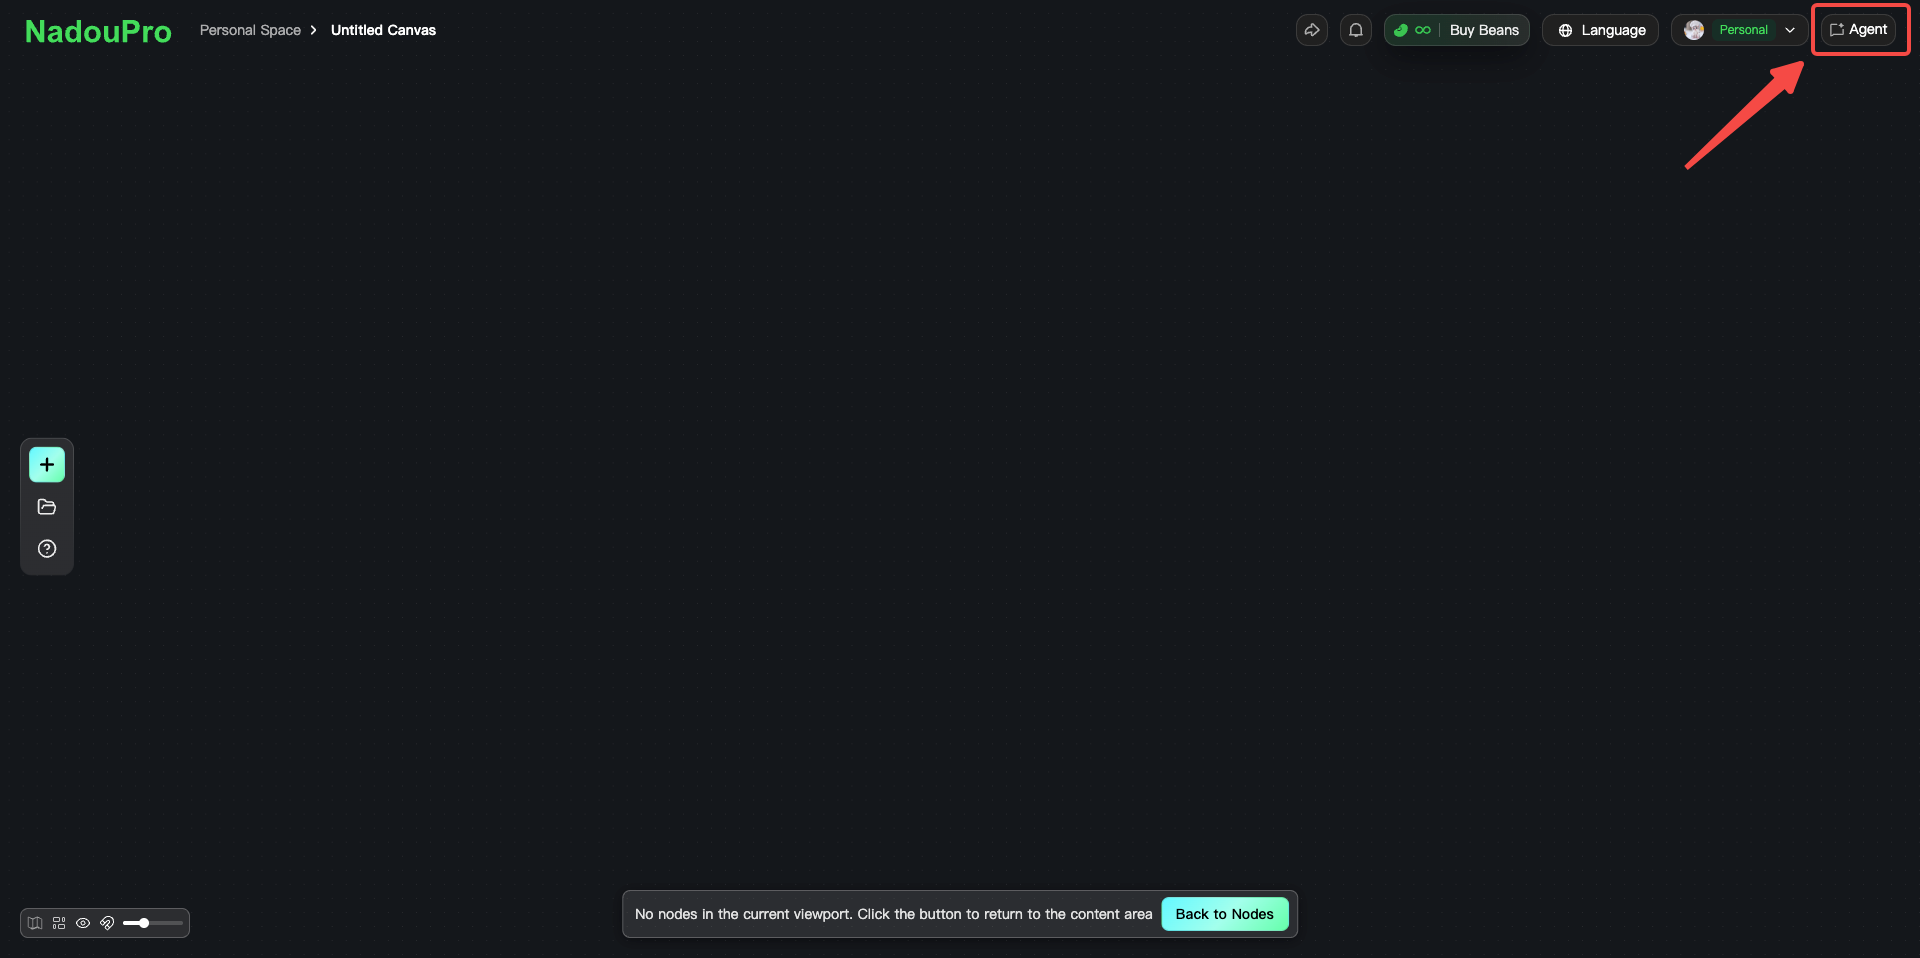
Besides adding and connecting nodes by hand, you can use the 【Agent】 entry in the upper-right corner of Canvas for conversational creation. Describe what you need in natural language, and Agent generates and connects nodes on the canvas. This is useful when you want fast output or are not familiar with the node workflow.
5.1 Conversational creation
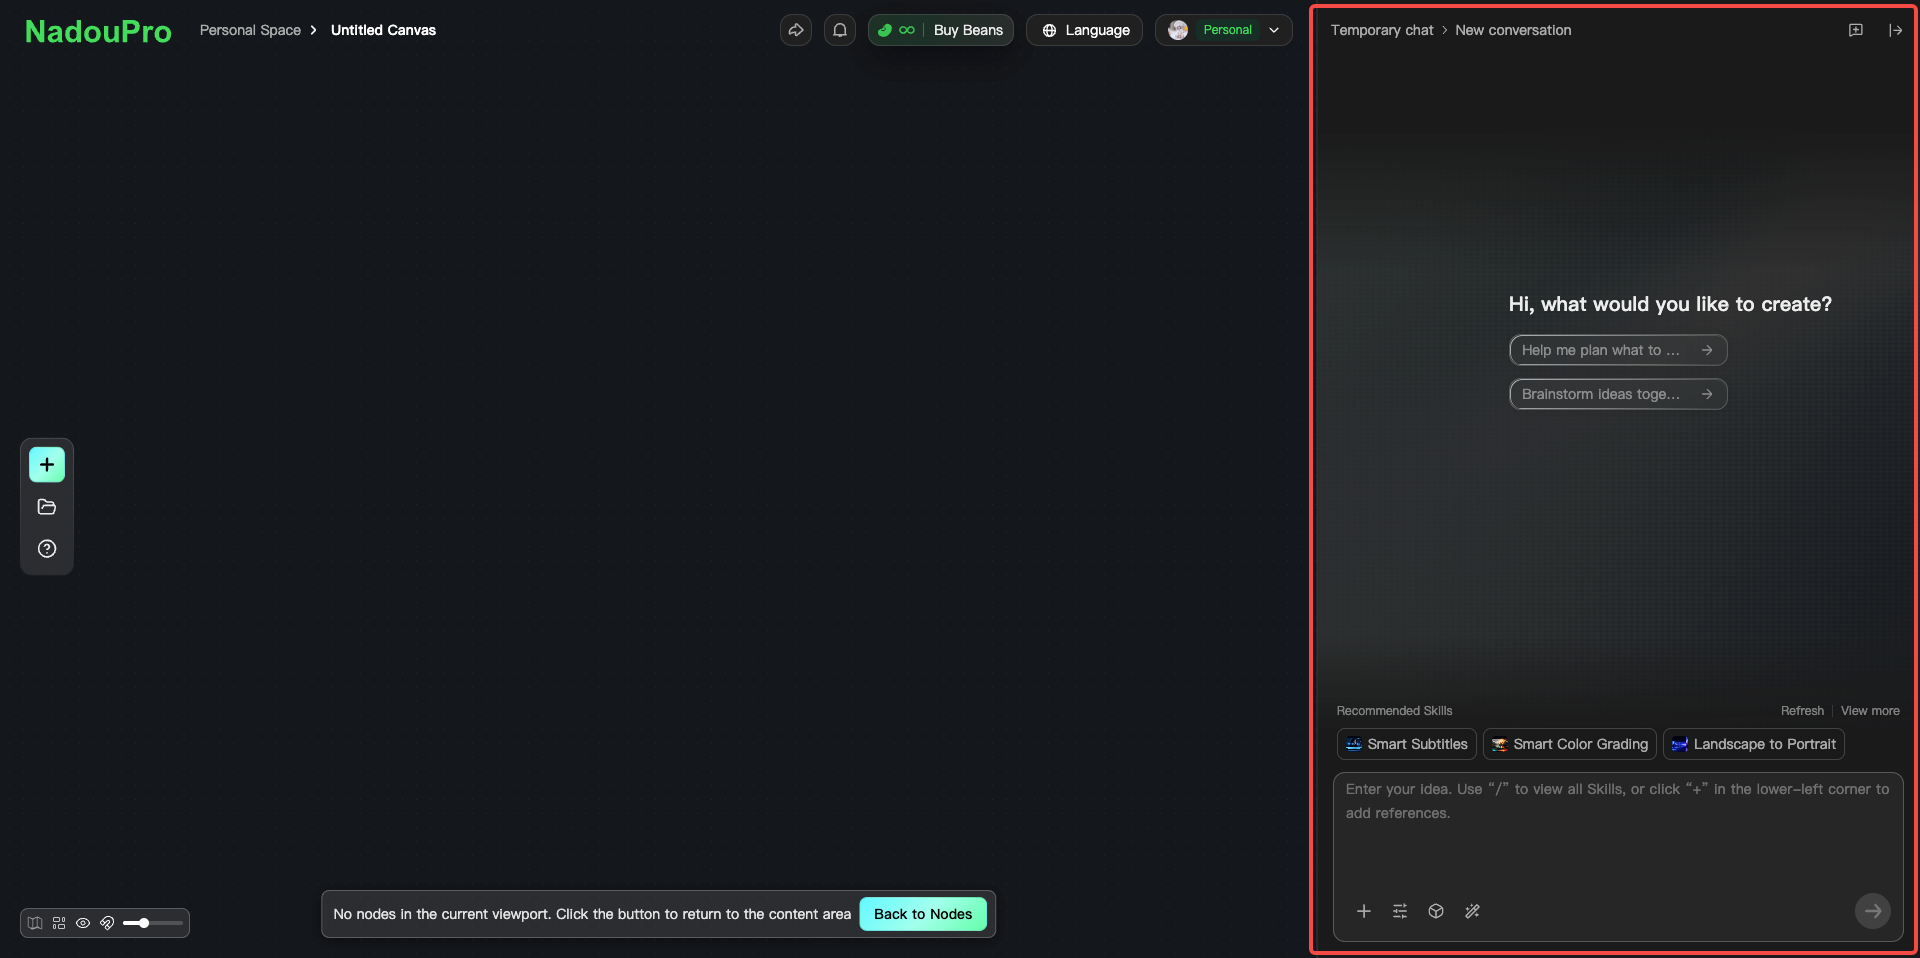
Click 【Agent】 in the upper-right corner to open the chat panel and enter your request. During the conversation you can:
Reference canvas nodes: use existing nodes as context so Agent continues from current content
Import materials from the workspace: reference uploaded workspace files in the chat without switching to the Assets panel
Upload local files: upload local files in the chat as reference materials
5.2 Agent settings
In the Agent chat panel you can configure:
Ask frequency: how often Agent confirms the plan with you. Higher frequency asks at more key steps; lower frequency lets Agent finish more of the flow on its own
Auto-generate materials: when on, Agent decides which materials are needed from the conversation and generates them, without one-by-one manual work
Image model: choose a model for Agent image tasks, such as Seedream 5.0 Pro, 奇智-IGI 2, or 奇智-INB 2
Video model: choose a model for Agent video tasks, such as Seedance 2.5, Seedance 2.0, or Kling 3.0 Omni 4K
Skill selection: choose a Skill pack such as cinematic camera moves, style restyle, or smart color grading. Available Skills are listed in the Skills chapter
6 How to build a workflow
Canvas lets you connect nodes into a full workflow. Mix node types as needed.
How to connect nodes
Each node has input (IN) and output (OUT) ports:
Hover the edge of a node
Click the connection button that appears
Drag a line from an input or output
The line represents material flow. For example:
Text node → generate a script → Image node → generate character design → Image + Text → Video node → generate motion video
Node input types
| Input type \ Node | Image node | Video node | Audio node | Text node |
|---|---|---|---|---|
| Image | ✅ | ✅ | ❌ | ✅ |
| Video | ❌ | ✅ | ❌ | ❌ |
| Audio | ❌ | ✅ | ✅ | ❌ |
| Text | ✅ | ✅ | ✅ | ✅ |
| 3D Director Stage | ✅ | ❌ | ❌ | ❌ |
| Edit | ✅ | ✅ | ✅ | ❌ |
7 Export and share
After production, you can export to DaVinci Resolve for further work.
You can also share the work or canvas to the NadouPro community for feedback, or sync it to iQIYI for a chance at ad revenue sharing.
8 Common creation-flow examples
Generate a short film from one sentence
Best for: you have an idea, but no complete materials.
Flow: Text node → generate a script / prompt → Image node → generate characters and scenes → Video node → generate motion video
Make a character design
Best for: work that needs character consistency.
Flow: upload a character reference → Image node (Image Reference) → generate a character sheet → use it in later video production
Make a complete film clip
Best for: short series, motion comics, and promo videos.
Flow: story synopsis → script generation → character design → scene design → storyboard generation → video production
9 Example: from idea to video
This walkthrough uses a short film to show the full Canvas workflow:
Step 1: Generate the story
Use a Text node: enter the idea → generate a script → one-click storyboard split
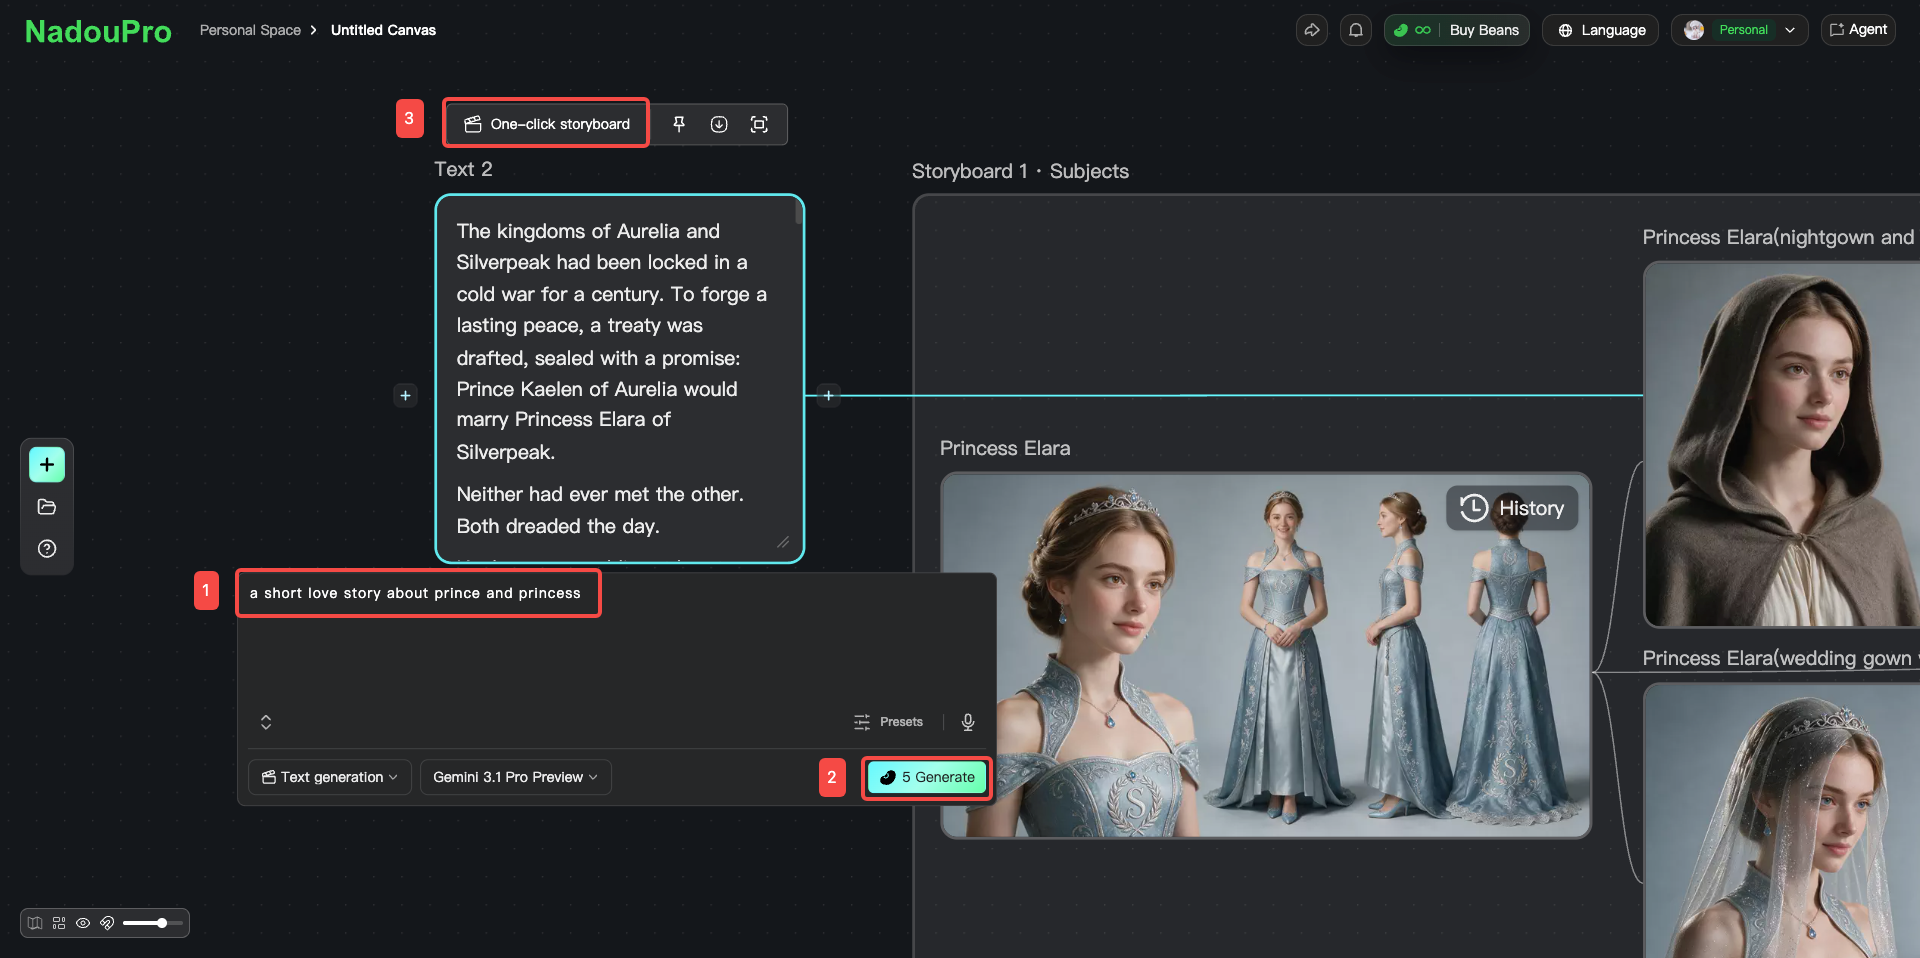
AI splits shot content into images (subjects such as characters, scenes, and props) and a storyboard table. Names and prompts are generated automatically, and each subject asset is shown clearly.
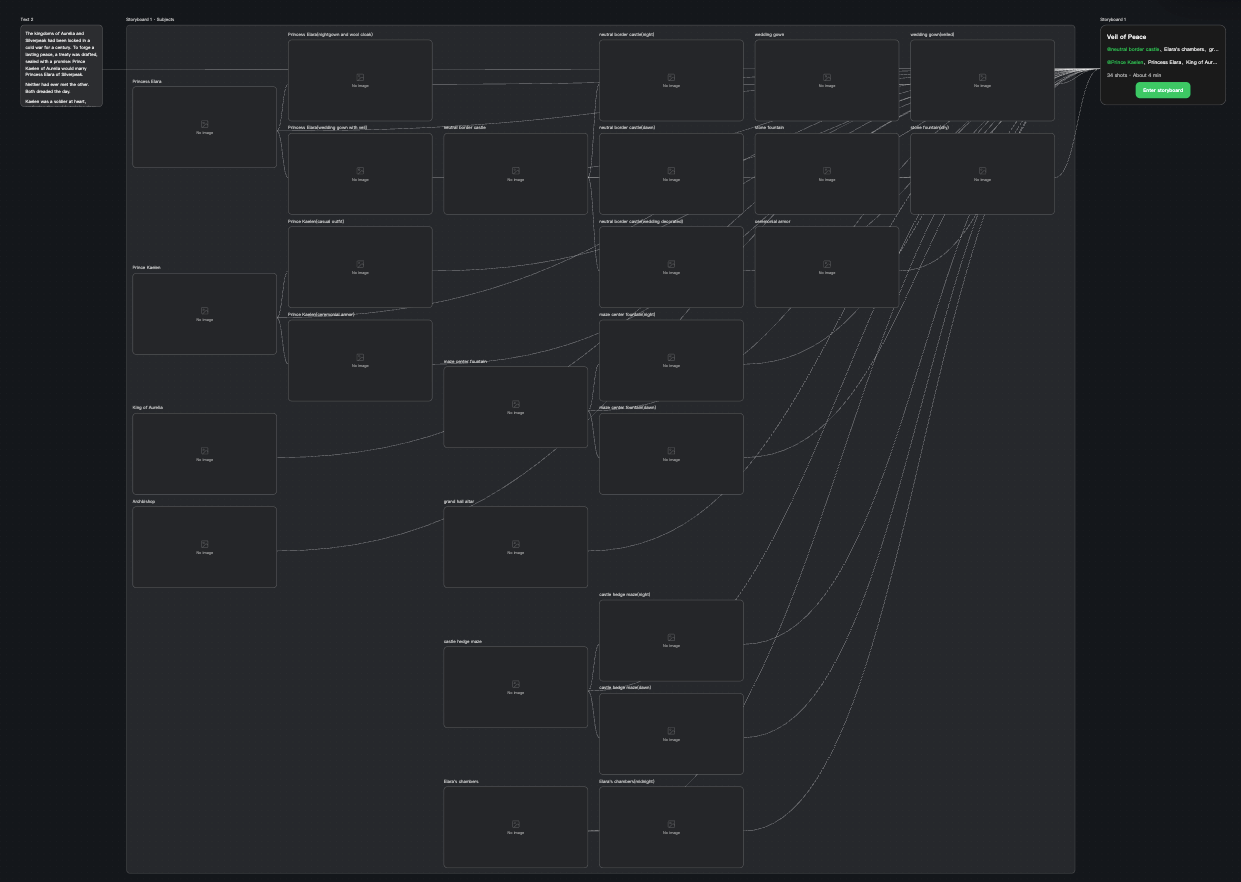
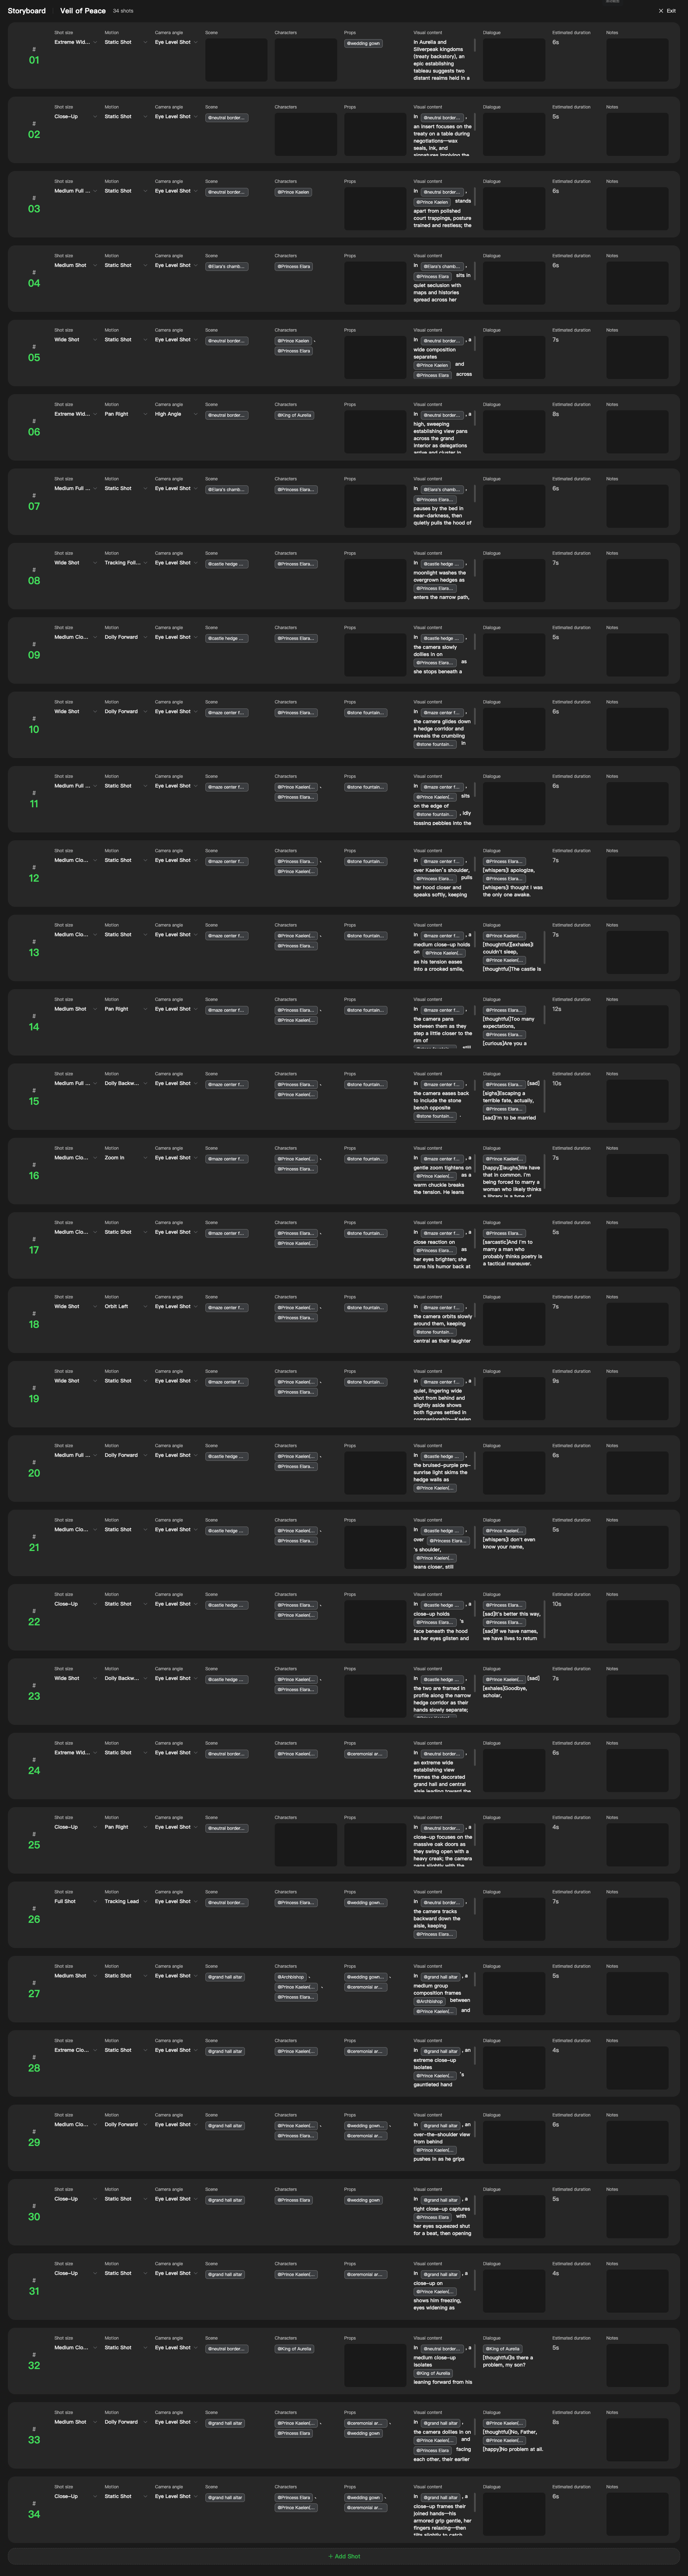
Step 2: Design characters, scenes, and props
From the one-click storyboard list:
Select the Image node for a character → review and edit the suggested prompt → generate the character
Select the Image node for a related character state → review and edit the suggested prompt → generate that state
Select the Image node for a scene → review and edit the suggested prompt → generate the scene
Select the Image node for a prop → review and edit the suggested prompt → generate the prop
You can also use 【Batch run】 to generate all subject images in one click
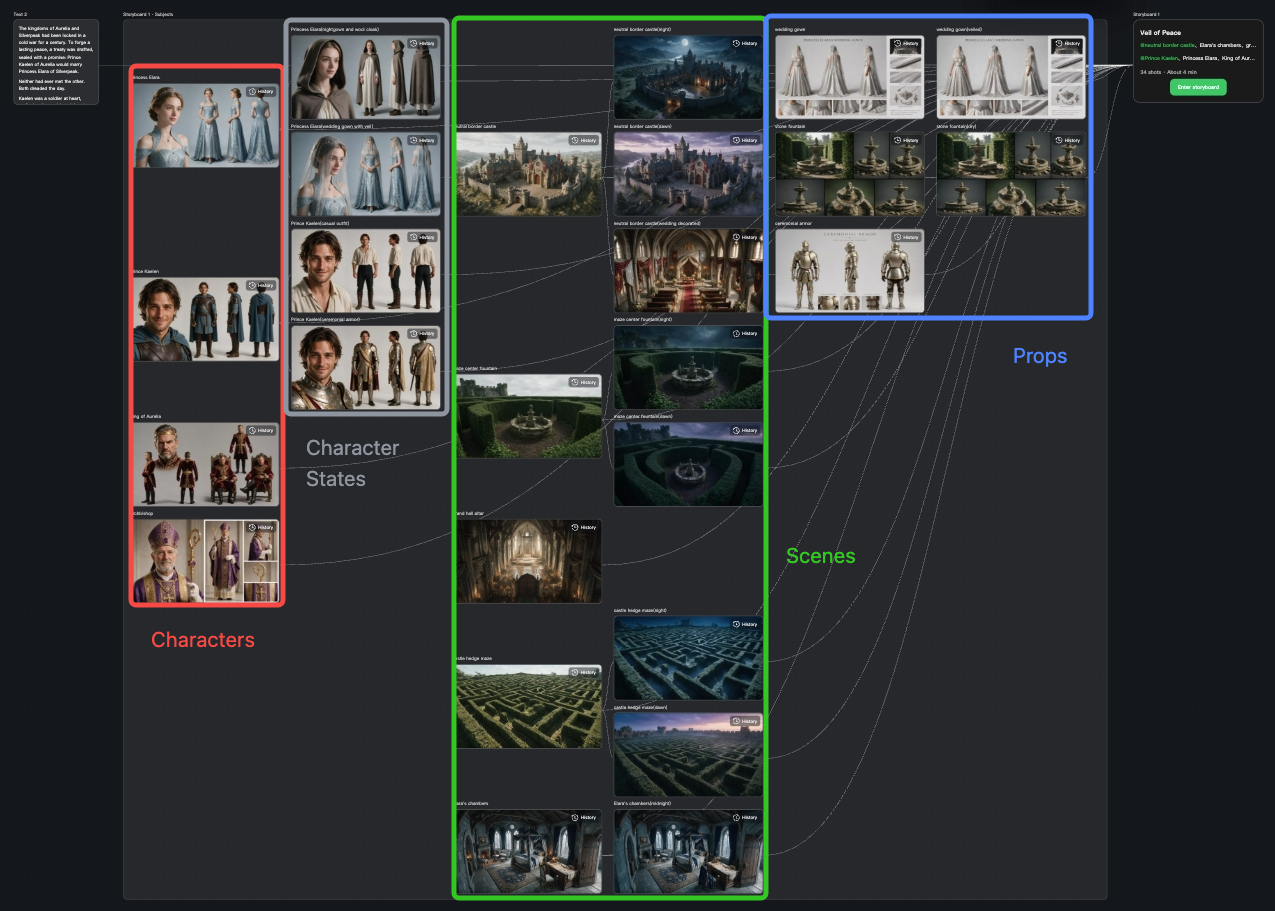
- The storyboard-table node supports 【One-click storyboard images】 and 【One-click storyboard videos】
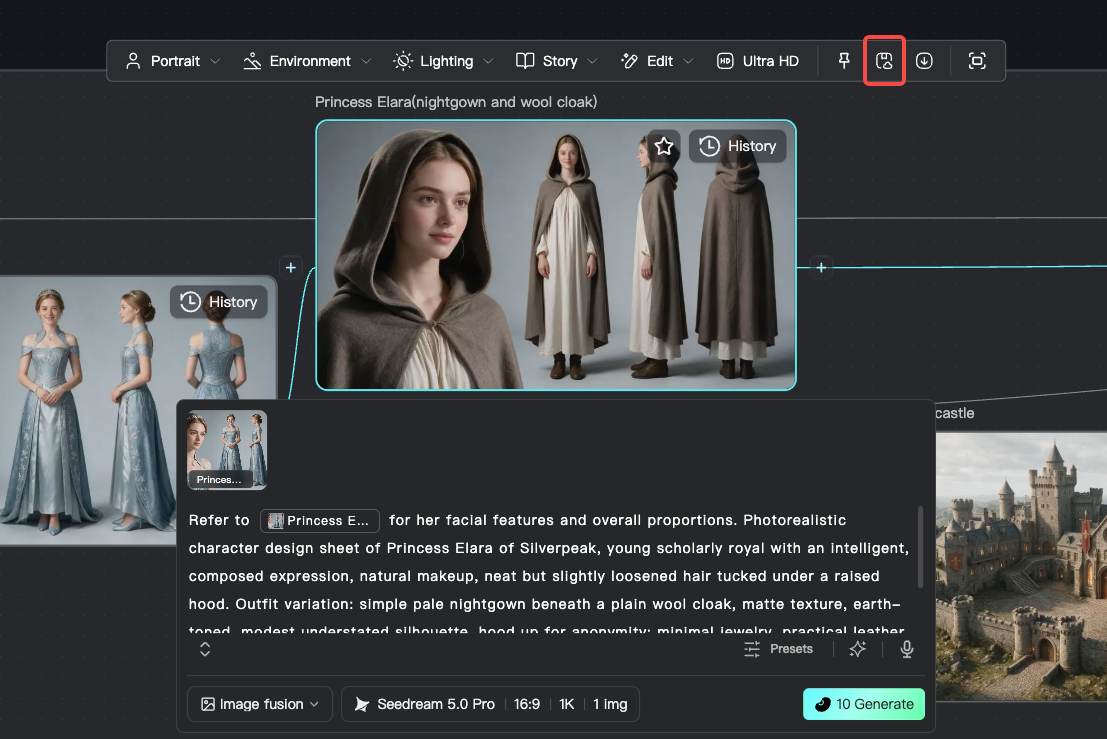
- After generation, click 【Save to space】 to store all subjects in the asset library.
Tip: click a node to see suggested prompts, then edit them as needed.
Step 3: Generate video
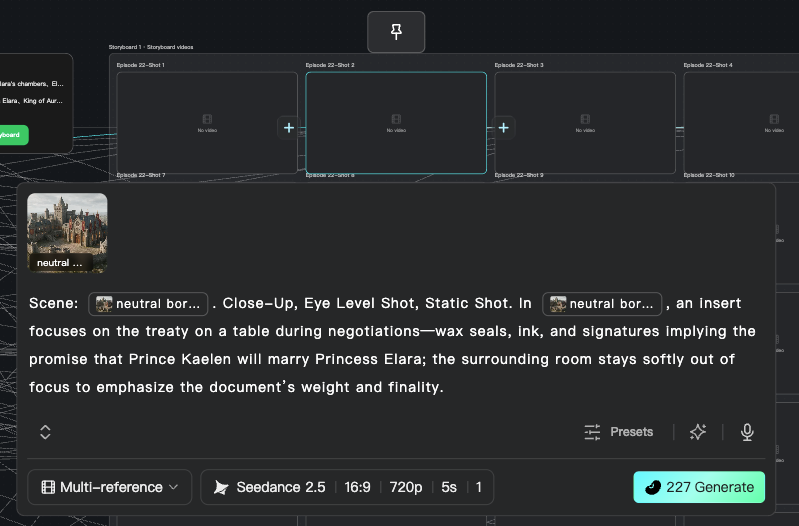
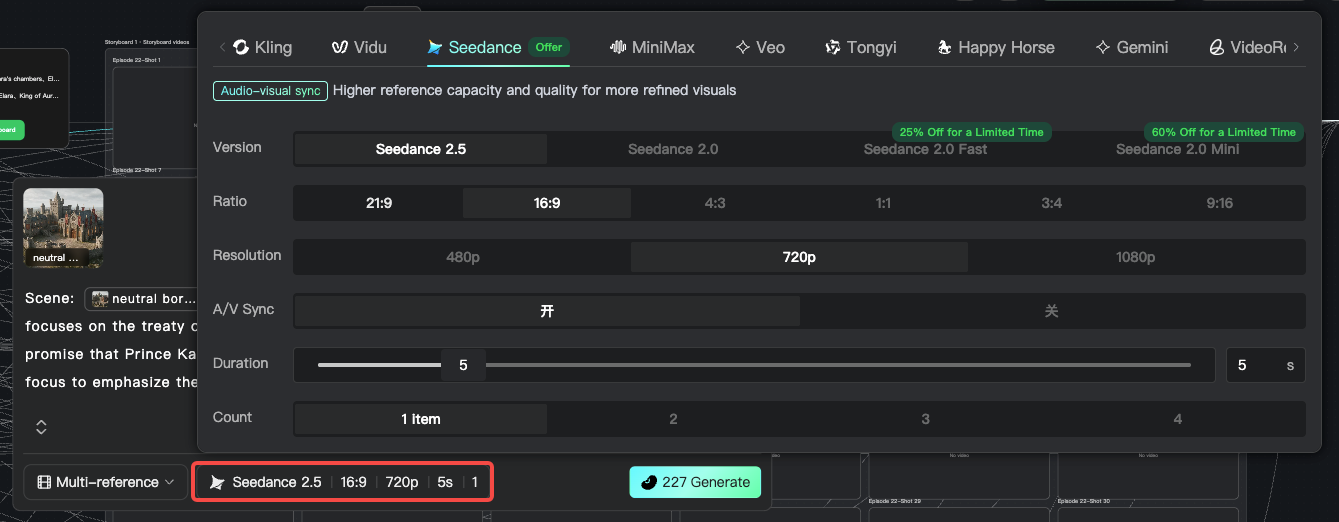
Connect the script, character images, and scene images to a Video node. Choose a generation mode and model, set aspect ratio, resolution, and duration, then click generate.
Step 4: Post-production
Connect generated video and audio to an Edit node, then click 【Go to edit】 for basic editing.
Step 5: Export
After creation, box-select the assets to export and click 【Batch download】 to save the generated content.
10 Canvas creation tips
Plan first, then generate
Recommended flow: define the goal → create a Text node to organize the brief → generate character and scene assets → then start video production. Generating video first often makes later changes more expensive.
Use reference assets
To keep characters consistent, scenes unified, and style stable, upload reference images first and create with Image Reference on the Image node.
Manage assets in modules
Save characters, scenes, props, and video clips separately so they are easier to reuse later. See How to Use Assets?.
11 FAQ
Q: How is Canvas different from the film-creation Workbench?
Canvas is for free exploration and flexible workflows. Workbench is for scripted, structured production. They complement each other.
Q: Can nodes be connected in a branching way?
Yes. One node’s output can connect to several node inputs, so you can reuse materials and branch the workflow.
Q: Can canvas content be shared with others?
Yes. NadouPro lets you share canvas content with other users for team collaboration.