
3D Director Studio User Guide
1 What is 3D Director Studio?
3D Director Studio provides a 3D viewport for arranging characters, posing them, and setting up cameras to create animated, multi-camera previsualization (previs). It is designed for film and television shot planning, complex scene blocking, and compositions with multiple characters.
You can adjust character positions and poses, camera positions, orientations, and focal lengths; plan and switch between multiple cameras; animate with timeline keyframes; and import 720° panoramas.
2 Getting started
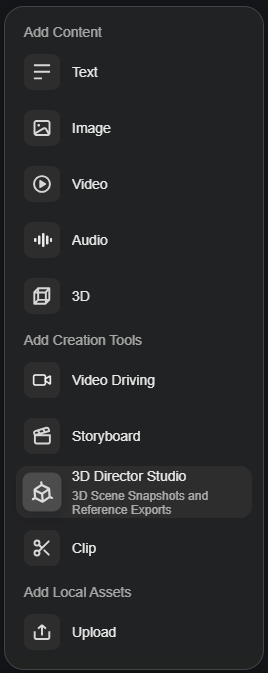
- Add a 3D Director Studio node to Canvas and open it.
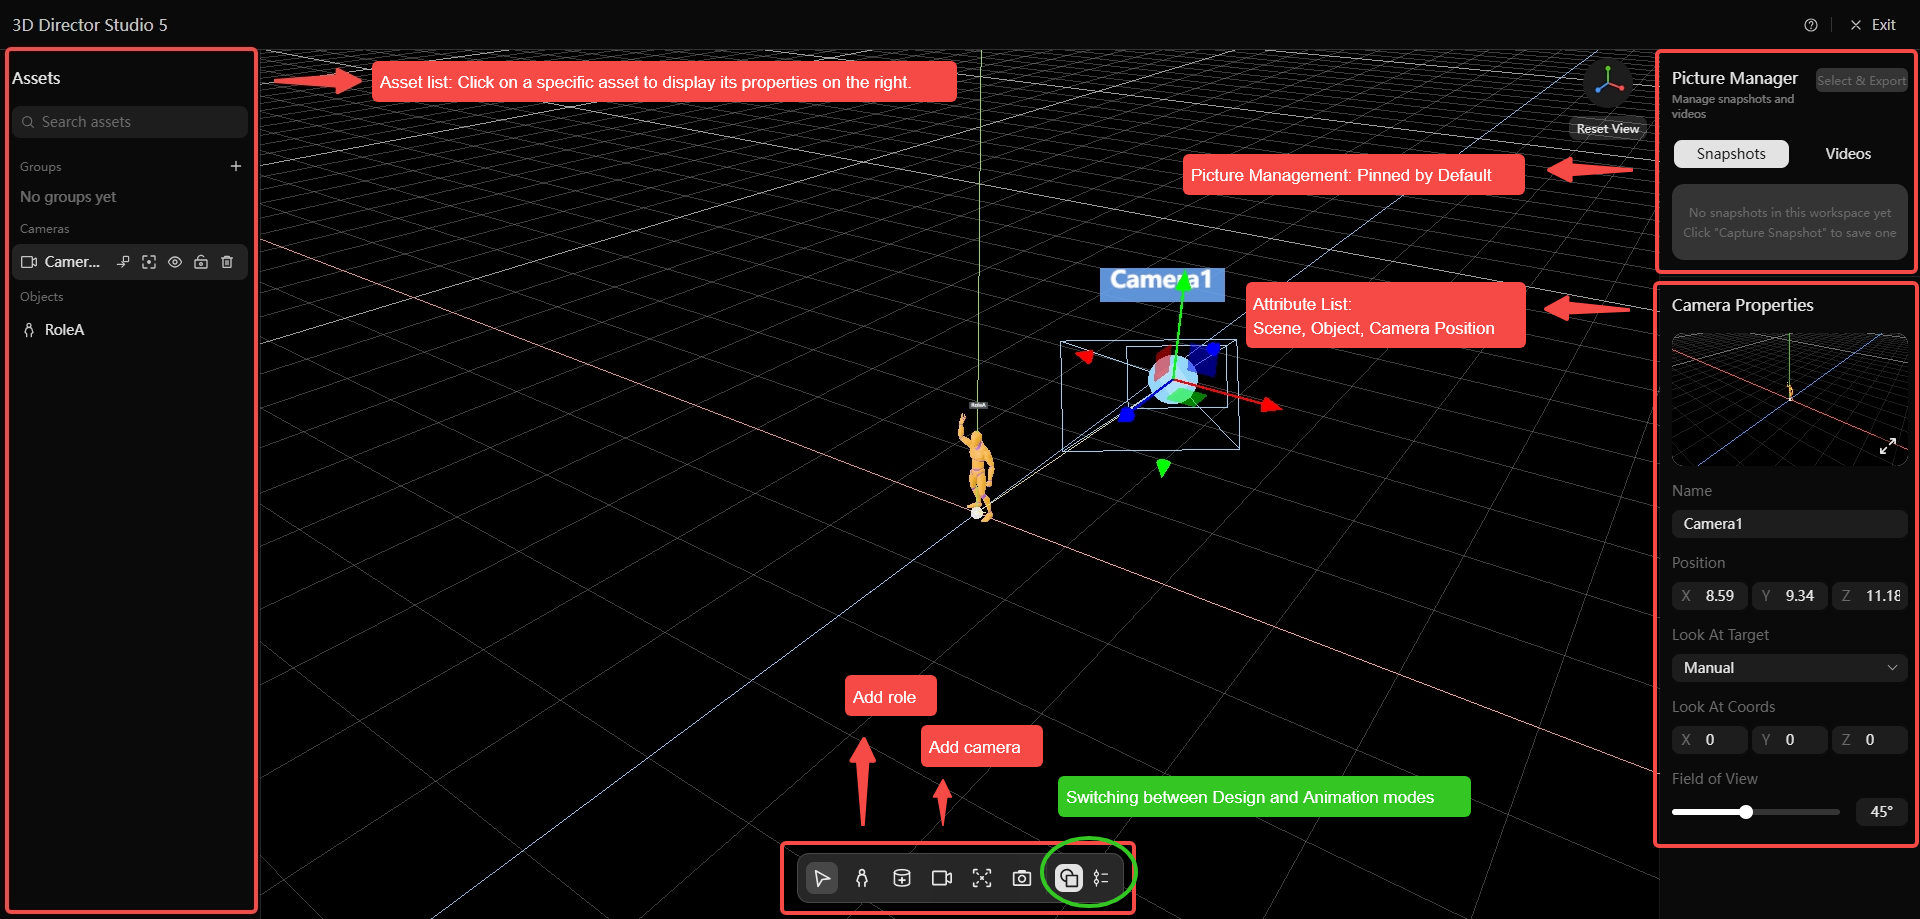
- The studio opens in Design mode. Use the bottom toolbar to add characters and cameras and establish their spatial relationships. Design mode is for building and adjusting the scene; Animation mode is for recording keyframes, arranging camera switches, and exporting video.
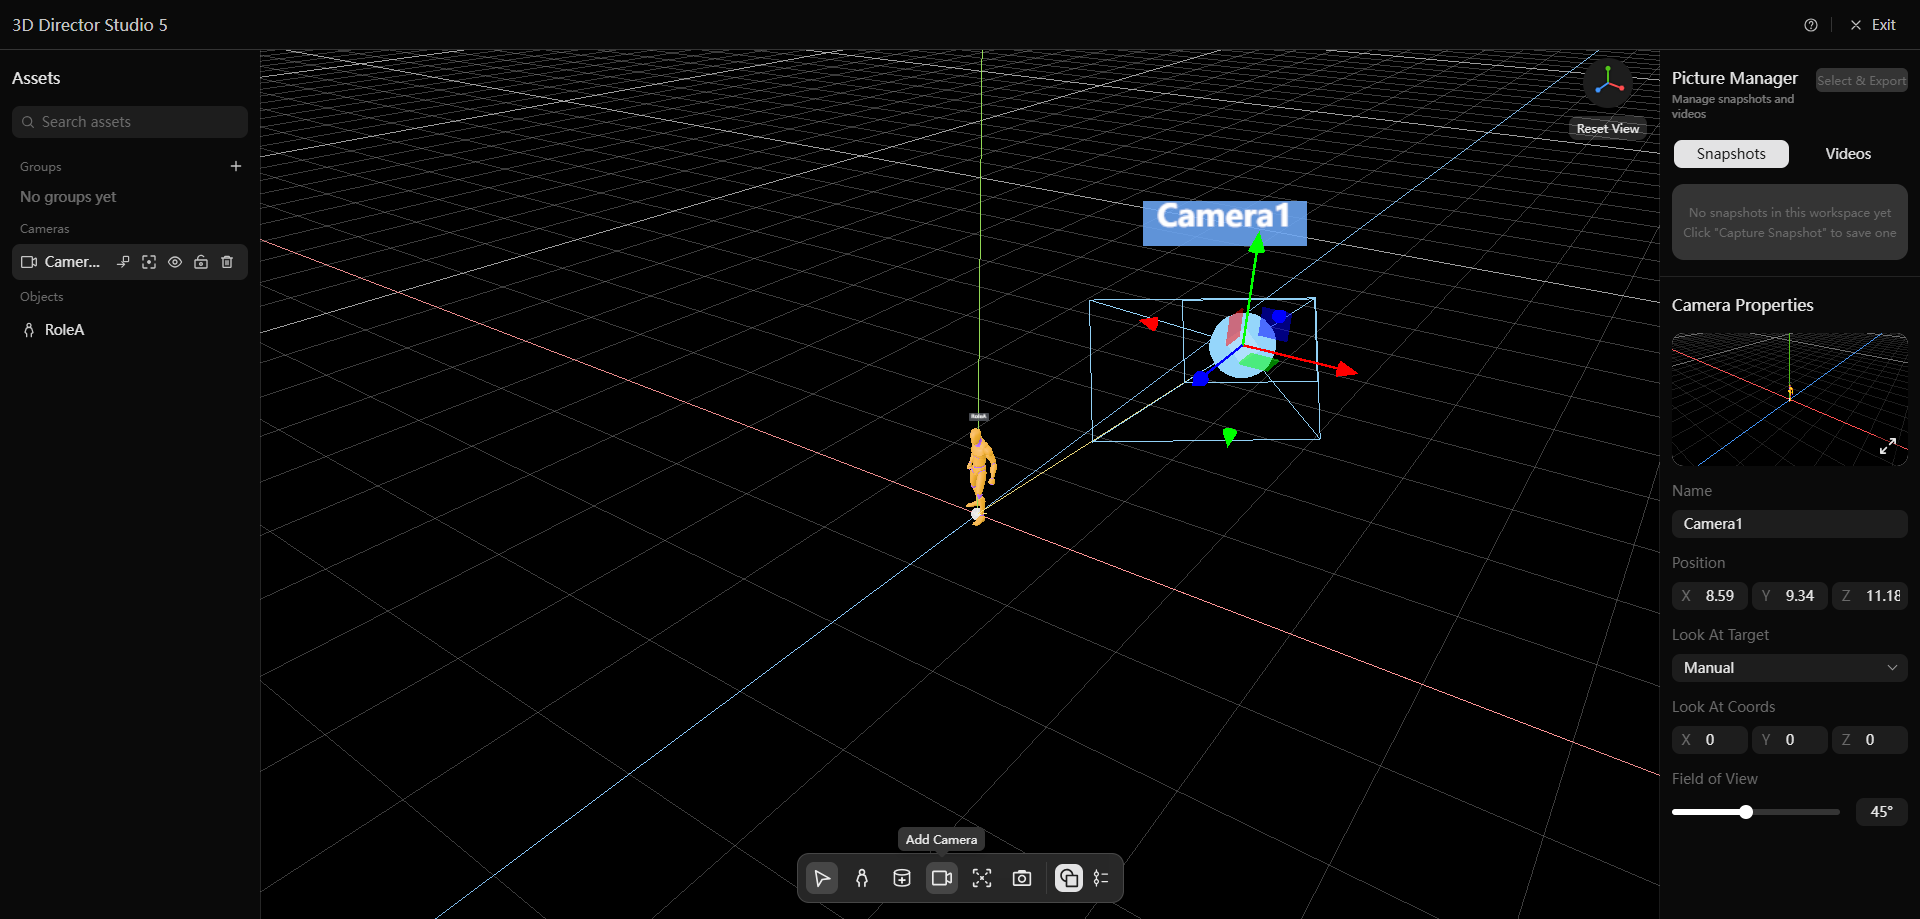
- Select a camera or object in the left panel, inspect and adjust it in the central viewport, and view or edit its properties in the right panel.
- Characters support a range of pose presets and joint-level pose adjustments.
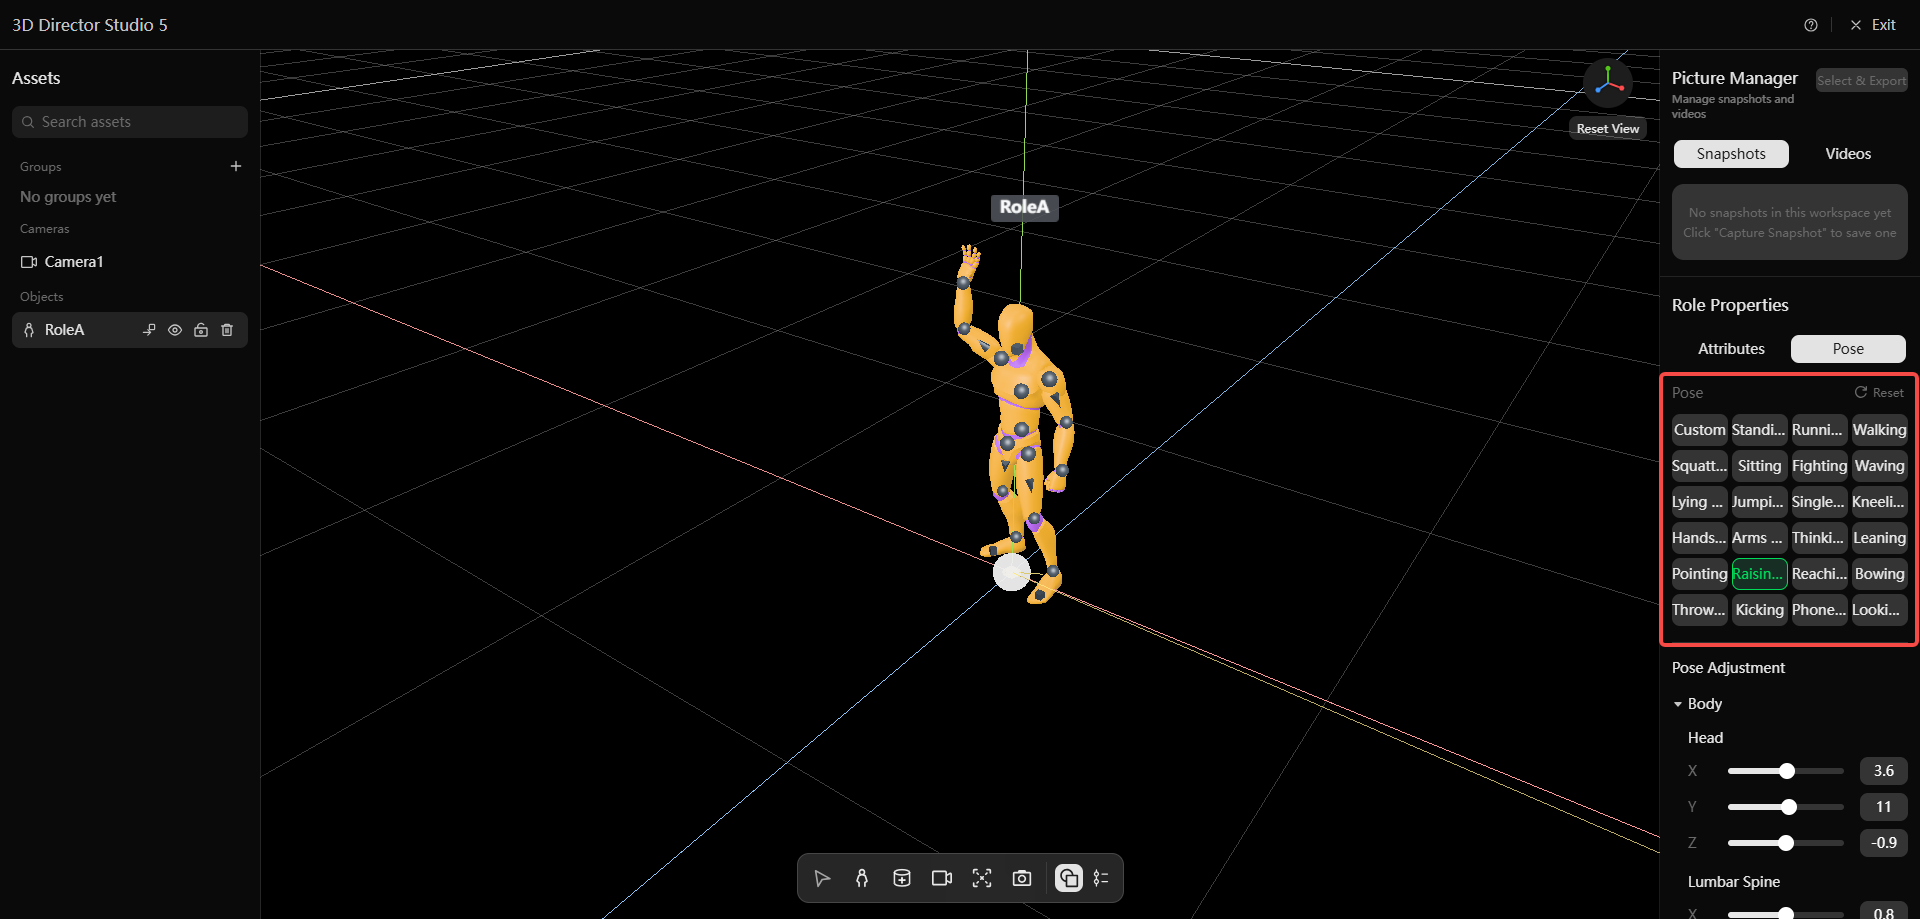
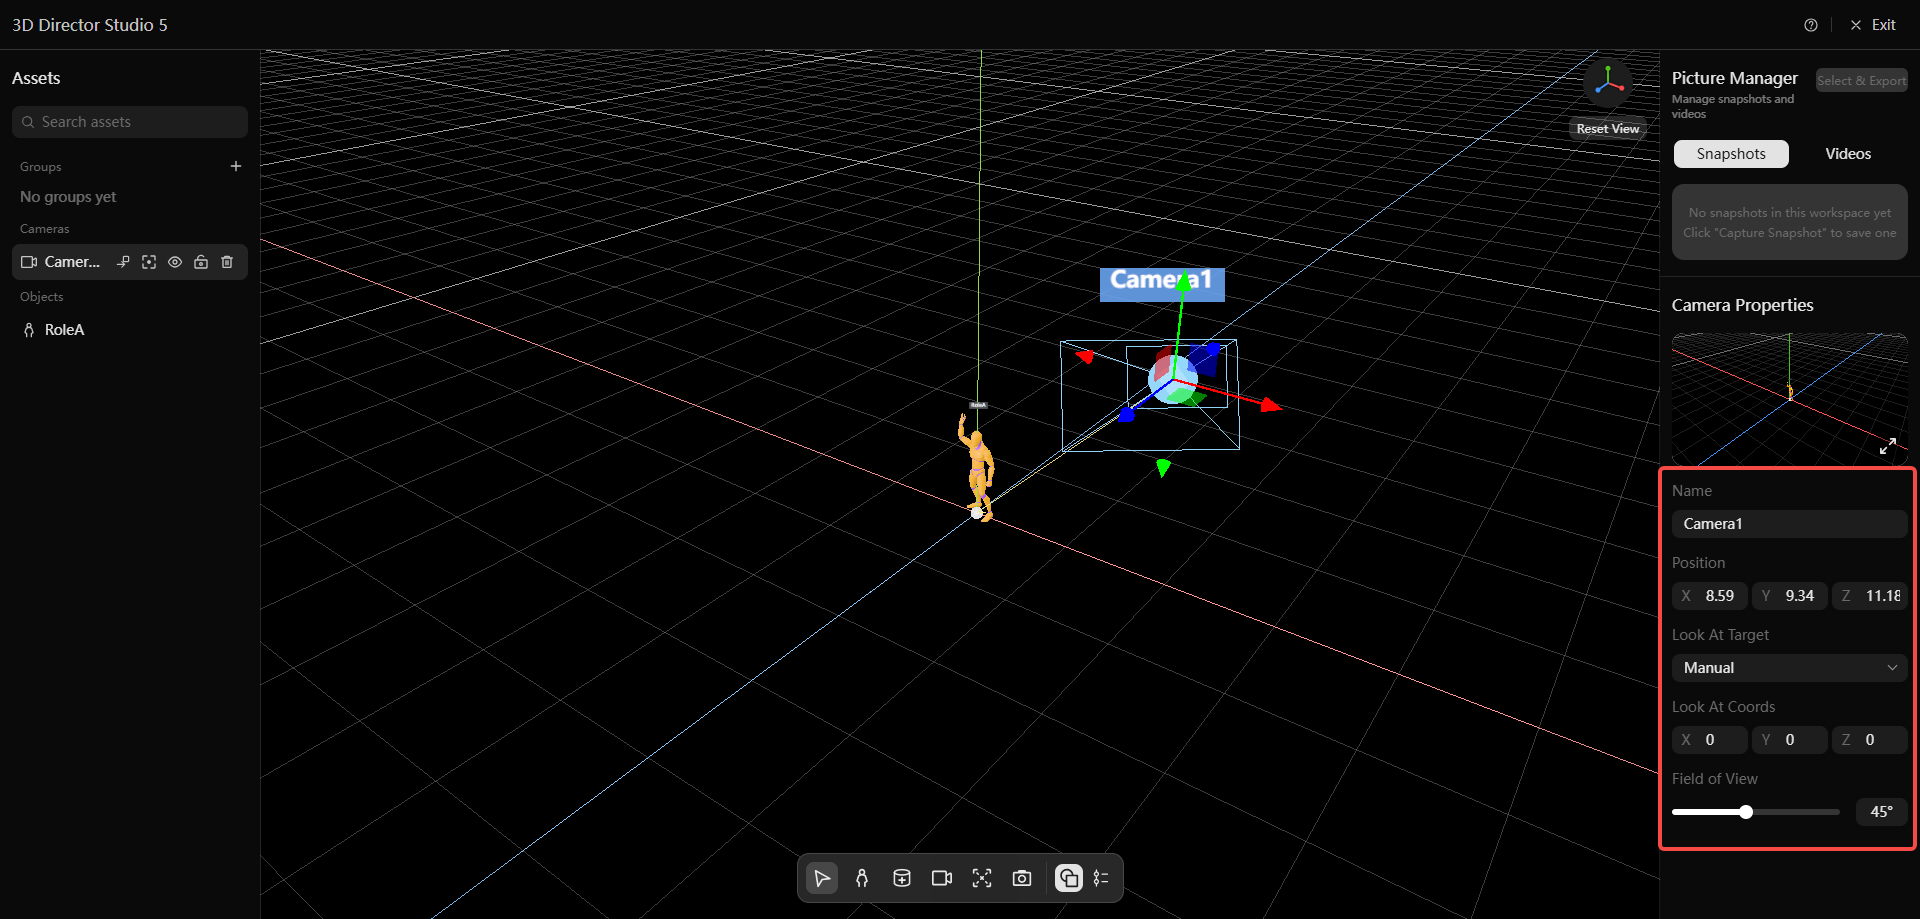
- Adjust camera focal length, orientation, and angle to suit the shot.
3 Importing 3D models into 3D Director Studio
After generating a model with a 3D node, import it into 3D Director Studio to refine its placement, camera viewpoint, and scene composition before generating subsequent images or video.
- Use a 3D node on Canvas to generate a 3D asset with a model such as Tripo H3.1.
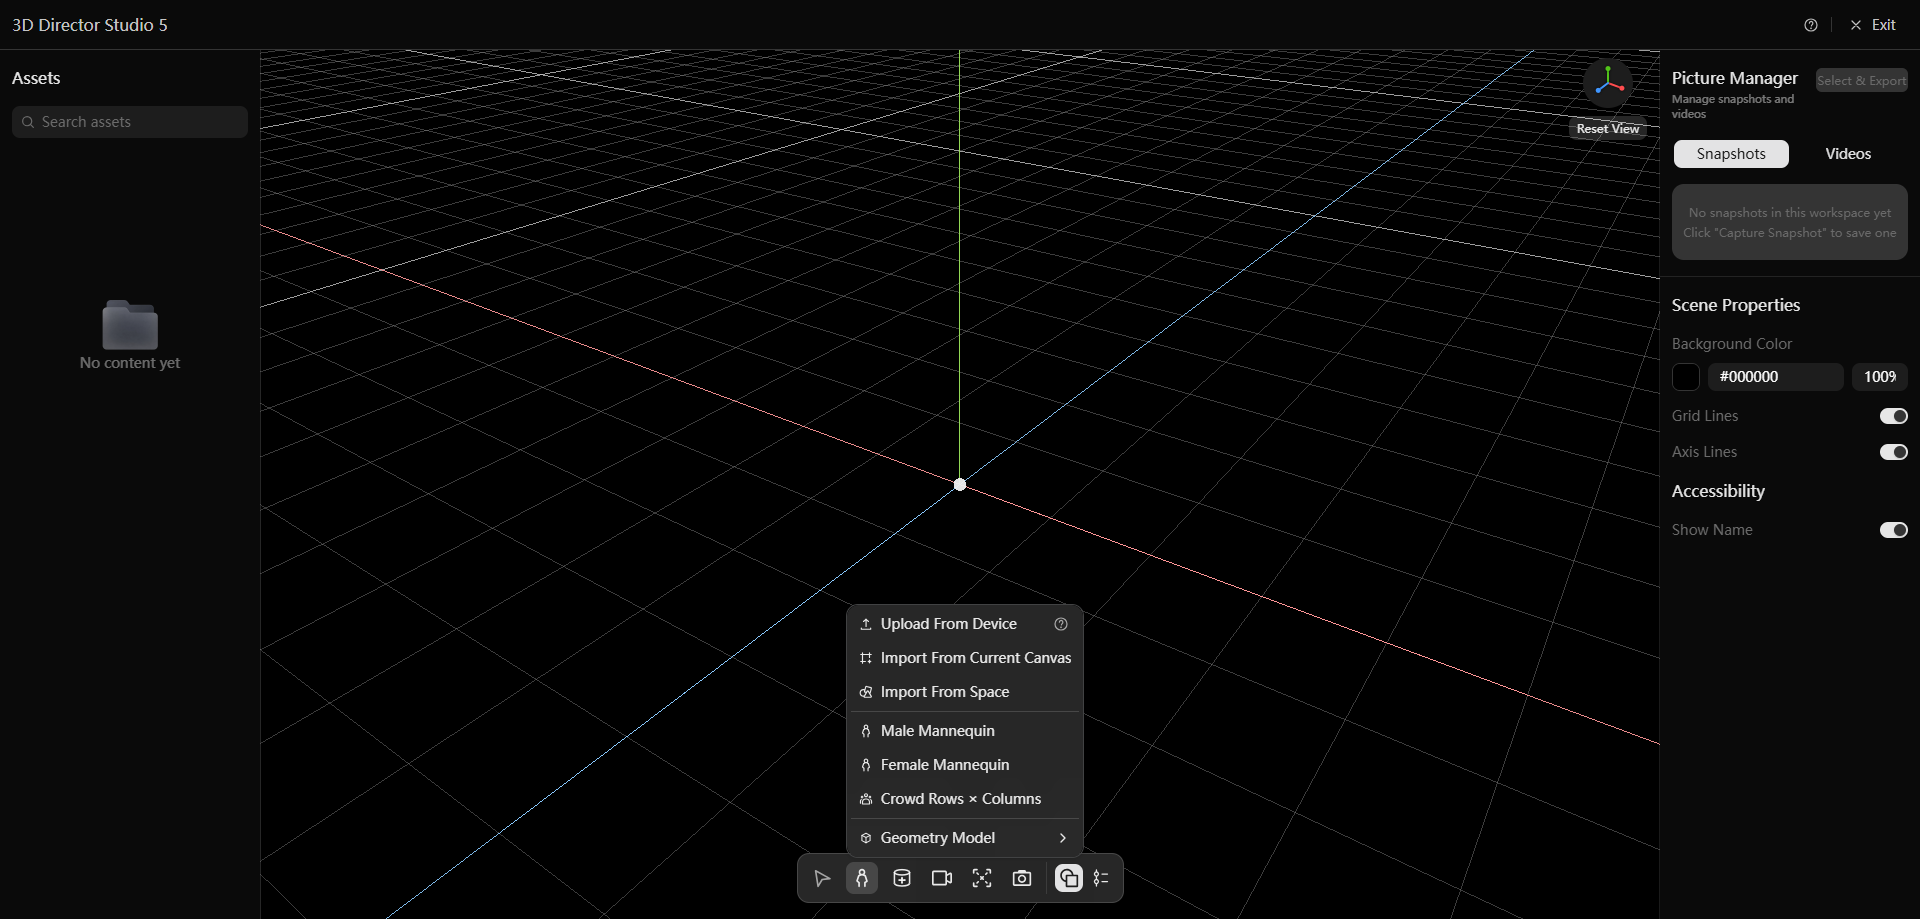
- Open 3D Director Studio and click Add Object in the bottom toolbar.
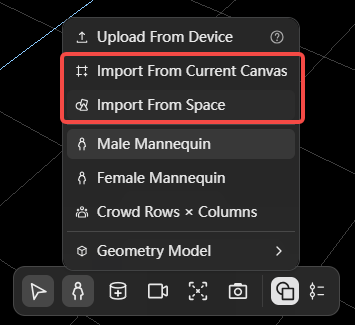
Choose an import source based on where the model is stored:
- Import From Current Canvas: import a 3D model already generated on the current canvas.
- Import From Space: import a 3D model previously saved to your space.
Select the model and import it into 3D Director Studio.
Adjust the model's position, rotation, and scale, then continue setting up the scene and cameras.
Once the composition is ready, capture a snapshot or switch to Animation mode to create previs and generate further images or video.
4 Building a scene in Design mode
- Use the bottom toolbar to add characters, scene objects, or cameras. Import a 720° panorama when you need a panoramic background.
- Select an asset in the left panel, then adjust its position, rotation, and scale in the 3D viewport or the properties panel on the right.
- Select a character to apply a pose preset or refine the body, arms, legs, and head.
- Select a camera to adjust its position, orientation, and focal length. You can also set a look-at target using an object or coordinates.
- Capture a snapshot to save the current composition.
5 Creating previs in Animation mode
- Click Animation in the bottom toolbar to open the timeline.
- Select the object or camera to animate in the left panel, move the playhead to the desired time, and use the Add Keyframe control. This creates the corresponding track and an initial keyframe at the current time.
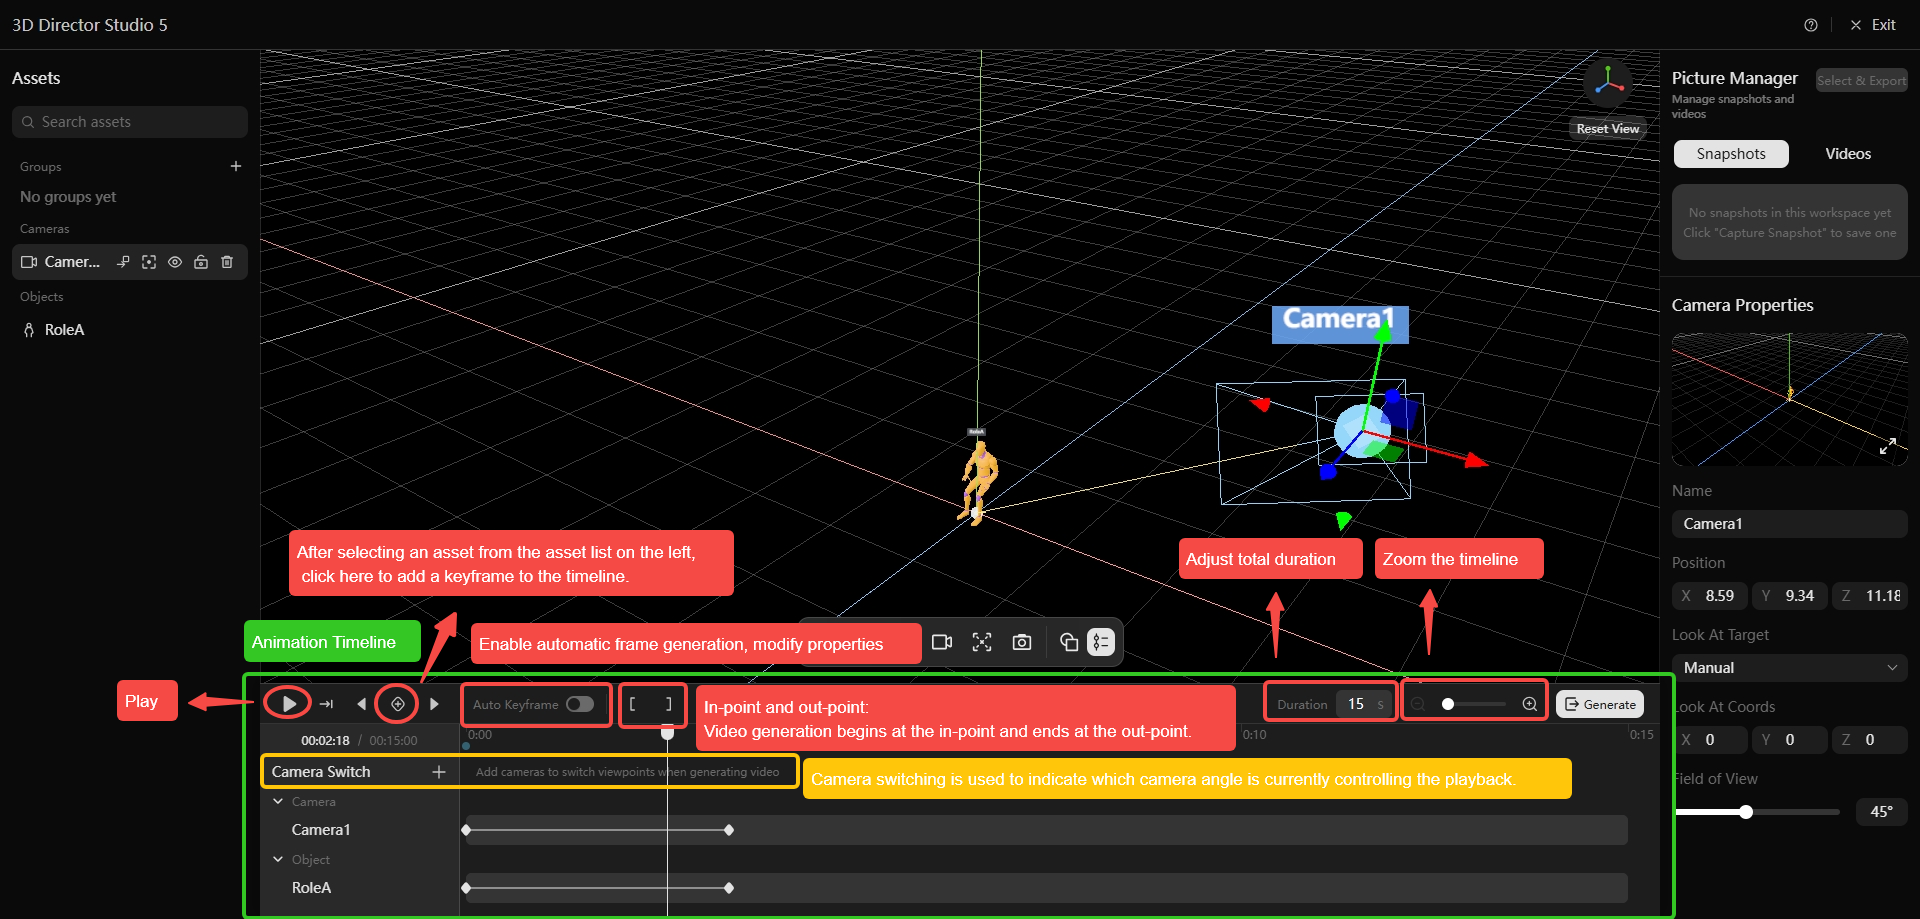
- After adjusting object, camera, or asset properties, add another keyframe to record the new state. With Auto Keyframe enabled, property changes add keyframes automatically. The first keyframe operation creates the corresponding track and a keyframe at the current time.
- Drag a diamond-shaped keyframe to change its timing. Click a keyframe to inspect and edit the property values stored at that time.
- To switch shots, click the plus sign next to Camera Switch, choose a camera, and add a camera-switch marker to the timeline. Each marker activates its camera until the next marker, and playback switches cameras in sequence. Drag markers to adjust switch timing; markers in the same sequence do not overlap.
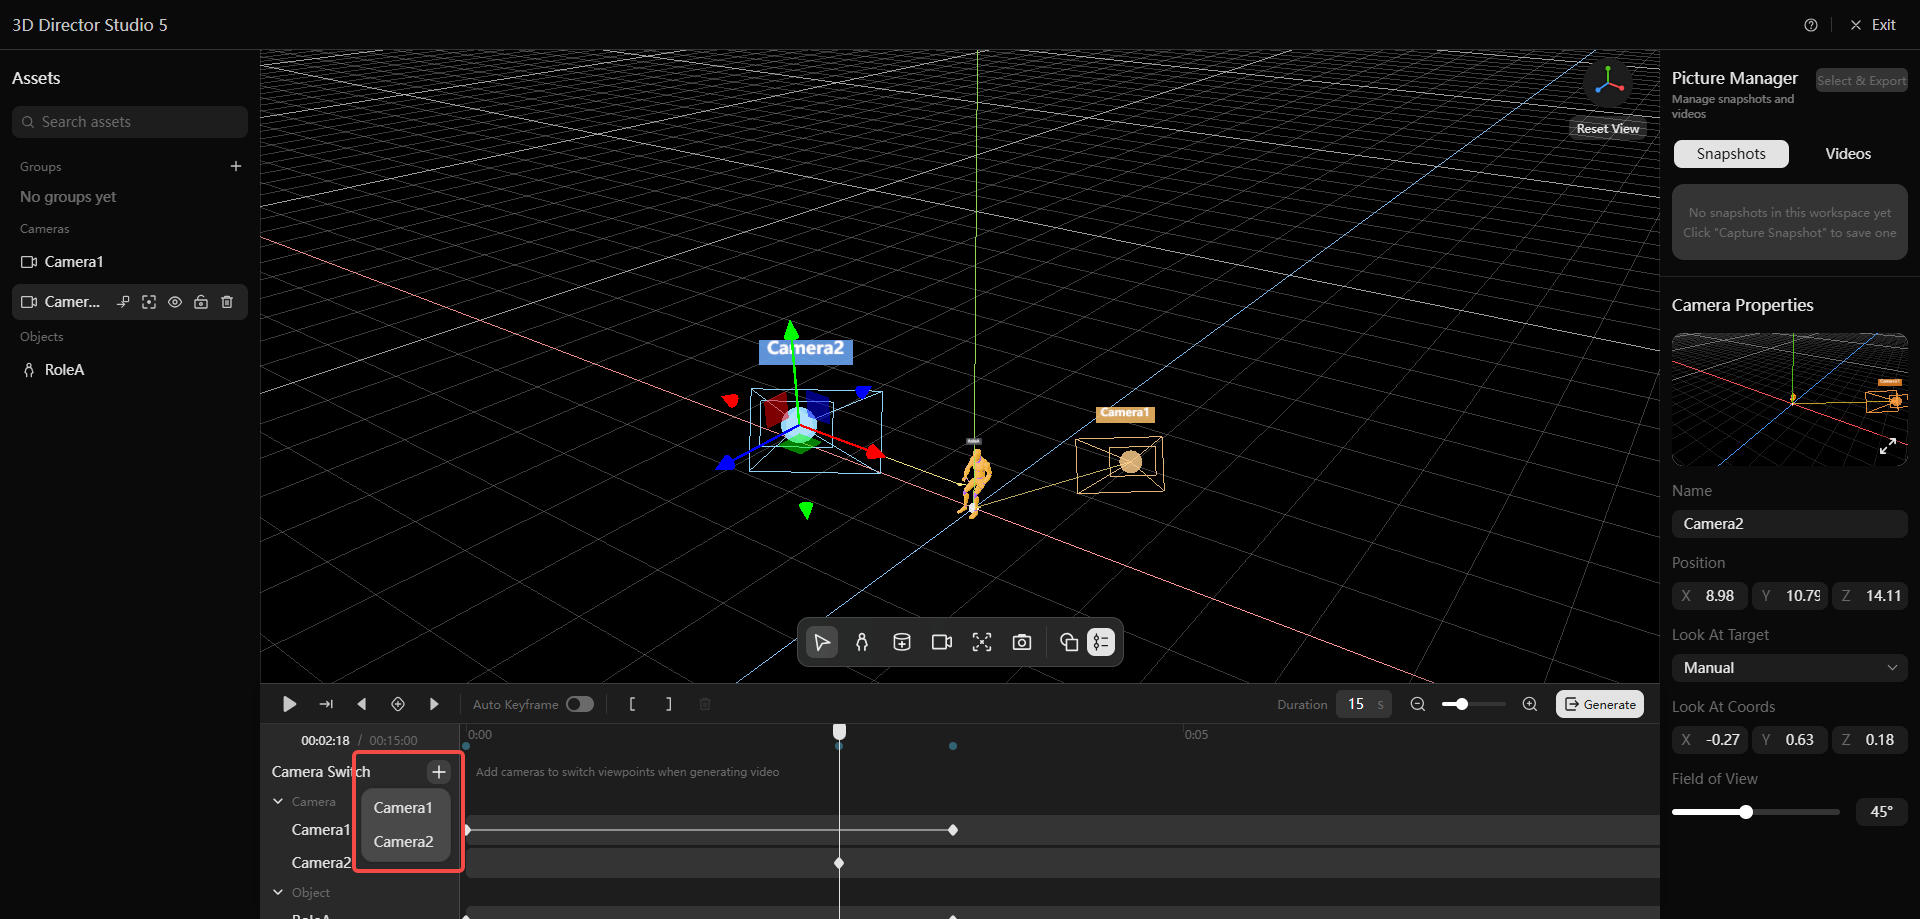
- Playback viewpoint priority: camera sequence > locked camera view > free view.
- Set the in-point and out-point to define the video recording range. If neither is set, the default timeline range is used. Click Generate to record and generate the video. Wait for recording to finish as prompted; cancelling before completion discards that recording.
- When recording finishes, select the video under Picture Manager > Videos in the right panel, then export it.
Animation mode: timeline, camera switching, tracks, and keyframes
6 Operating tips
- Hiding an asset only affects its visibility and playback. Deleting an asset also removes its associated timeline content.
- When a camera view is locked, you cannot move the viewpoint with the mouse or keyboard shortcuts. Exit the locked camera view to restore navigation.
- Keyboard shortcuts: V to move, R to rotate, and X to scale.
- Your project is saved continuously as you work.
7 Example results
- Use visual blocking to position characters, scale props, establish performance poses, and refine composition before production. This makes complex scenes and character staging easier to manage. Connect the previs video to a Video node as a reference to generate the final video.
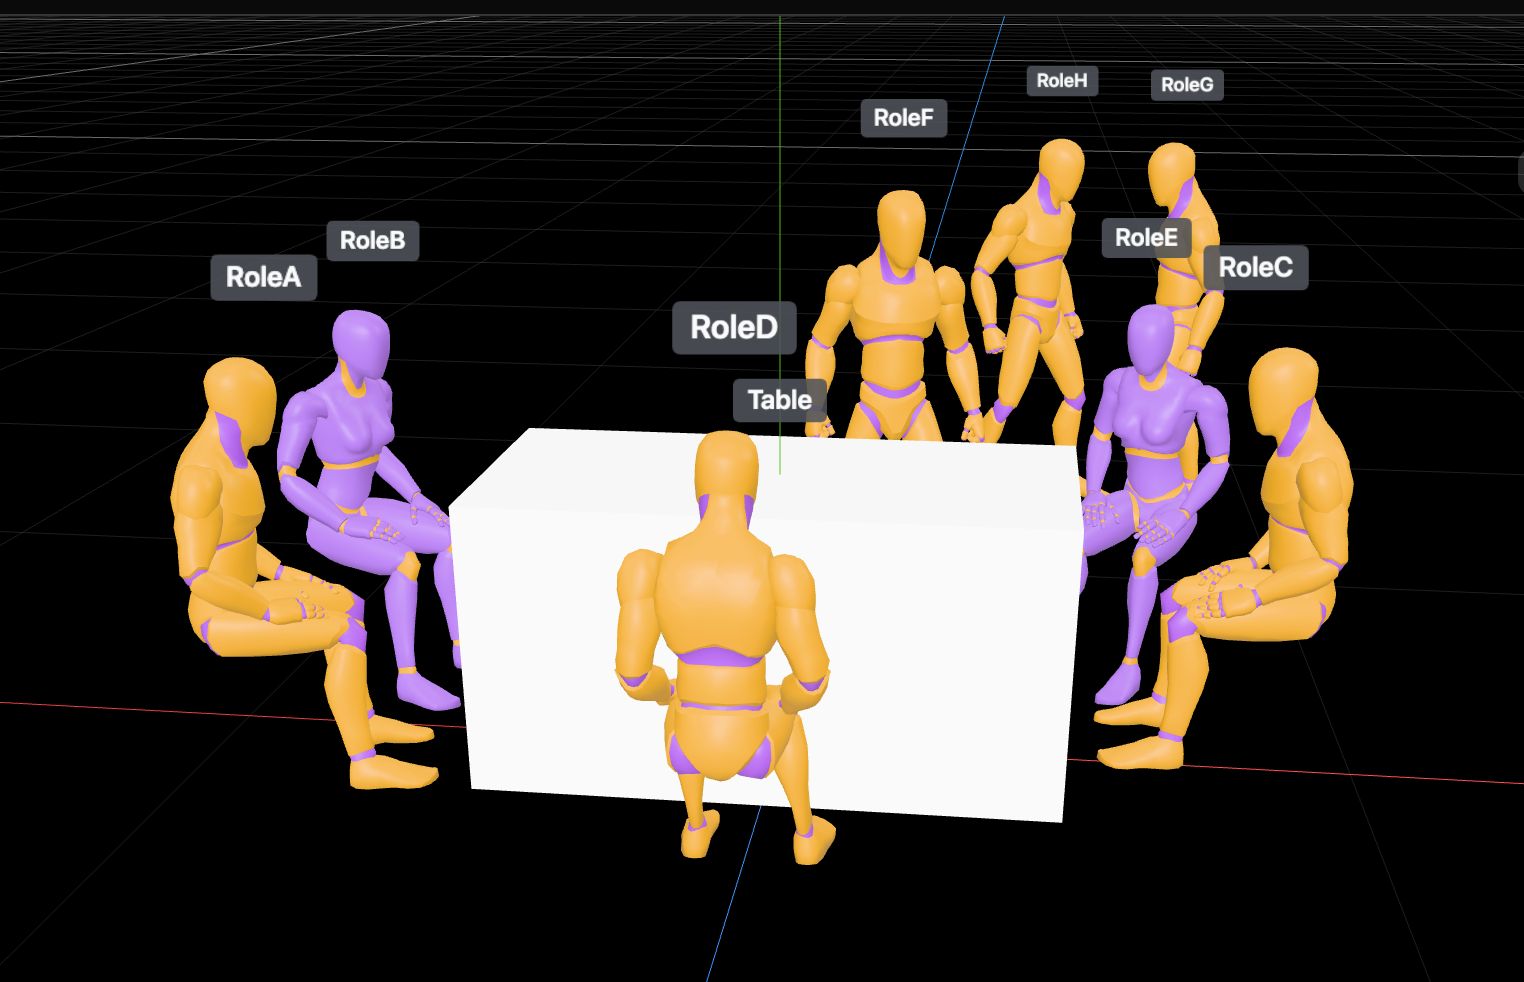
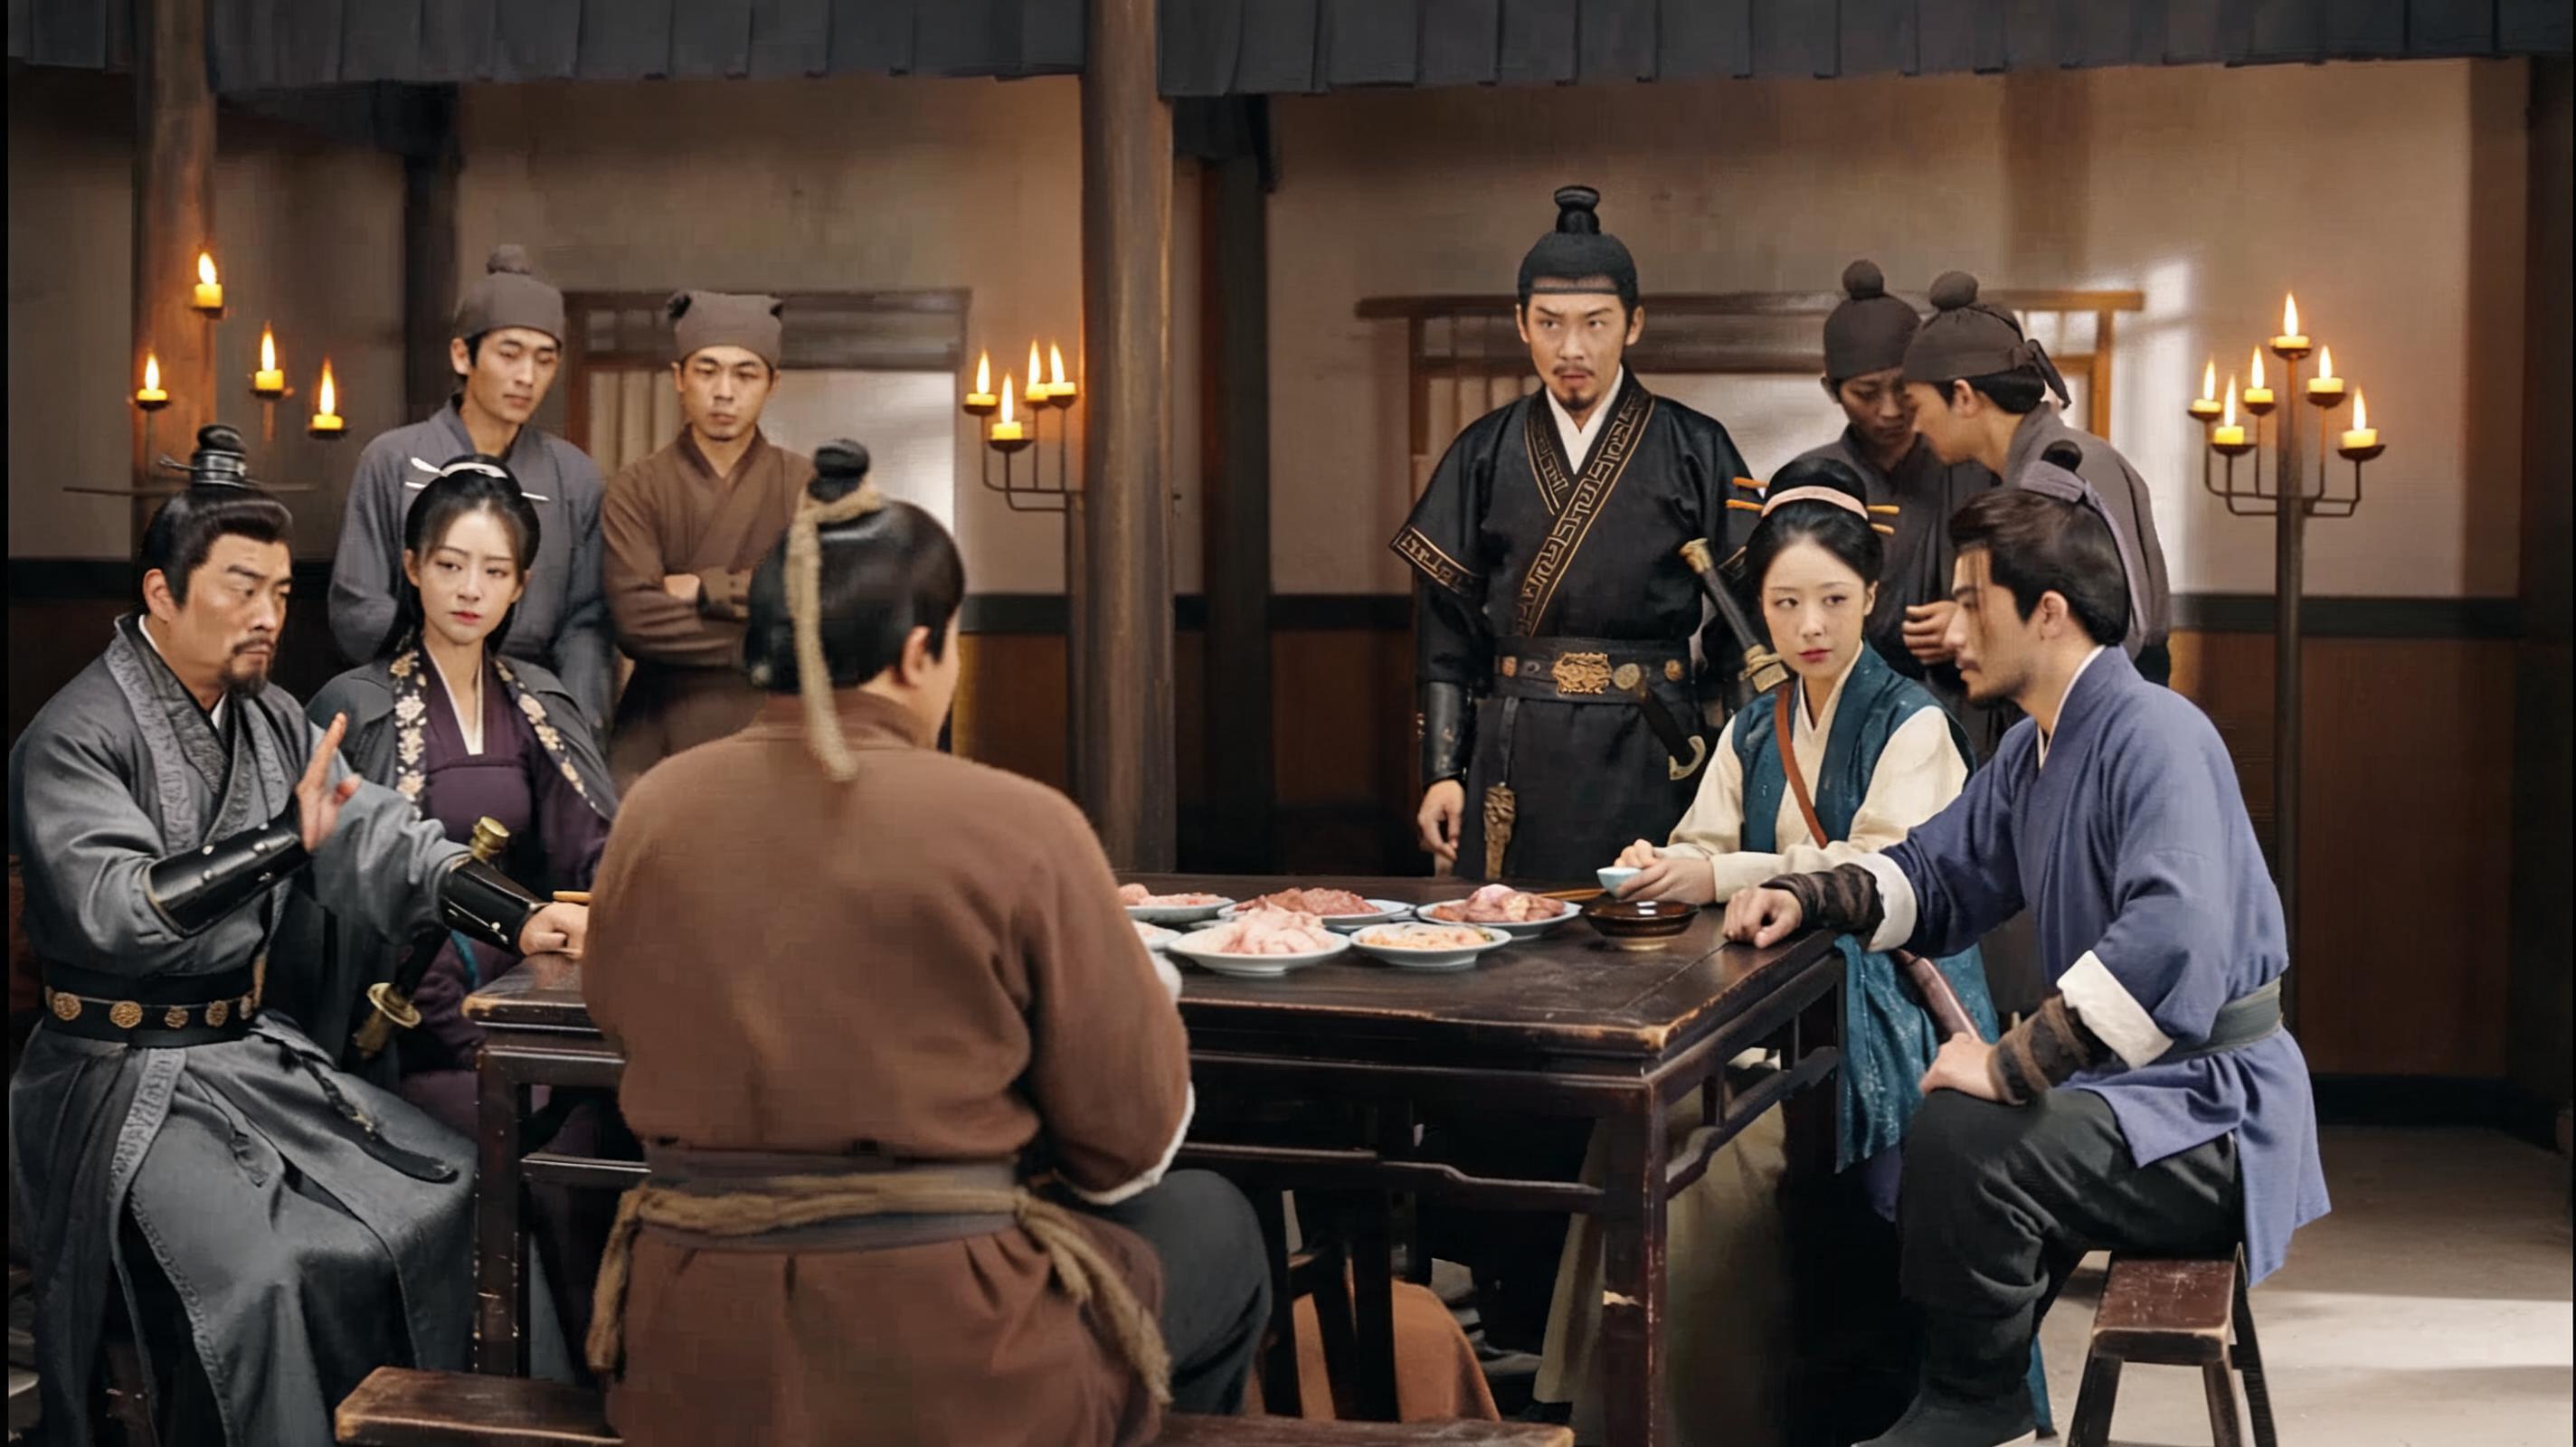
- The dedicated multi-camera editing timeline supports complete videos up to 90 seconds long. Set up cameras and character animation, with frame-level control over camera movement and character action so the generated imagery follows your creative intent.
3D previs with untextured models
Generated result
- Arrange multi-camera shot sequences to create quick cutting references for professional multi-camera production.
3D previs with untextured models
Generated result
8 FAQ
Q: Why is there no animation during playback after I adjust a character or camera?
Switch to Animation mode, select the character or camera in the left panel, move the playhead to the desired time, and add a keyframe. Move the playhead to another time, change the properties, and add another keyframe to record the new state.
Q: Why does playback not switch between the cameras I set up?
Add camera-switch markers to the Camera Switch track and check their order and timing. Playback switches cameras according to these markers on the timeline.
Q: Where can I view and export the generated video?
After video generation finishes, open Picture Manager in the right panel and switch to Videos to review the result and export it to your device.