
How to Create AI Cyberpunk-Style Videos: From Defining the Style to the Final Cut
How to Create AI Cyberpunk-Style Videos: From Defining the Style to the Final Cut
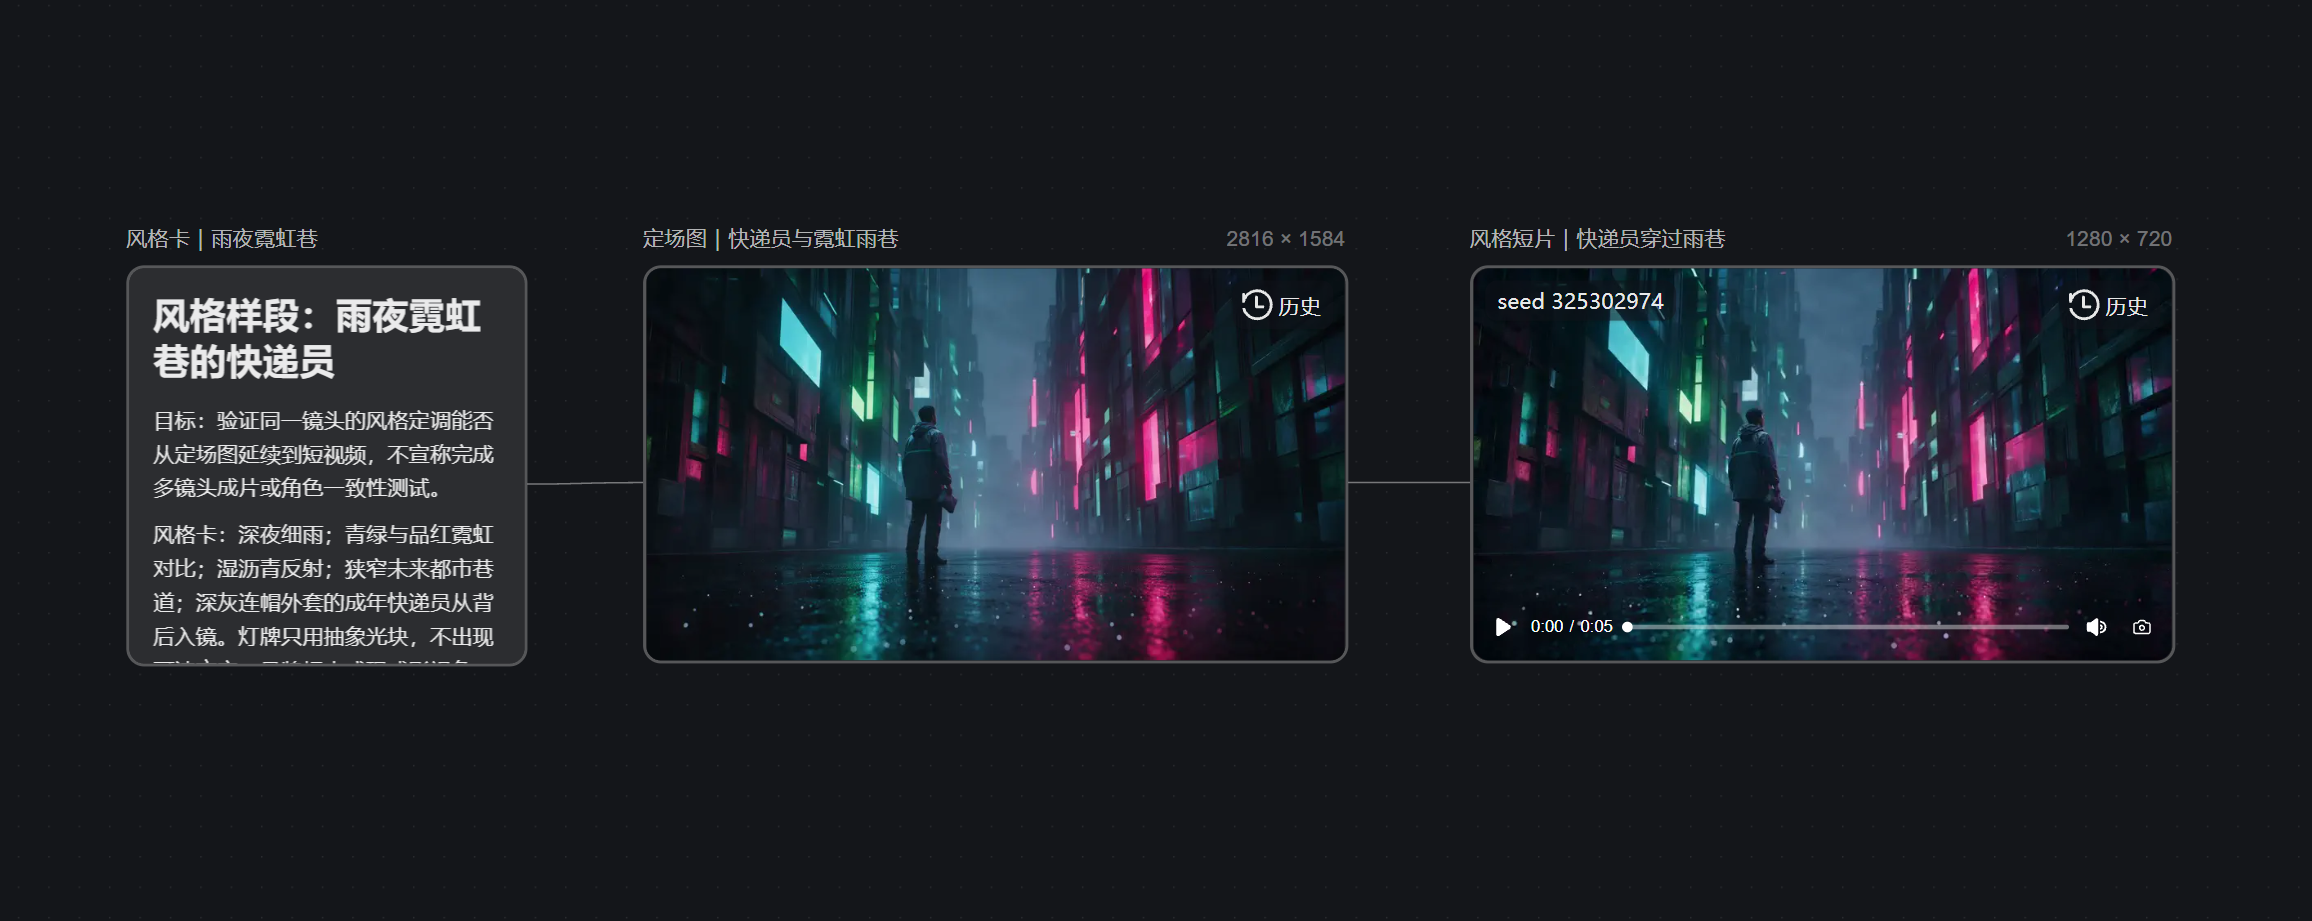
I created a single-shot sample called “Neon Alley on a Rainy Night” in the NadouPro canvas this time: first generate a reference still, then use it as a guide to generate an approximately 5-second clip. The pre-submission estimates were 3 credits for the image and 7 credits for the video, totaling an estimated 10 credits; I used this sample to verify whether the style can carry from a still frame into motion.
When making a cyberpunk-style video, break down the “future city” into verifiable visual requirements: time and weather, primary neon colors, ground and building materials, character silhouettes, and each shot’s action. Start with a short shot to validate the style, then expand into a storyboard, generate shot by shot, edit, and unify color and lighting. Simply stacking the prompt word “cyberpunk” or trying to generate a long piece in one go makes it hard to identify what went wrong.
Write a style card first, then decide the number of shots
Before starting, use a one-page style card to clarify “who is doing what, where.” For example: a courier in a dark coat walking through a drizzle in a futuristic city alley; teal and magenta neon as the primary colors, with wet asphalt showing reflections. Also list forbidden elements such as daytime sunshine, cluttered readable signs, blown-out flares, and sudden costume changes. A style card is easier to reuse across shots and to inspect than an ever-growing single long prompt.
Elements to lock down | How to verify in the shot |
|---|---|
Story and action | Assign only one main action per shot and be able to explain why the character is here |
Primary colors and materials | Neon colors should not jump across shots; wet reflections should be visible while highlights retain depth |
Characters and environment | Clothing silhouette, handheld items, and alley structure should be recognizable across adjacent shots |
Source assets | The allowed scope for characters, street scenes, music, and typefaces should be documented; do not directly borrow existing film characters |
Reference images of licensed characters or scenes can help describe styling, but don’t upload unrelated assets just to reach a fixed number. Reference images also don’t guarantee absolute cross-shot consistency; character appearance still needs shot-by-shot checking.
From a style sample to a complete short
-
Reference still: First generate a still that clearly shows the character, the alley, and the primary colors. Check composition, reflections, highlights, and sign text; if the still isn’t nailed, don’t rush into batch video generation.
-
Single-shot video: Using the reference still as guidance, give the clip only one clear action, for example the character walking forward with a gentle follow. Observe whether the character deforms, the background suddenly changes, or the motion serves the story.
-
Expand the storyboard: After the sample passes, write a shot list recording shot size, action, reference assets, and acceptance criteria for each entry. When the same character appears across shots, reuse the confirmed styling description and licensed references; do not assume consistency is approved just because a reference was used.
-
Assembly and review: Edit in narrative order, match brightness and color temperature across adjacent shots, then add licensed ambient sound, music, and editable subtitles. Watch silently once to check visual continuity, then play with sound to verify rhythm and levels, and finally export according to the target platform’s requirements.
NadouPro hands-on test: single shot of the neon rain alley
The following is a demonstration constructed for this article, not an already published project or a fully edited and scored short. In the NadouPro case canvas I linked three nodes in sequence: style card → reference still → style clip. The style card limited drizzle, teal and magenta neon, wet reflections, and a single courier, and required no readable text or brand logos.
The reference still was generated by Seedream 5.0 Pro at a size of 2816×1584. It places the character’s back in the rain alley, with teal and magenta reflections on the wet ground; this image serves as both the visual baseline and the real reference for the next video node.
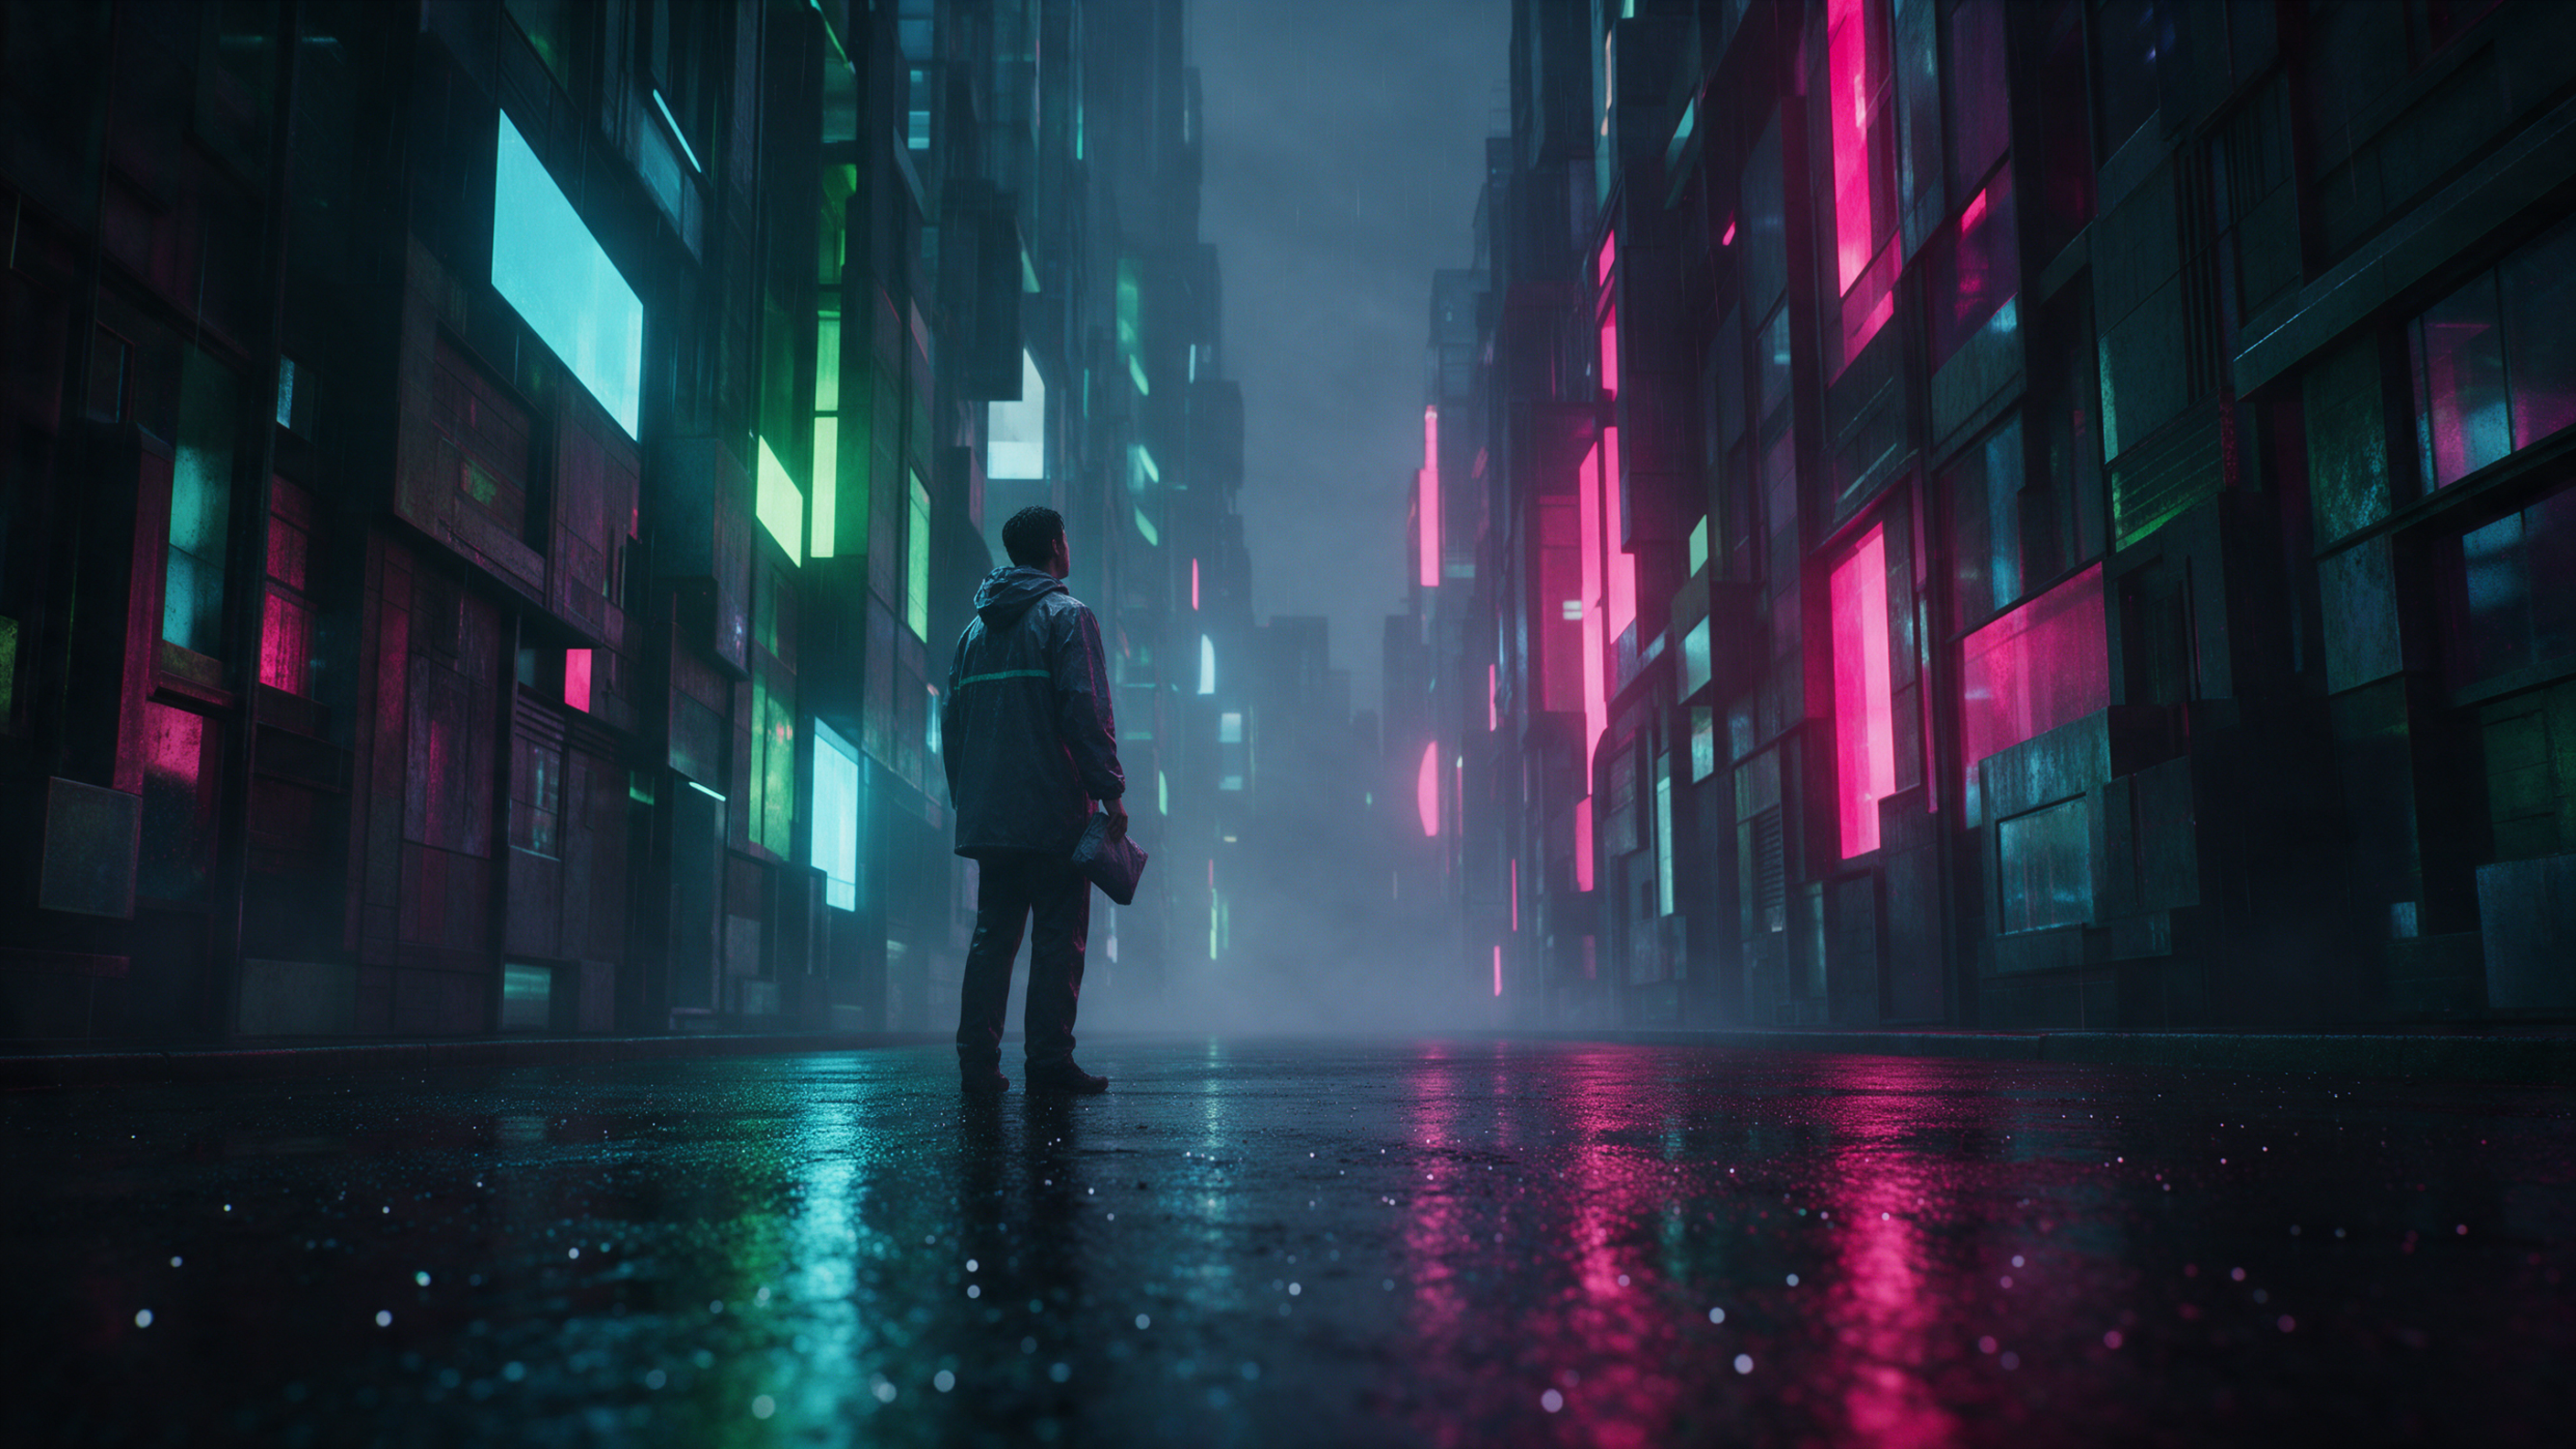
The video was generated by Seedance 2.0 Mini with this still as a reference; it is actually 1280×720, about 5 seconds long, with no audio. In playback, the courier walks forward along the same rain alley, and the character’s back, the primary neon colors, and the ground reflections correspond to the reference still. This result indicates the single-shot style direction is worth continuing; it does not prove multi-shot character consistency and is not equivalent to a finished piece.
The pre-submission estimate for the image and video together was an estimated 10 credits, not the final billing record. To expand this into a complete short, you would need to add shots, edit, and add sound, and check character and color continuity between adjacent shots; do not call this single-shot sample a finished work.
If the image is wrong, first locate which layer is failing
-
Messy frame: Remove competing props and material descriptors, keep only the character, the primary colors, the rainy night, and the wet reflections, then regenerate the key still.
-
Neon washed out: Constrain strong glare and overexposure in the prompt and check whether highlights can still be recovered in post; don’t rely on simply increasing brightness to create a “neon look.”
-
Character drifting: Compare clothing, hairstyle, handheld items, and silhouette to the previous shot; verify the reference assets are still correctly applied, and if necessary redo the problematic shot.
-
Looks like wallpaper, not video: Add observable actions and appropriate camera moves, keep one main event per shot, and avoid having both character and camera attempt too many things at once.
What to check before export and release
When watching through, verify the primary color remains stable, characters are recognizable across shots, actions cut together, subtitles are readable, and audio does not drown out focal elements. Before commercial use, confirm the authorization scope for input reference images, music, fonts, and output materials; specific rights and AI content labeling requirements depend on current platform and distribution channel rules.
Frequently Asked Questions
Is writing only “cyberpunk” in the prompt enough?
No. At minimum, specify character actions, the rainy urban environment, primary colors and materials, and what elements you don’t want. First validate these conditions with a reference still to ensure they actually appear in the image.
How do I keep the same character and environment across multiple shots?
Reuse the same style card and the confirmed character and scene references, generate shot by shot according to the shot list, and verify each shot. References provide direction but do not replace acceptance checks; if the coat silhouette, character proportions, or alley structure change, address that shot before continuing editing.
After the single-shot sample passes, what is the next step?
Break the script into a small number of shots, write one action and one acceptance point per shot, then generate, edit, and unify color and sound. This workflow helps identify which shot experiences a style drift and makes it easier to only fix the problematic segments.