
How to Choose an AI Anime-Style Video Generation Tool? Nadou Pro Implementation Path
How to Choose an AI Anime-Style Video Generation Tool? Nadou Pro Implementation Path
I used the Nadou Pro canvas to test-shoot a single anime-style shot of an original fictional passenger by the train window, focusing on the basic performance of how the art style carries from images to short video. The image and the video were estimated at 3 and 7 credits respectively before submission, totaling 10 credits; actual charges are subject to the platform's records. This round did not perform cross-shot consistency comparisons.
When choosing an anime-style video tool, attractive still frames are not enough — the key test is whether linework, coloring, and character design hold up once the character moves. Nadou Pro can be used to organize references, storyboards, and video production; shoot a short clip using the same character assets, then decide whether the result suits your target style.
“Anime feel” includes many visual choices beyond thick lines and cel shading. Delicate linework, flat color blocks, or heavy shadows all produce very different aesthetics. Define the desired treatment first so references and prompts have a clear direction.
Practical Case: Single-Shot Style Test of a Passenger by the Train Window
The task card specified a short-haired passenger by the train window, flat-color palette and warm background, limiting the action to a slight eye lift. First use Seedream 5.0 Pro to generate a 16:9, 2K reference still, then have Seedance 2.0 Mini reference that image to generate a 5-second, 720p, silent short clip.
Open the Nadou Pro case canvas to verify the task card, assets, and connections.
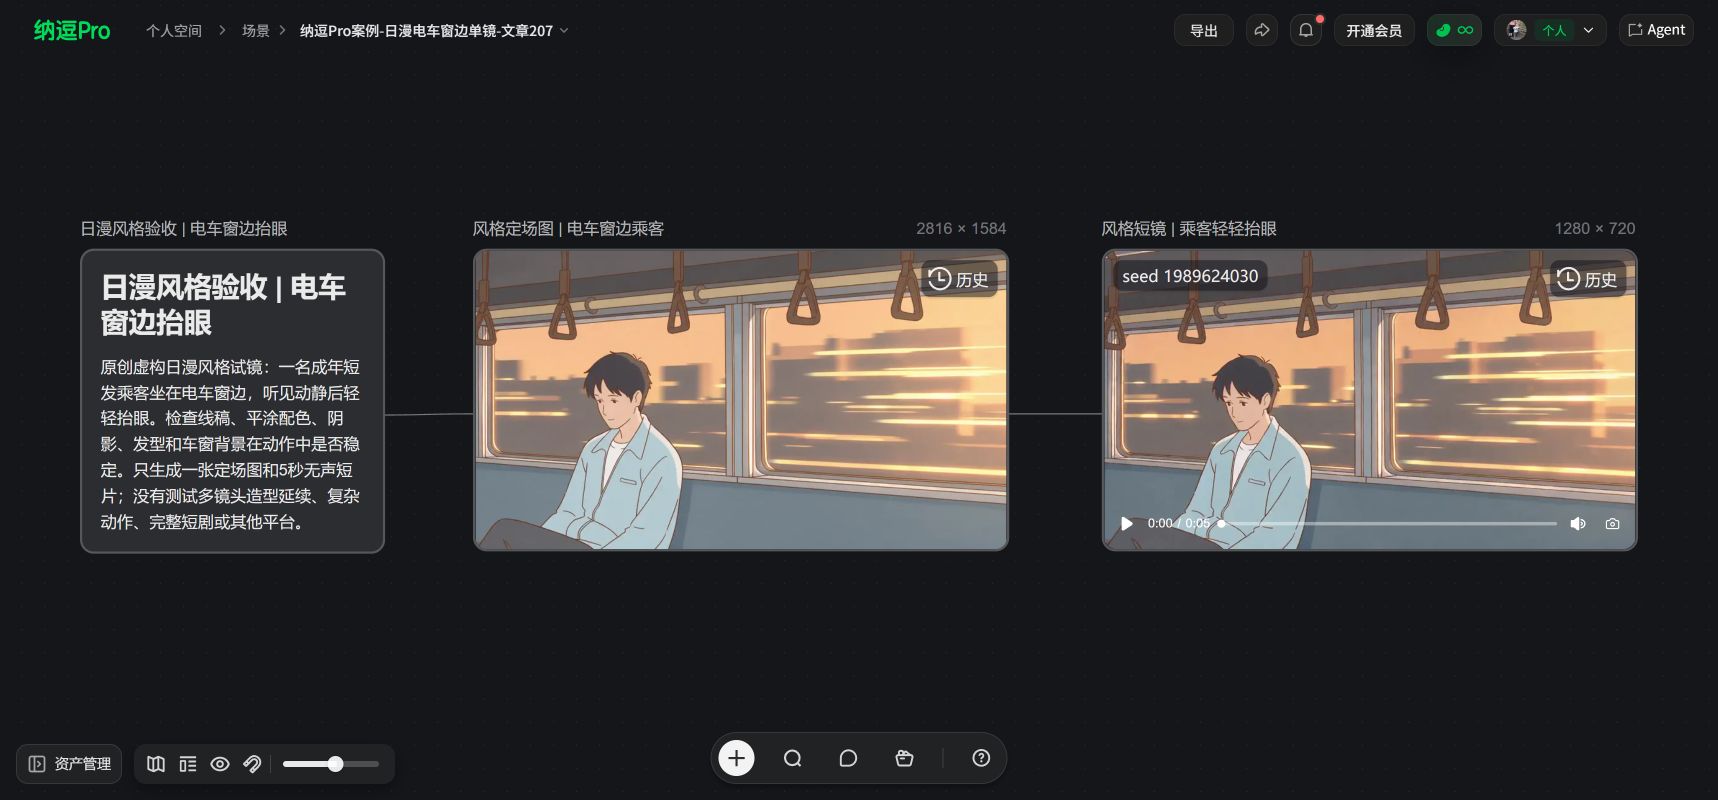
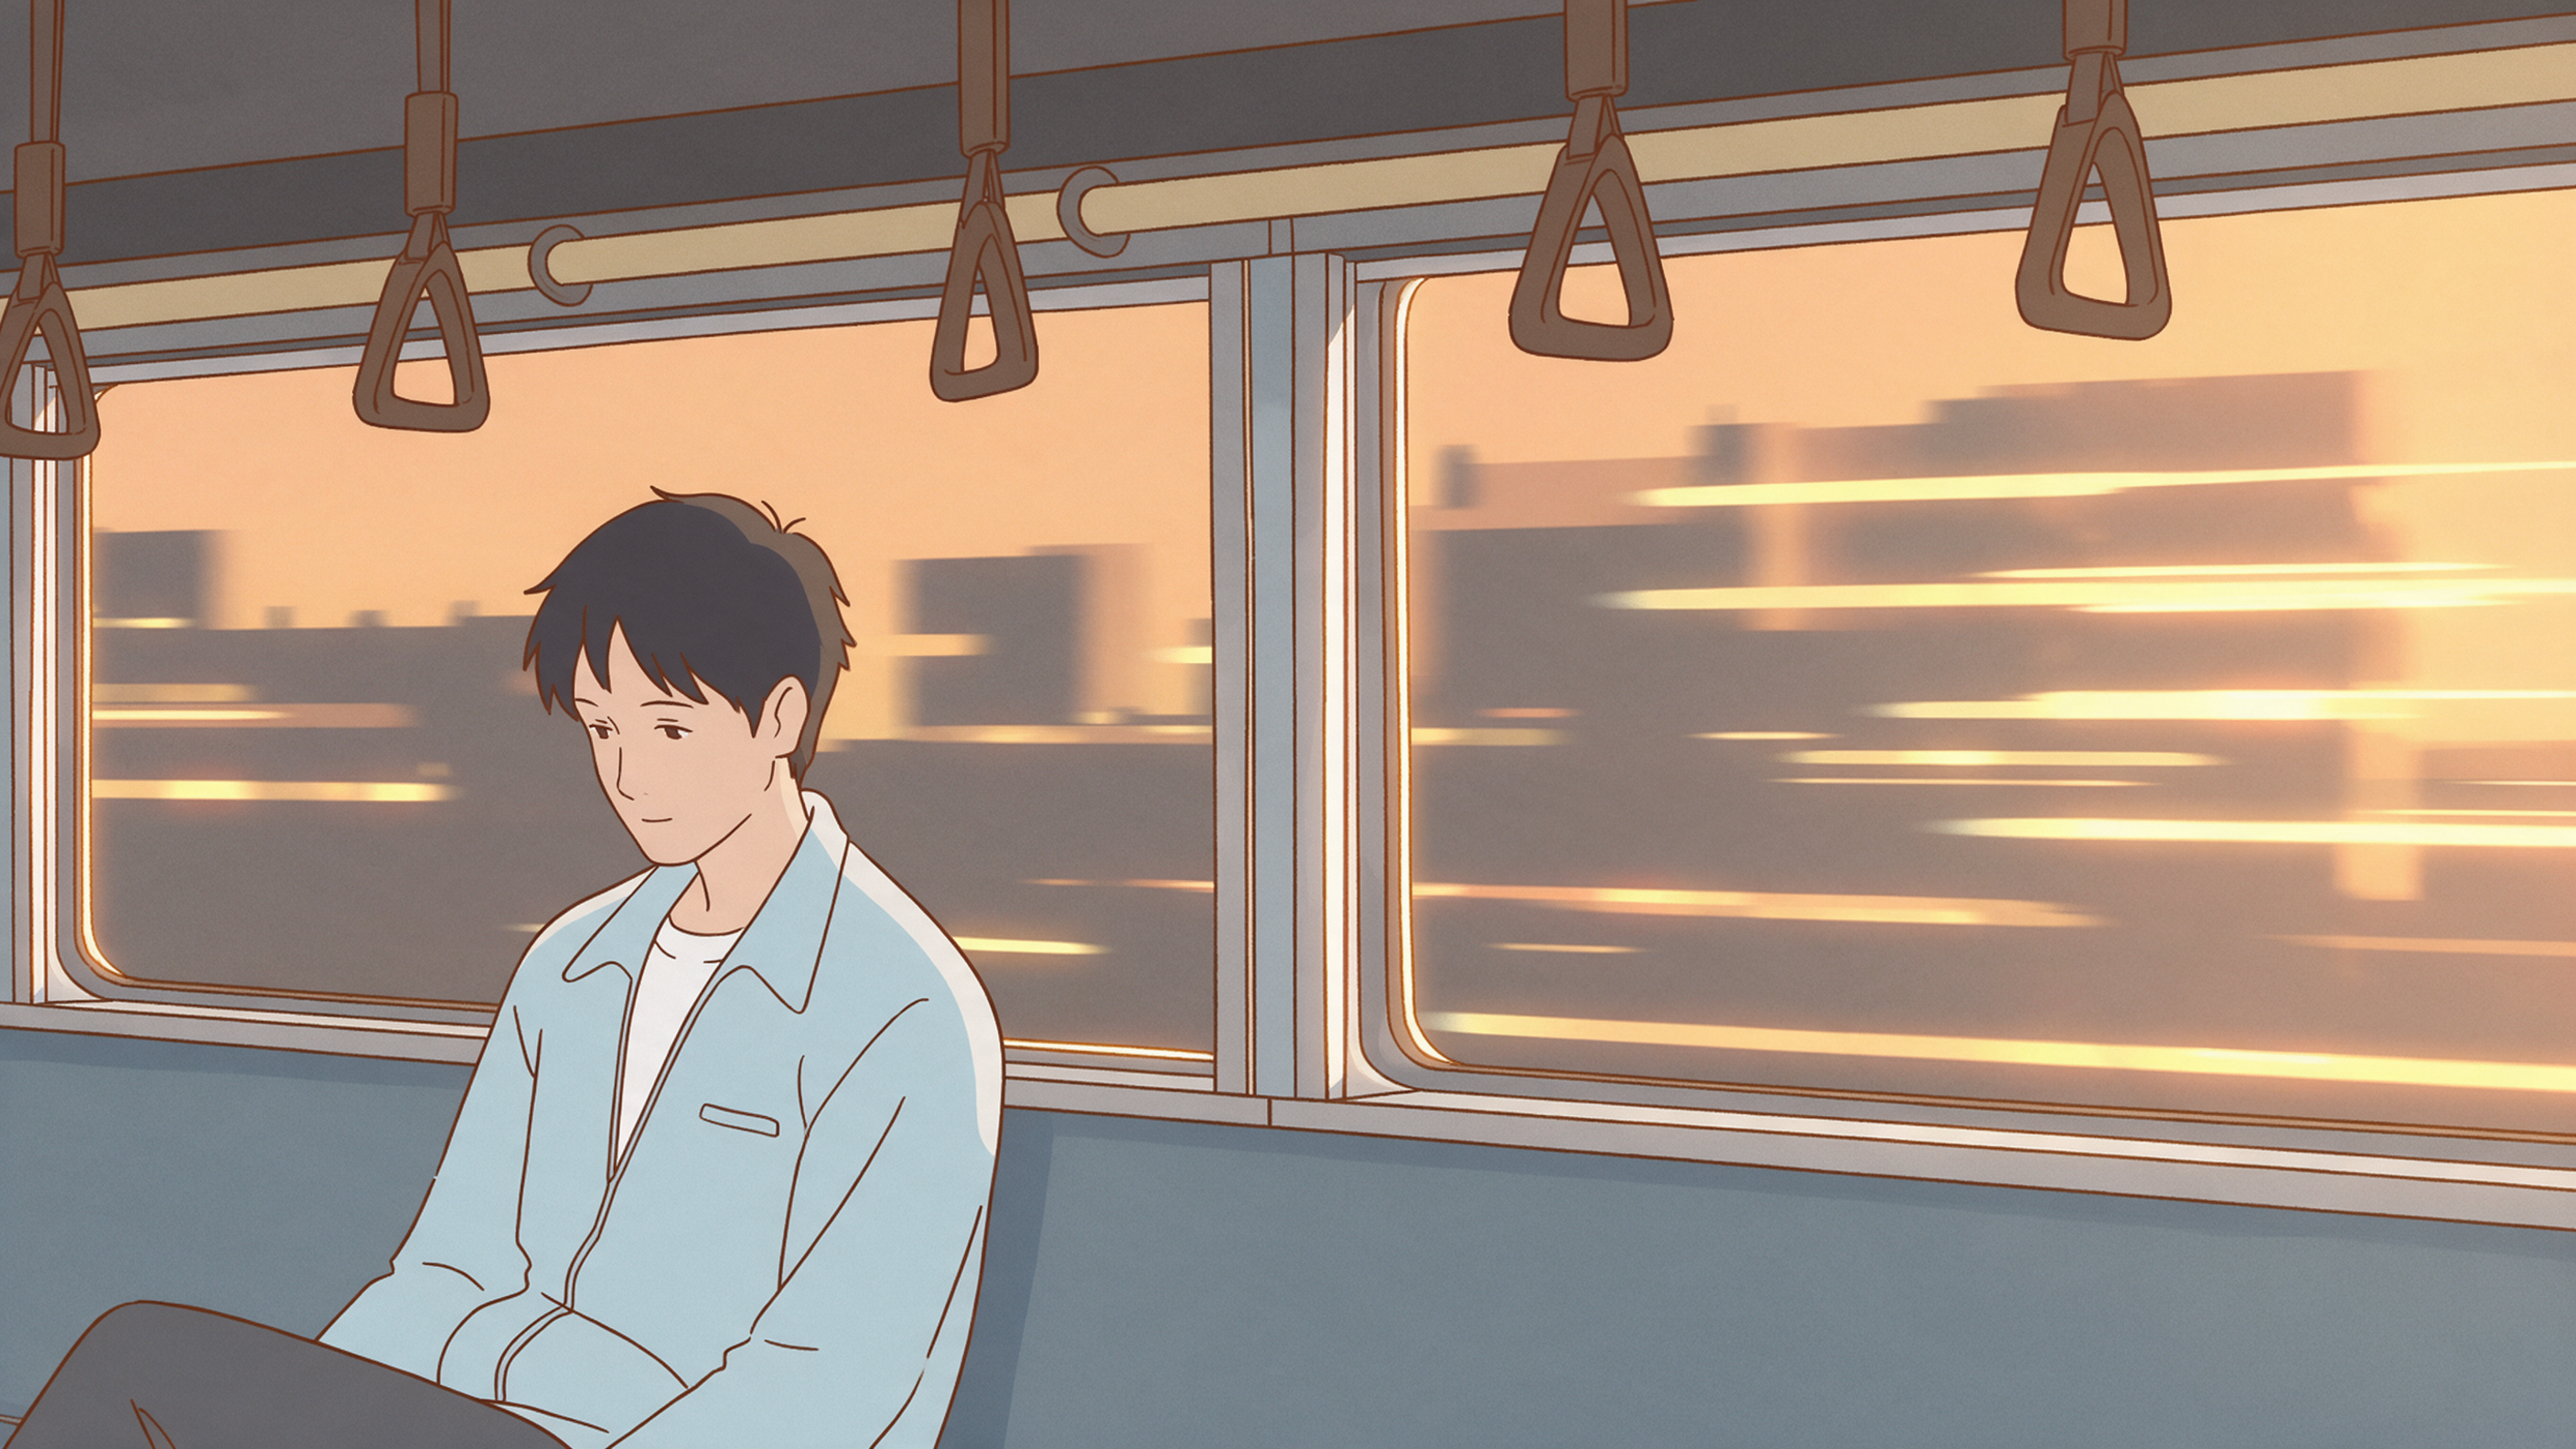
Screenshots show the task card, the anime-style reference still, the short clip, and the node connections. The still frame makes the character, the window, and the warm-colored elements readable, and the clip's first frame continues the main composition; whether linework and hairstyle remain stable throughout the full motion must be checked frame by frame and cannot be inferred from the first frame alone.
Validation scope: Only a single character single-shot style and action were test-shot; this does not demonstrate style consistency across multiple shots, different angles, or other tools.
Compare Results Using the Same Style Specification Table
Dimension | What to determine first | What to check in the video |
|---|---|---|
Linework | Thickness, color, and contour rendering | Whether it breaks or changes during motion |
Coloring | Flat colors, layered shading, or other treatments | Whether it suddenly shifts to unwanted realistic rendering |
Character | Face shape, hairstyle contours, iris color, and clothing | Whether the same character is recognizable from different angles |
Background | Detail density, color, and sense of space | Whether it coordinates with the character's visual treatment |
Movement | Expression range, pauses, and motion speed | Whether it matches the emotion of the scene |
The table does not require all anime to follow the same technique. The key is to define the film's visual rules first, then check whether the results comply.
In Nadou Pro, Review Stills First, Then Generate Motion
Organize character and scene images first, and choose the generation mode according to current input needs. The official media guide lists multiple video modes to reference; specific asset requirements must be checked against the selected model. Media Generation Guide.
Once frontal images are finalized, add the angles needed for shots. Even if hair and clothing colors match in profile shots, check whether the contours still read as the same character. Clearly label character images, clothing variants, and style references separately so they are not confused during use.
When you already have illustrations, check whether the image suits the target composition. A reference that only shows a head cannot fully convey full-body clothing, hands, or props.
Test the Style with a Simple Action
Here is a fictional practice shot: the character sits by the train window and, after hearing a sound, lifts their eyes. It can check the dynamic consistency of the face, hair, and background without introducing complex running or jumping from the start.
Example prompt:
The short-haired character from the reference image sits by the train window and gently lifts their eyes to look forward. Medium-close shot, fixed camera. Continue the reference image's clear fine linework, flat color palette, and layered shading; the hair moves only slightly, and the outside scenery drifts slowly.
This prompt example demonstrates a description method and has not been validated for stability. After adjusting inputs for the selected mode, review the entire video, especially watching the eye lift and head movement for any changes in linework or facial features.
If the style suddenly changes mid-shot, first check whether the references mixed different treatments, then see if the motion is excessive. Identifying the specific change and adjusting it is more effective for troubleshooting than repeatedly appending vague requests to “always stay consistent”; after adjustments, rewatch the clip to confirm.
For Multi-Shot Shorts, Check Both Narrative and Appearance
Write the purpose of each shot clearly, for example establishing context, presenting new information, or showing a reaction. The next shot can change framing, but the character's appearance, costume state, and spatial relationships should be consistent.
Reuse verified original references. If the previous shot has an error, do not blindly pass it down the line; when changing camera position, you also do not need to force the previous shot's last frame to be the new shot's first frame.
Allow some space in the edit for reactions, and check whether the audio lines up. A character calmly holding in frame can also convey emotion; you do not need to add motion to every shot just to make the video “come to life.”
When Choosing, Consider Costs and Rework Together
Record the attempts each usable clip went through, not just the best version. Re-validate after changing the model, duration, or specs — do not assume that passing a low-spec test means all conditions remain valid.
Minor color shifts can be fixed in post, but if linework, coloring approach, or character silhouette are noticeably inconsistent, return to the problematic assets. An unverified color grading feature should not be taken as a selection promise.
Complete one scene for a character first, and store the style description, references, and accepted clips together. When adding shots later, compare them against these materials to check whether the new results remain within the same visual setup.