
How to Make AI Anime-Style Short Dramas: A Practical Workflow from Script to Final Cut
How to Make AI Anime-Style Short Dramas: A Practical Workflow from Script to Final Cut
I tested a mockup of the second shot in a fictional four-shot anime-style short drama on the Nadou Pro canvas: a girl discovers a small robot inside her backpack. The establishing still and the short clip were quoted at 3 and 7 points respectively before submission, totaling 10 points; actual charges are subject to the platform's records. This is just a 5-second silent shot and was not edited into a complete short drama.
When making an AI anime-style short drama, you can follow this sequence: write a clear scene → prepare character and art-style references → break into shots and check still frames → generate video shot by shot → edit, add voice-over and subtitles → review the final cut. For your first production, complete a short scene with simple character relationships and a clear cause and effect — it will be easier to locate whether problems come from the script, imagery, or pacing.
Below, using the fictional practice scene "A girl finds a little robot in her backpack," I explain how to perform each step and use Nadou Pro's canvas features as an operational example. The examples demonstrate the decomposition method and do not represent the platform's actual final output quality.
Practical Example: "Discovering the Little Robot" in a Four-Shot Story
First write the story as observable actions: an adult girl approaches her backpack, revealing a small white robot inside; the robot's eyes change from dim to bright. I used Seedream 5.0 Pro to make a 16:9, 2K establishing still, then used it as a reference in Seedance 2.0 Mini to generate a 5-second, 720p, silent clip.
Open the Nadou Pro example canvas, and check the task card, assets, and connections.
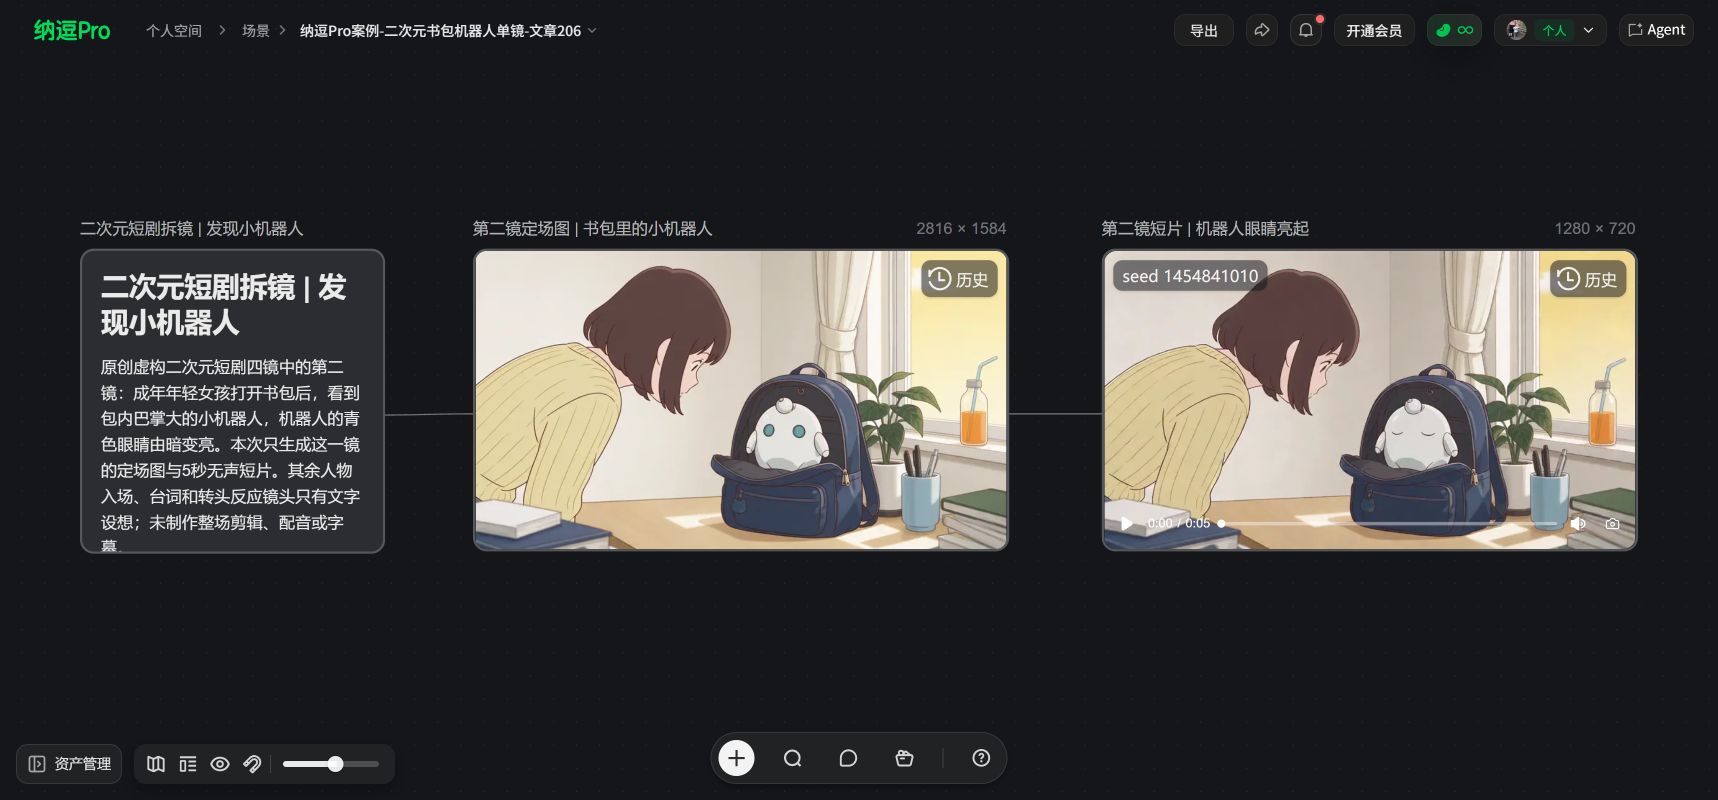
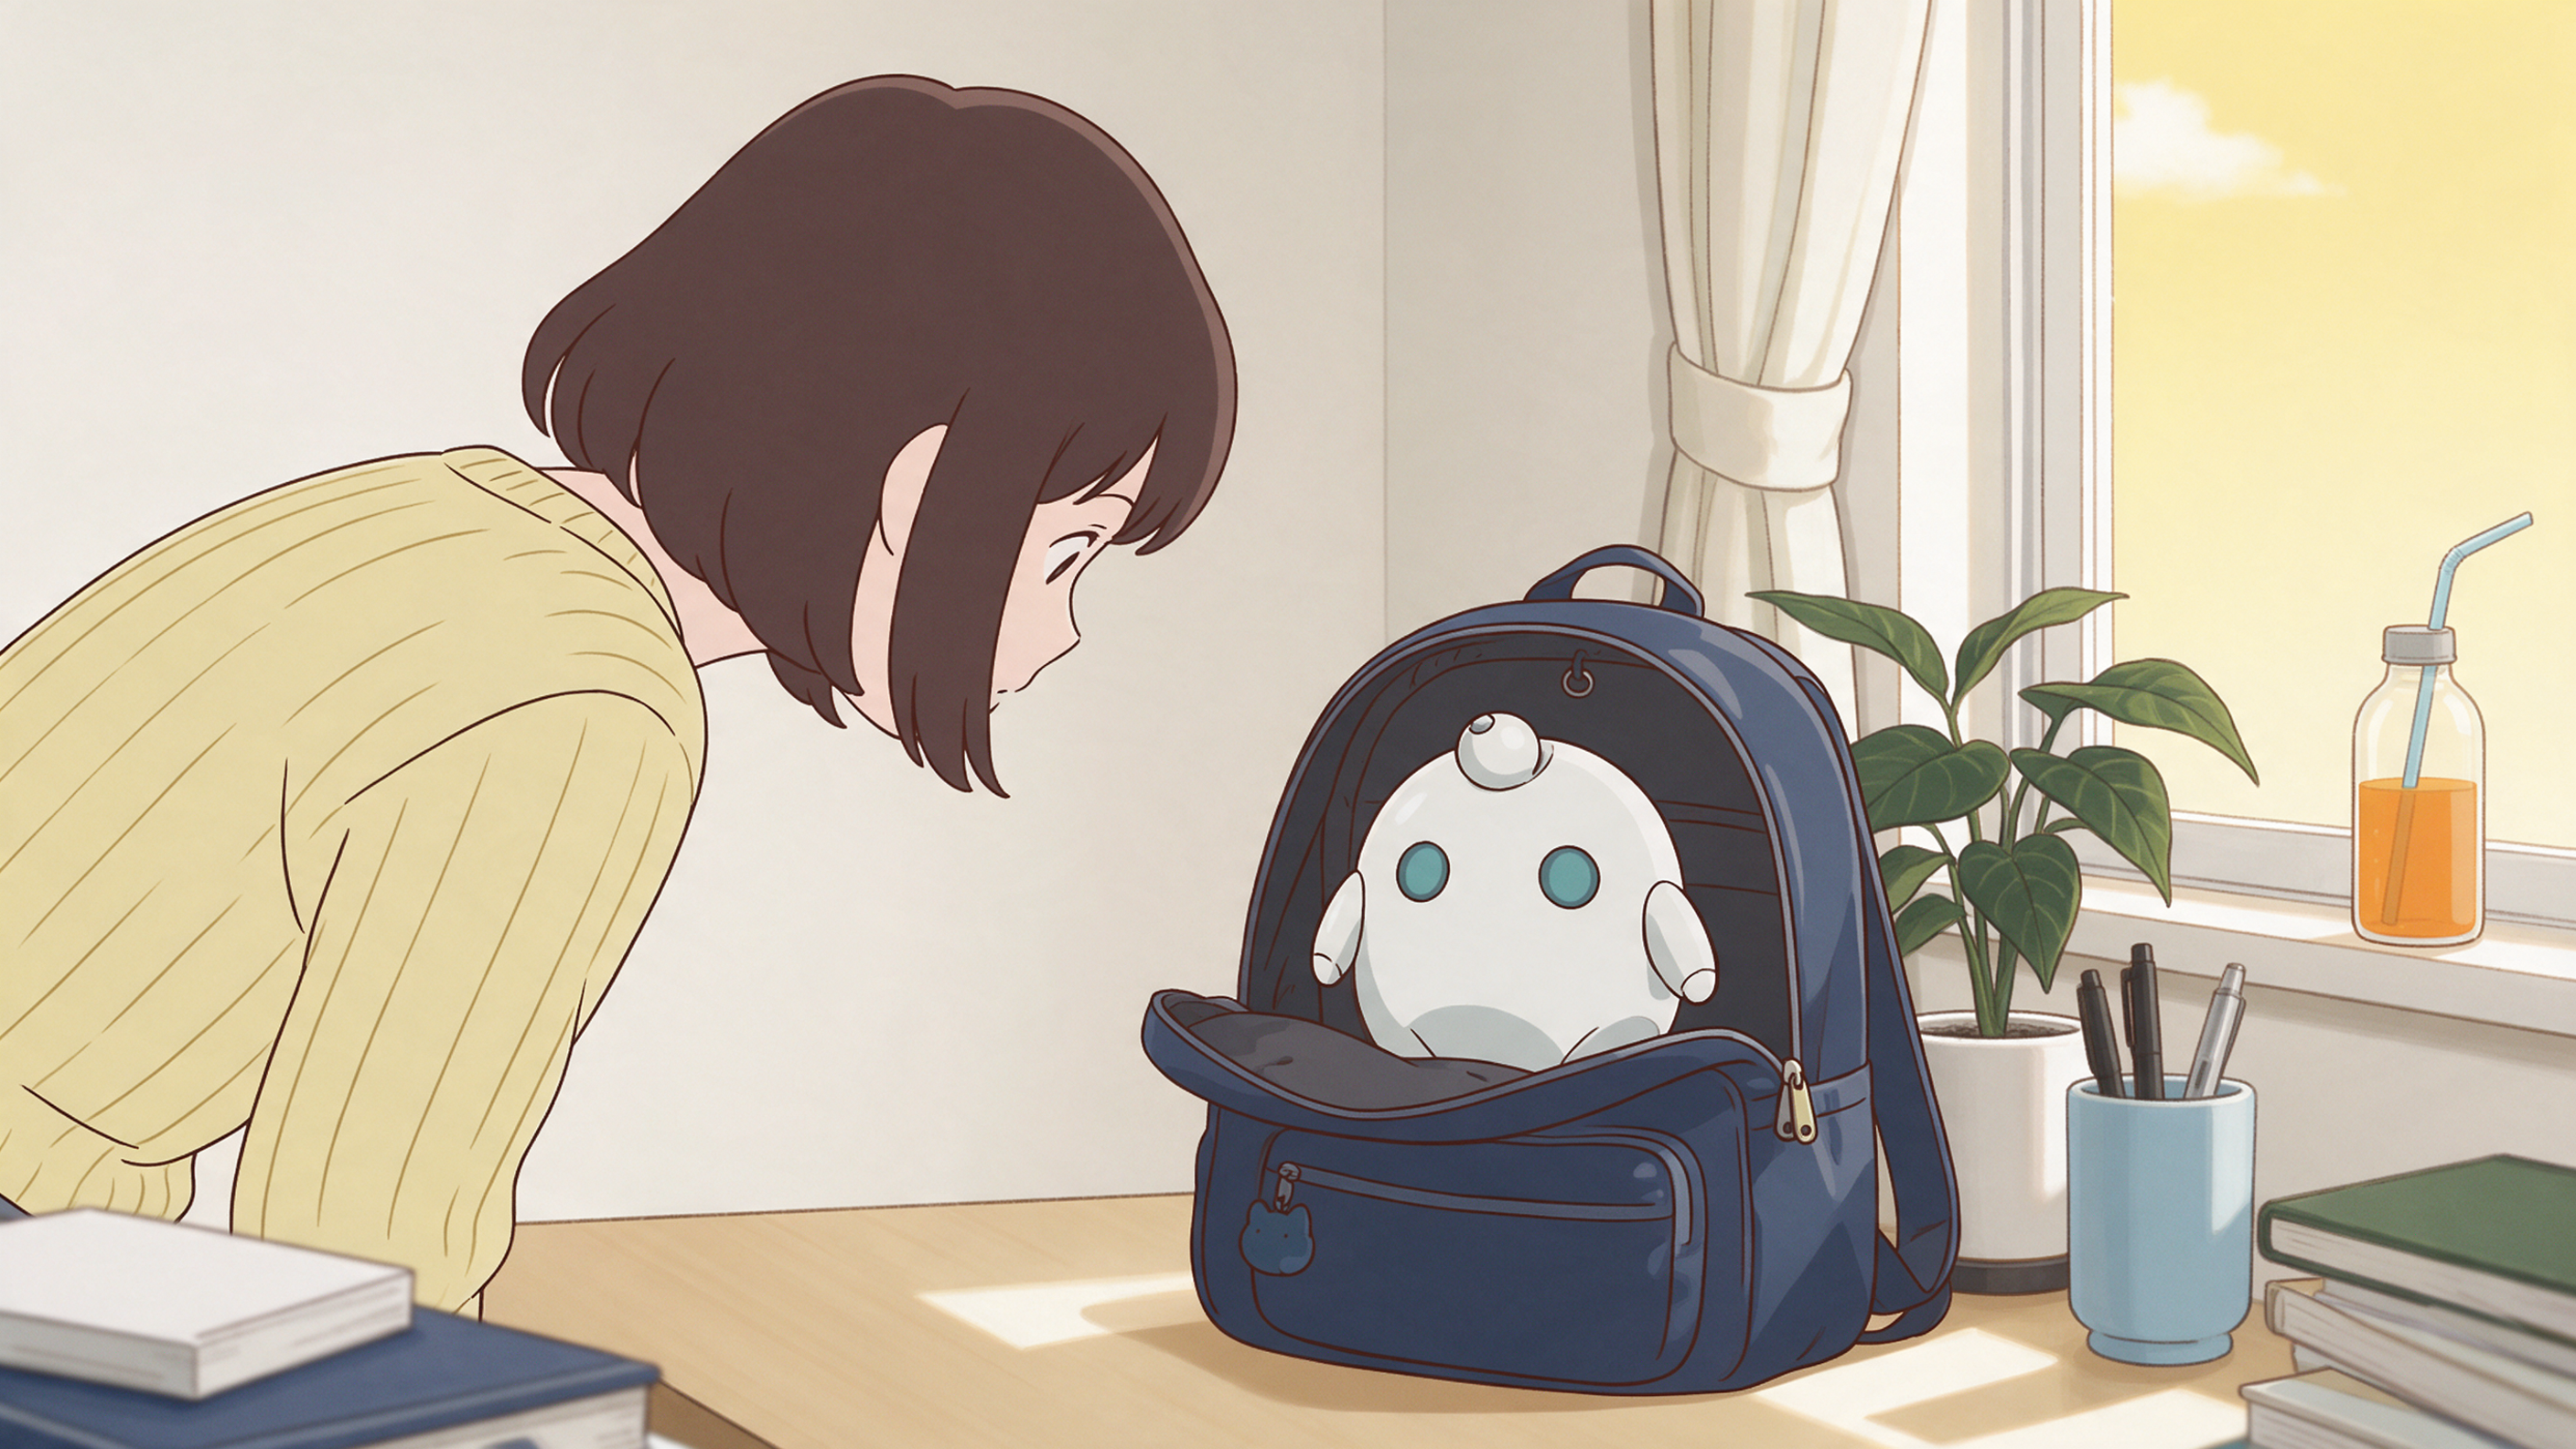
On the canvas you can verify the instruction card, the establishing stills of the girl and the backpack, the short clip, and the connection lines. The first frame clearly shows the character and the robot; in the video's first frame the robot's eyes are closed. Whether the eye change matches the script should be verified by playing and inspecting frame by frame. The other three shots, dialogue, voice-over, subtitles, and editing were not produced.
Verification scope: Only the second shot in the four-shot concept was completed; there is no final cut, dialogue recording, subtitles, or cross-shot character consistency testing.
1. First write the story as shootable actions
"The girl discovered a secret and was very surprised" is suitable as a synopsis but is not enough to directly guide visuals. You need to write: what the secret is, in which shot the audience sees it, and how the character reacts.
The practice scene can be written like this:
The girl returns to her room and sets her backpack on the table. A prompt tone suddenly sounds from the bag. She pulls the zipper open and sees a palm-sized robot. The robot's eyes light up and it says, "Finally found you." The girl pauses, looking up toward the door.
The focus of this scene is "why does the unfamiliar robot know her?" Start with a sound to introduce the anomaly, reveal the robot in the middle, and leave a question at the end. When producing, do not try to cram in a chase, transformation, or a second storyline.
Before breaking the scene into shots, confirm three things: what the protagonist intends to do, what change interrupts her, and where this scene should end. Read the dialogue aloud; if a line cannot be finished in one breath, leave time for it or shorten it — don’t force it into the image after the visuals are already generated.
2. Prepare a consistent set of character, art-style, and prop references
Continuity in anime-style short dramas is not just about whether faces look similar; it includes eye shape, hairstyle silhouette, line thickness, shading style, and the positioning of clothing and props. A single nice image doesn't guarantee it will fit consistently into the same short drama.
You can prepare a short design sheet like this:
Asset | What to confirm | How to check |
|---|---|---|
Girl reference | Hairstyle, iris color, clothing style, and main colors | Can the same person be recognized from front and side views? |
Robot reference | Size, shell color, eye and marking positions | Is the scale reasonable when placed inside the backpack? |
Room reference | Positions of the table, door, and main light sources | Do spatial relationships still make sense when changing camera angles? |
Art-style reference | Linework, flat coloring or cel-shading, color tendencies | Do the characters and background belong to the same visual style? |
Prepare only the angles you will actually use in the current scene. If you need a back view later, add a back-view reference then — there is no need to generate a large amount of unused material at the start.
Nadou Pro's image generation can be used to prepare character and storyboard references; the multi-reference mode in video generation can accept subject reference images to help keep characters and scenes consistent. Check the input requirements for different modes separately — do not treat image fusion and the video multi-reference feature as the same function. See the AI Media Generation Guide for details on specific capabilities.
Reference images provide constraints but still require per-image inspection. Test one close-up and one medium shot first to confirm hairstyle, clothing, linework, and shading can be sustained, then continue making the remaining shots.
3. Break a scene into useful shots
Each shot should serve a clear narrative task. The following table can be used as a first-version shot list for the practice scene:
Shot | Frame & action | Sound | What this shot must convey |
|---|---|---|---|
1: Medium shot | The girl sets the backpack on the table; her hand has just left the strap | Sound of the bag being set down, followed by a prompt tone | Establish the character's position and introduce the anomaly |
2: Close-up | The zipper is open and the robot is visible inside the bag | Brief silence | Show the audience where the anomaly comes from |
3: Robot close-up | The robot's eyes light up | "Finally found you." | Provide the story turn |
4: Girl close-up | The girl pauses and looks toward the door | Keep ambient sound | Leave a suspense through the character's reaction |
Here the full action of "unzipping the bag" is omitted and we cut directly to the open bag. The practical reason: the focus of the scene is the discovery of the robot, and the complex hand manipulation is not necessary information to show.
In the Nadou Pro canvas, storyboard nodes can extract characters, scenes, and props from the script to generate storyboard cards. Treat these as a draft and continue to check shot sizes, eyelines, action continuity, and dialogue assignment; see the Canvas Guide for related operations.
Before video generation, review the static storyboards in order: is the backpack always on the same side? Has the robot's size changed? Are the door the girl looks toward and the room reference consistent? Fix issues found at the still-frame stage as much as possible before moving on.
4. Generate video shot by shot, and limit the number of simultaneous actions
Choose the generation mode supported by your model, upload storyboard images or reference images per the interface requirements, and then describe the primary action of the shot. Duration, aspect ratio, and resolution depend on the actual options provided by the chosen model.
For example, the prompt for the robot close-up can be written as:
Reference the little robot in the reference images, keeping shell color, eye shape, and chest marking consistent. 2D animation style, clear linework, flat color blocks, and cel-shading. The robot is inside the open backpack, close-up, fixed camera position. Its eyes change from dim to bright, and it slightly lifts its head. Keep the backpack and background position stable; avoid switching to a photorealistic or 3D rendering style, and do not add other characters.
This prompt only handles the simple set of actions "eyes brighten, head lifts." Whether to generate the dialogue at the same time depends on the audio capabilities of the selected model; you can also add the robot's voice separately in post-production.
After generation, first check whether the action is completed, then check whether the art style, proportions, and framing are stable. Do not only inspect the first frame: hair accessories, collars, or robot markings may change during motion.
Writing "do X at second Y" in the prompt can convey timing intent, but it does not replace precise editing. For exact pauses and cut points, adjust according to the actual generated clip. If actions feel crowded, prioritize splitting the shot; do not keep appending more requirements into the same prompt.
5. Edit and add sound to join the shots into a scene
Once you have all clips, do a rough cut in story order, remove idle footage with no information, then arrange dialogue, ambient sound, and subtitles. Nadou Pro's canvas editing node supports importing image, video, and audio assets, entering online editing and exporting; see the Canvas Guide for the entry point.
For this scene, focus on checking three positions:
-
When the prompt tone sounds: can the audience associate the sound with the backpack? If necessary, shorten the preceding action buildup.
-
When the robot speaks: is the line being cut off, or is music covering the voice? If using a frontal speaking shot, also check lip-sync between mouth movement and audio.
-
When the girl turns her head: is there enough time for comprehension and reaction? Too long a pause drags the scene; too short and expressions are unclear.
If you need to adjust transitions, first try changing the cut points or adding a useful reaction shot. Nadou Pro's "start-and-end frames" mode constrains a video's start and end frames using two images to generate the middle transition; it should not be treated as a direct method to extend existing video. If you really need to lengthen a clip, check whether the current video editing mode and model support it, and verify that the join is natural. See the AI Media Generation Guide for function details.
6. When you encounter visual problems, fix the problematic shot
Problem | Check first | How to adjust |
|---|---|---|
The character looks different between shots | Were the same design references used? Are clothing and hairstyle descriptions conflicting? | Unify references and descriptions; re-create shots with obvious changes |
The anime-style frame suddenly has a 3D look | Did reference images of different styles get mixed in, or does the prompt request realistic materials? | Unify linework, shading, and material expressions; test single shots first |
Hands or prop contact is incorrect | Are multiple actions like grabbing, turning, and speaking being requested simultaneously? | Split into before-and-after contact shots and express the result through editing |
Shot transitions are directionally inconsistent | Are eyelines, door, and table positions consistent? | Return to the storyboard to correct framing, then regenerate the corresponding clips |
Dialogue length does not fit the shot timing | Is the dialogue longer than the shot's available duration? | Shorten lines, redo the voice-over, or add reaction shots; rearrange cut points |
Do not remake the entire film because of one bad shot. After replacement, play the new clip together with the preceding and following shots to ensure the new segment does not introduce directional, lighting, or audio issues.
Before exporting the final cut, watch the whole story
In the last review, first step away from prompts and nodes and watch only the finished film: can the audience understand what happened, recognize the same character, and hear key lines clearly? Then check subtitles for typos, image cropping, sudden volume changes, as well as asset licensing and the AI-content labeling required by distribution platforms.
The goal of the first version is to complete a scene that is understandable, flows smoothly, and has a basically consistent style. Once this short scene runs through, adding characters, complex actions, or episodes becomes easier and subsequent fixes are simpler to locate.